11th Annual Huntington Beach Cruise-In

I flew the family down in our Bonanza to the 11th annual Huntington Beach Cruise-In. There were a ton of beautiful cars there and we spent quite a bit of time talking to many of the owners. One of the more impressive Cobras at the show was Saul Sotelo’s Mk4. It has a number of custom features which we really liked. It has the Lucas headlights which we will be using. It also has billet aluminum quick jacks and some custom aero work.

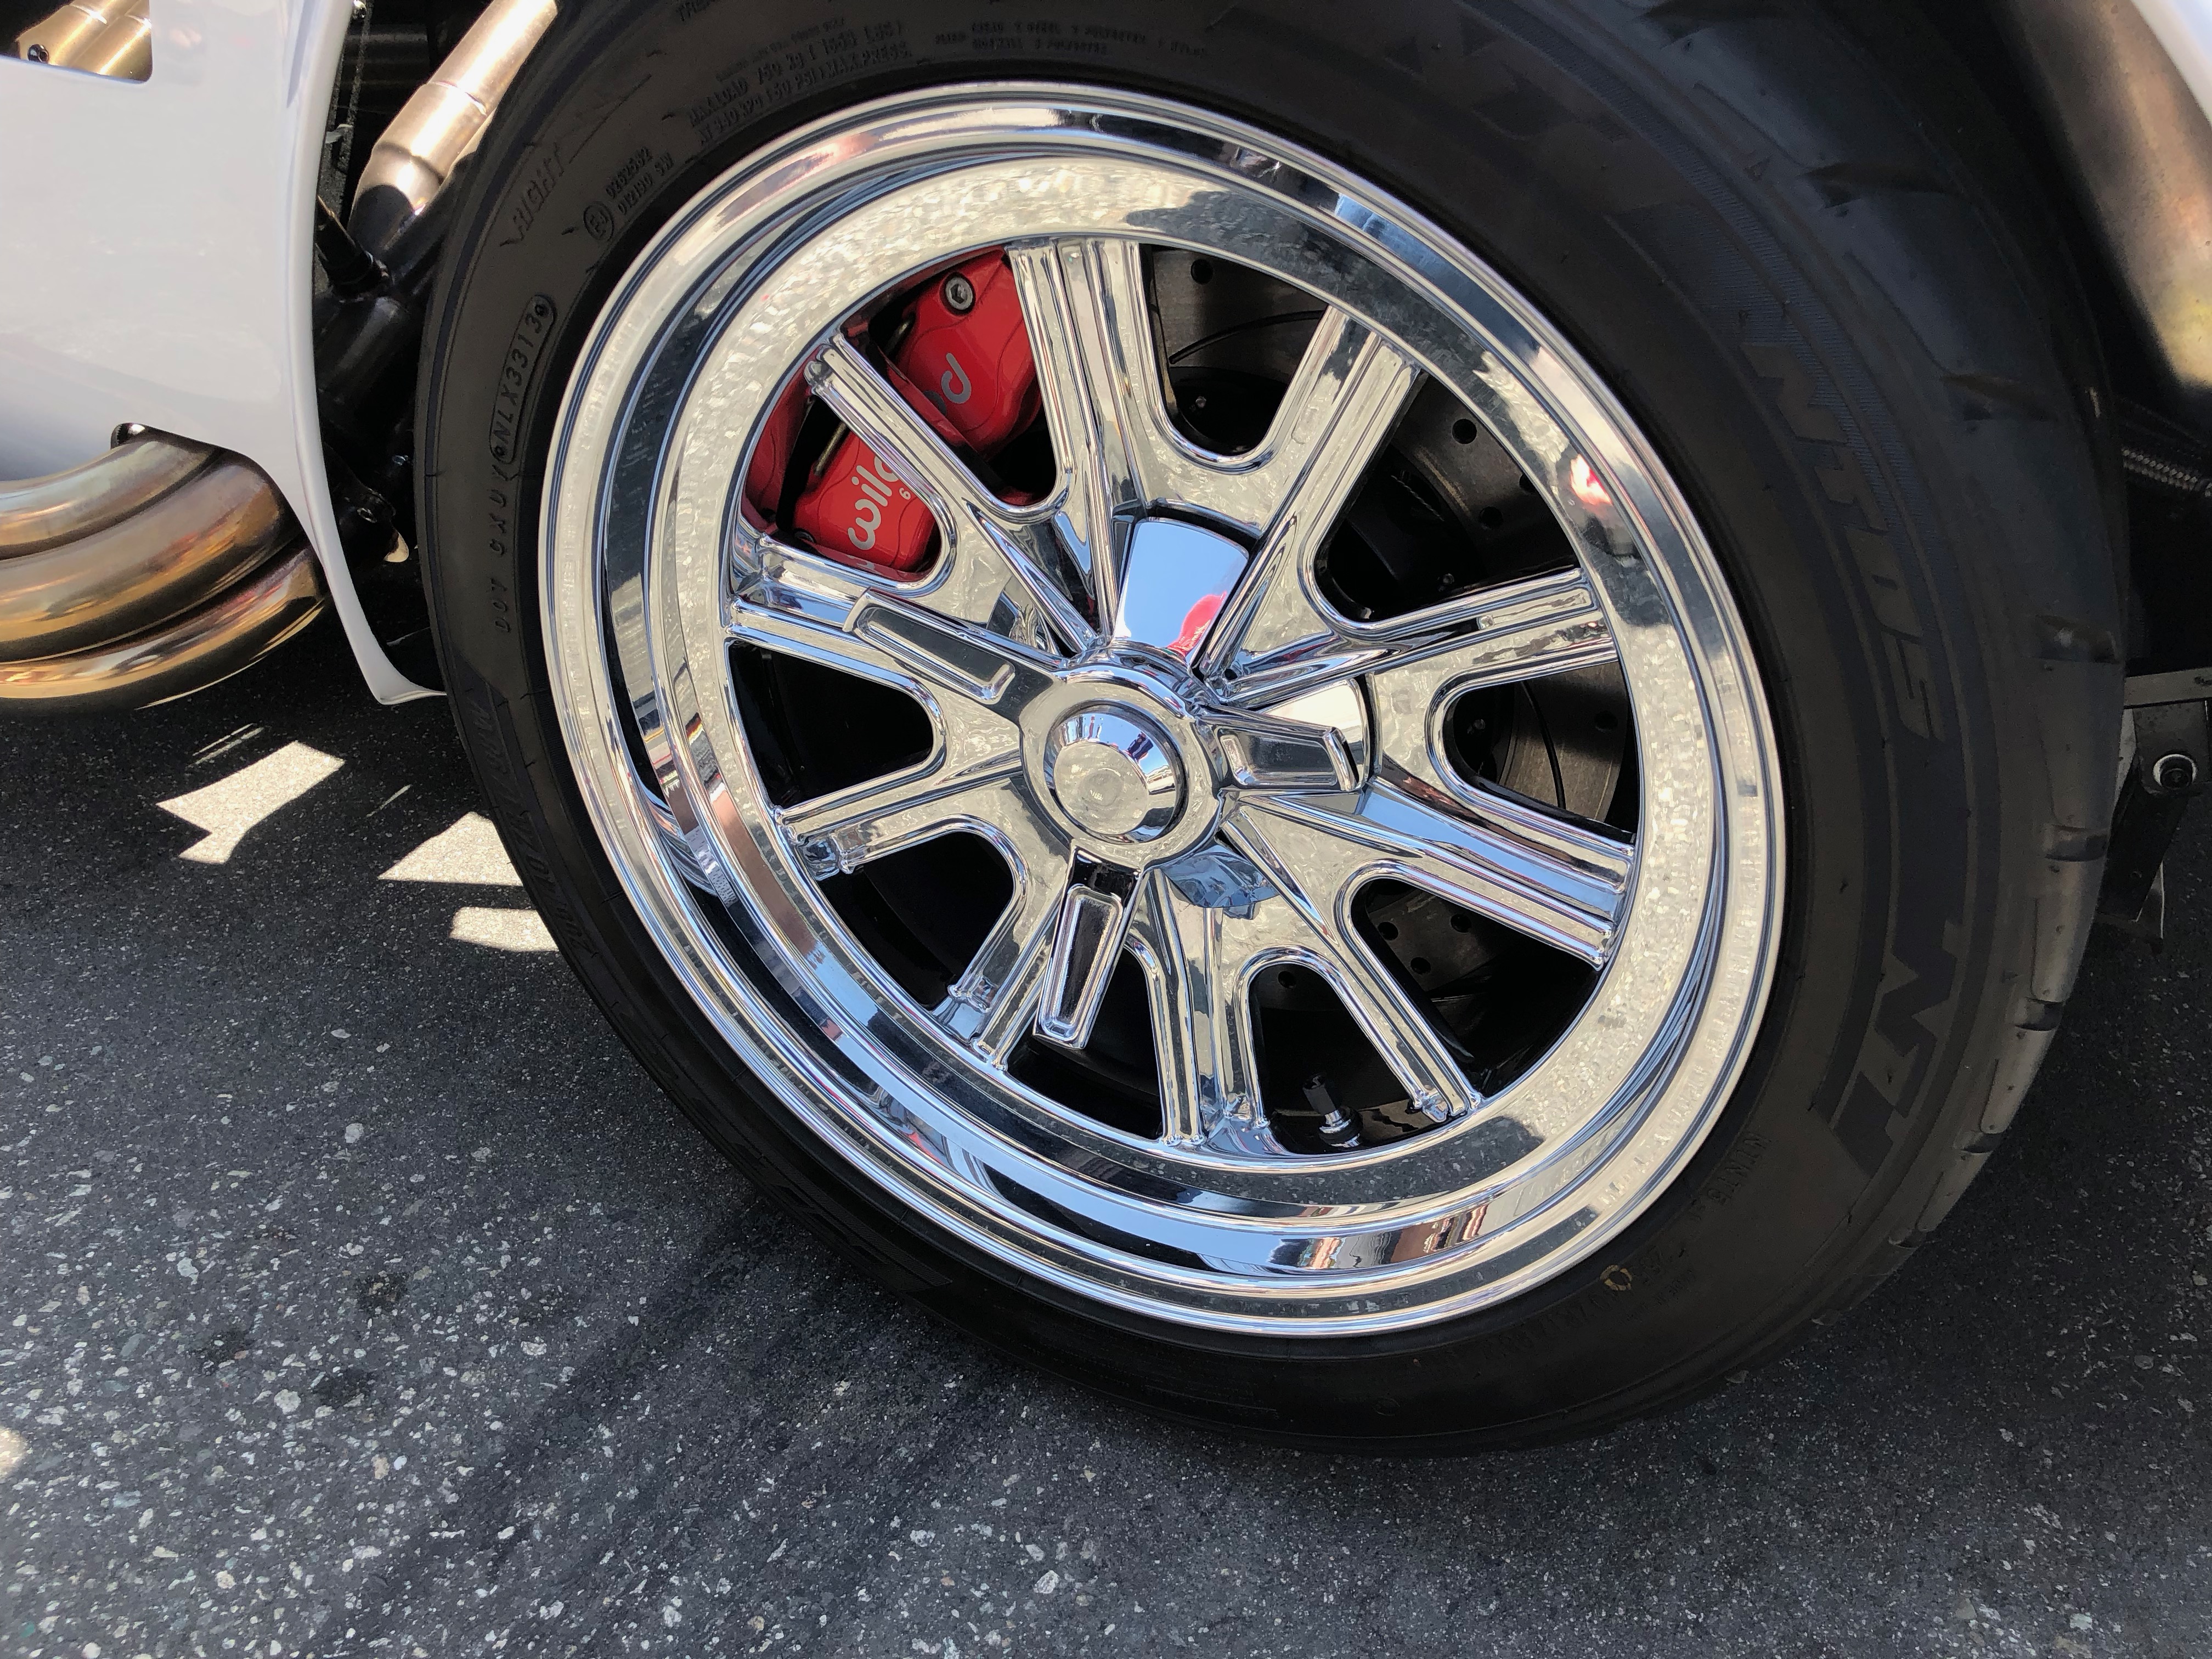
Jenn really likes the look of the chromed wheels, so I think there’s a good chance we’ll be doing that to our wheels. These are 17″ wheels like ours.

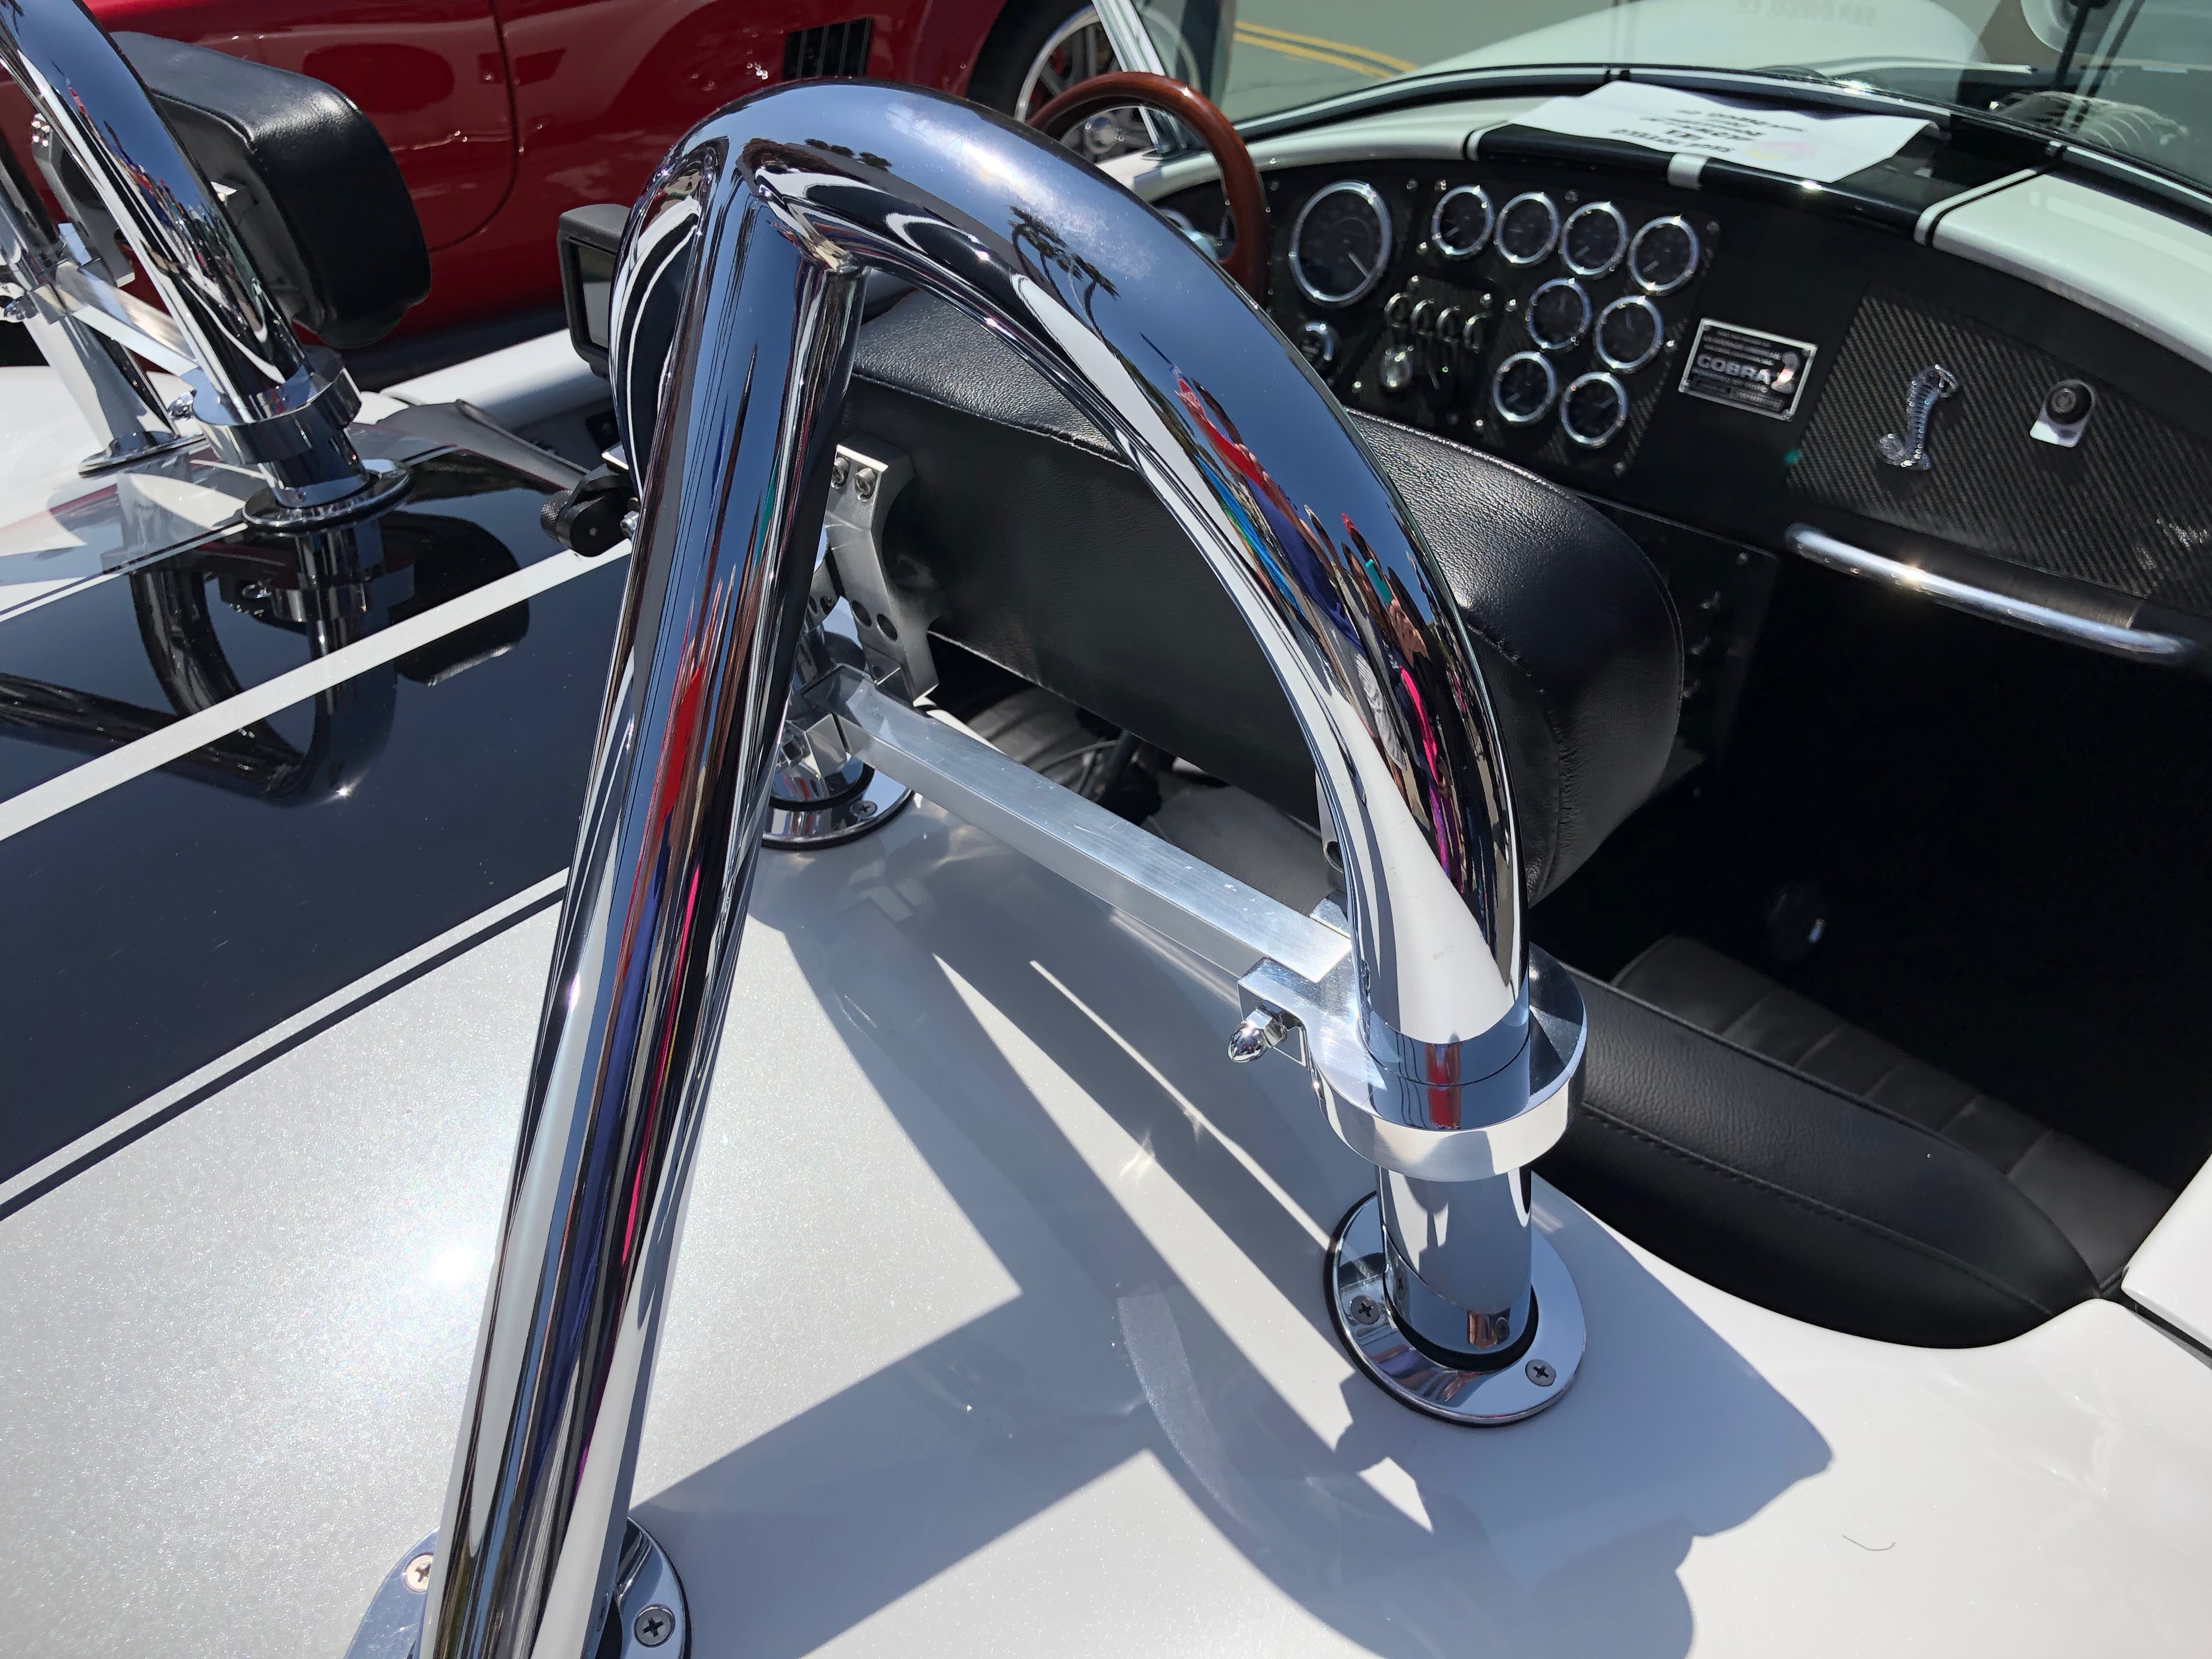
He also used Breeze Automotive’s 1.75″ rollbars which we both like much better than Factory Five’s current 1.5″ or early model 2″ tubes. Unfortunately, Breeze doesn’t have these in stock right now due to supplier issues. Hopefully, they’ll get those resolved soon. He also had some slick headrests that mounted to the rollbars. We like the idea of having headrests but will probably need something adjustable since our seats are adjustable.

Installing Chassis Panels

With the chassis rivnut basically complete, I started installing the chassis panels that don’t get in the way of anything else. The inner and outer trunk side panels won’t interfere with any future work, so I went ahead and installed these. I’m attaching the panels with button-head 8-32 screws which have a fairly low profile like the pop rivets would have had.

I ordered a bunch of stainless steel socket head screws, but they use a fairly small 3/32″ drive which is fairly easy to strip. I stripped three of them just on these four panels. I’m probably going to replace all of these small 8-32 button head screws with torx head screws which I use extensively on my RV-7. They’re virtually impossible to strip.

Finished Existing Chassis Rivnuts

I went around the car and wrapped up all of the chassis rivnuts that were too close to other structure for me to use my Astro Pneumatic Rivet Nut tool. All of the rivets on the outer seat floor (like the one on the lower left here) were too close to the side structure.

The ones at the outer edge of the trunk were up against an adjacent piece of tubing.

There were also a couple on the upper trunk floor that were too near the outer edge and couldn’t be reached with the other tool. The tool I used to set all of these is a wedge-type hand tool. It’s much more time consuming, but I was able to set about 40 in about an hour and a half. Just like the Astro tool, it’s also possible to break if you apply too much torque, but it just uses screws so they’re inexpensive to replace.

More Chassis Rivnuts

Astro Pneumatic was nice enough to send me replacement mandrels even though they consider them consumables. I went ahead and ordered a couple of extras since I knew I had hundreds more rivnuts to install. I managed to make it through virtually every remaining rivnut on the chassis. There are only a handful left that I can’t reach with the Astro tool.

I broke one of the replacement mandrels by over-torquing the tool slightly. After that, I only used the tool with a 1/4″ drive socket wrench instead of a cordless drill. By doing that, I could pretty easily stop before the torque got too high. After that, I installed 200+ rivnuts without breaking a mandrel (more than the previous two mandrels combined).

Wiring Connectors and Rear Brake Line

My order of Weather Pack connectors showed up, so I installed the remaining ones that were missing. For the headlights, I also fabricated short jumper cables to the plug that attaches to the back of the bulb. When I switch to LED bulbs, they might have a different connector on the back, so it will be trivial to fabricate a different jumper if necessary.

I also got started on the rear brake line. This line runs from the forward side of the pilot’s footbox, along the upper 3/4″ tubing to the x-frame and down to the main 4″ chassis tubing. There will be a union there to the piece of tubing that runs the rest of the way to the rear tee.

Chassis Rivnuts & Front End Wiring

I knocked out a bunch more of the chassis rivnuts that will secure the aluminum panels. Unfortunately, the 8-32 mandrel broke after a couple hundred, so I had to stop. Astro Pneumatic has a 1 year warranty and claims they will replace any component that fails under normal use, so we’ll see if they cover this. In the mean time, I have plenty of other things to work on.

Three of the wires in the front chassis wiring harness (parking lights, low beams and high beams) need to be split and run to both the front left corner and front right corner. I stripped the insulation and used a few solder sleeves to splice into the wires. The bundle for the front left corner (which also includes the left turn signal) cuts under the chassis tubing and runs across the top edge of the radiator, secured by some adel clamps.

I ran out of three-conductor Weather Pack connectors, so I just terminated these with the appropriate plugs and seals. There will be two connectors here: one connector for the headlights with a ground wire, low and high beam wires, and another connector for the indicator light with a ground wire, parking light, and right turn signal.

Another pair of wires drop down to the lower chassis tubing for the fan wiring. There will be a rivnut and zip-tie mounting block installed here, but it’s just zip-tied for now.

From there, it runs across to the fan. There will be a couple more attachment points across the lower edge of the fan shroud to secure this cable.

The cable that cuts across the top of the radiator runs down the left chassis member and terminates in a similar set of six wires. The two ground wires are secured to the chassis with a screw behind the bundle of four terminals to the left.

Adding Rivnuts for Panel Attachment

Since we’re going to completely disassemble the car before final assembly so that we can finish the chassis, we’ve been temporarily attaching all of the aluminum panels with sheet metal screws. We had been planning on riveting the panels on during final assembly, but if we ever need to remove the panels, we’d have to drill out the rivets. I don’t know how likely that is, but I’m really trying to plan for any possible future maintenance. To that end, we decided to attach all panels with screws.

I started drilling out the attachment holes and installing rivnuts. I haven’t counted how many of these I’ll need, but I’ve used up the first 100 I ordered and I’m a long way from being done. I’m guessing there are close to 500 over the whole car.