Installed Mill and Lathe in the Shop

In preparation for resuming work on the car, I wanted to improve the tooling I have for metal work. I was fortunate to have a friend give me a Precision Matthews PM-25MV bench top mill he was no longer using. I added a couple of upgrades to the mill including a power feed on the x-axis and a quill stop and quill lock (not pictured).

I also decided to add a lathe to the shop since I’ve already needed a lathe for a few tasks on the car. I don’t have a ton of space, so I picked up a Precision Matthews PM-1022V lathe and mounted it on an identical tool box.

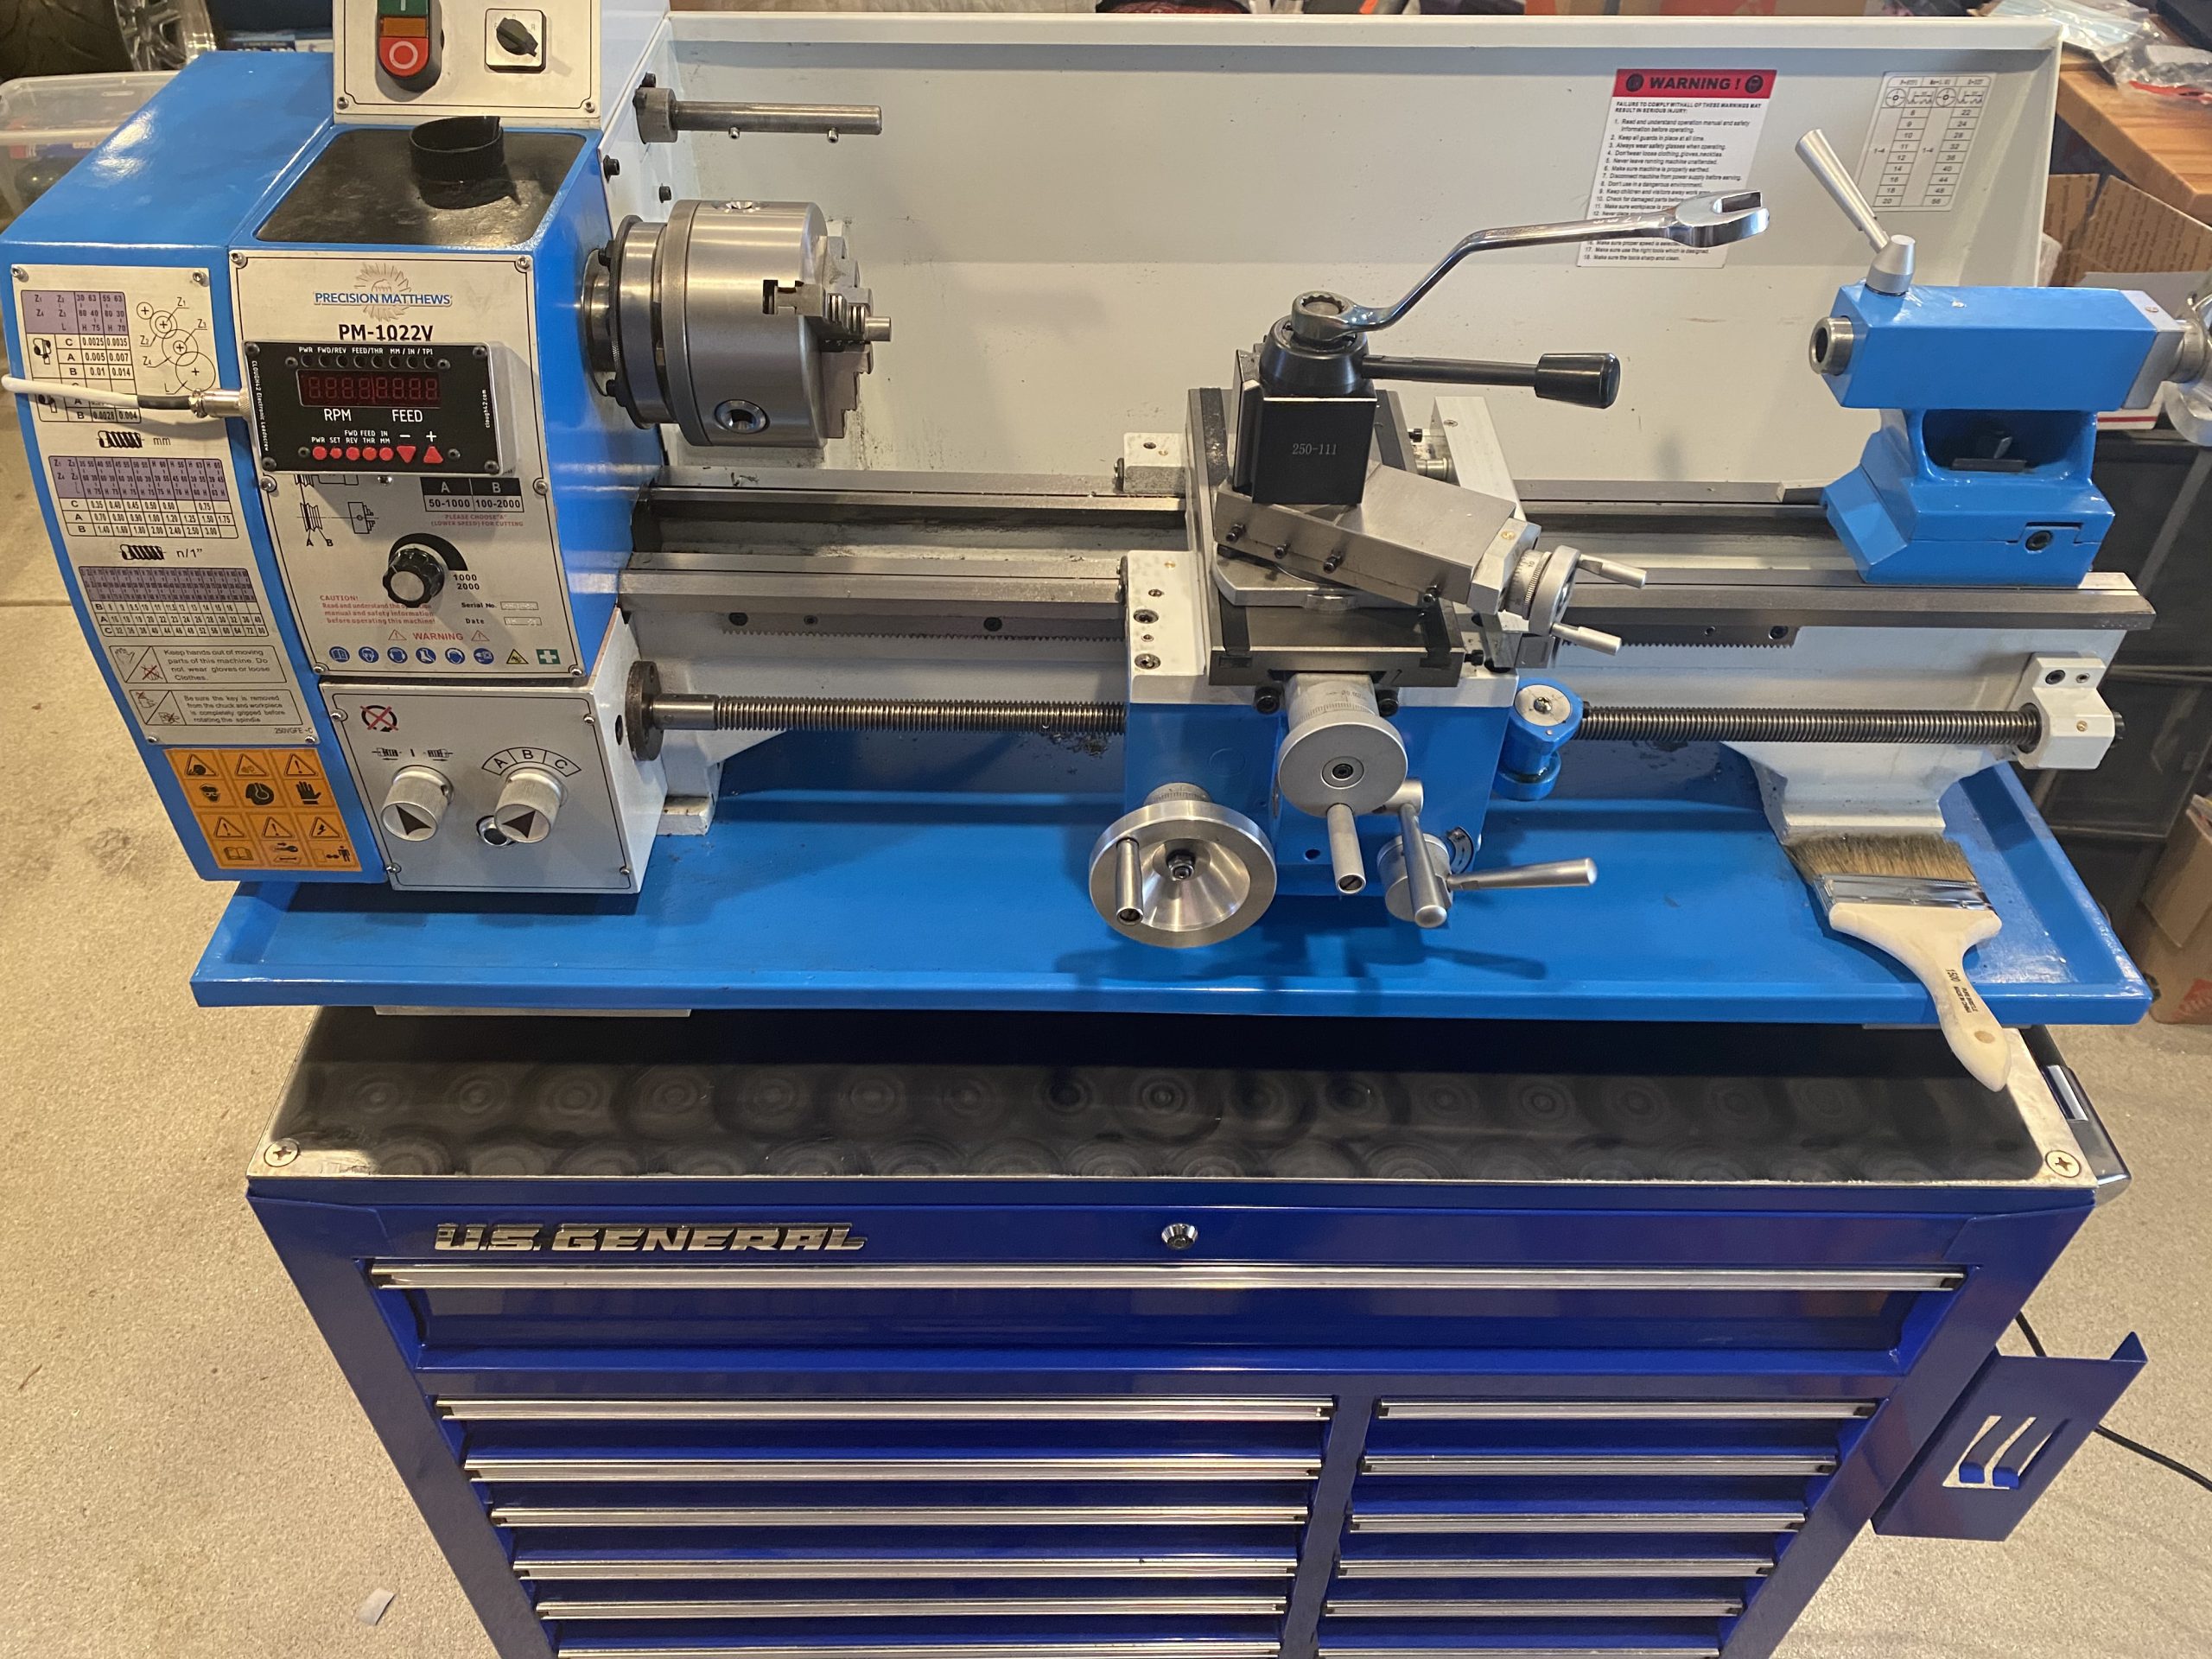
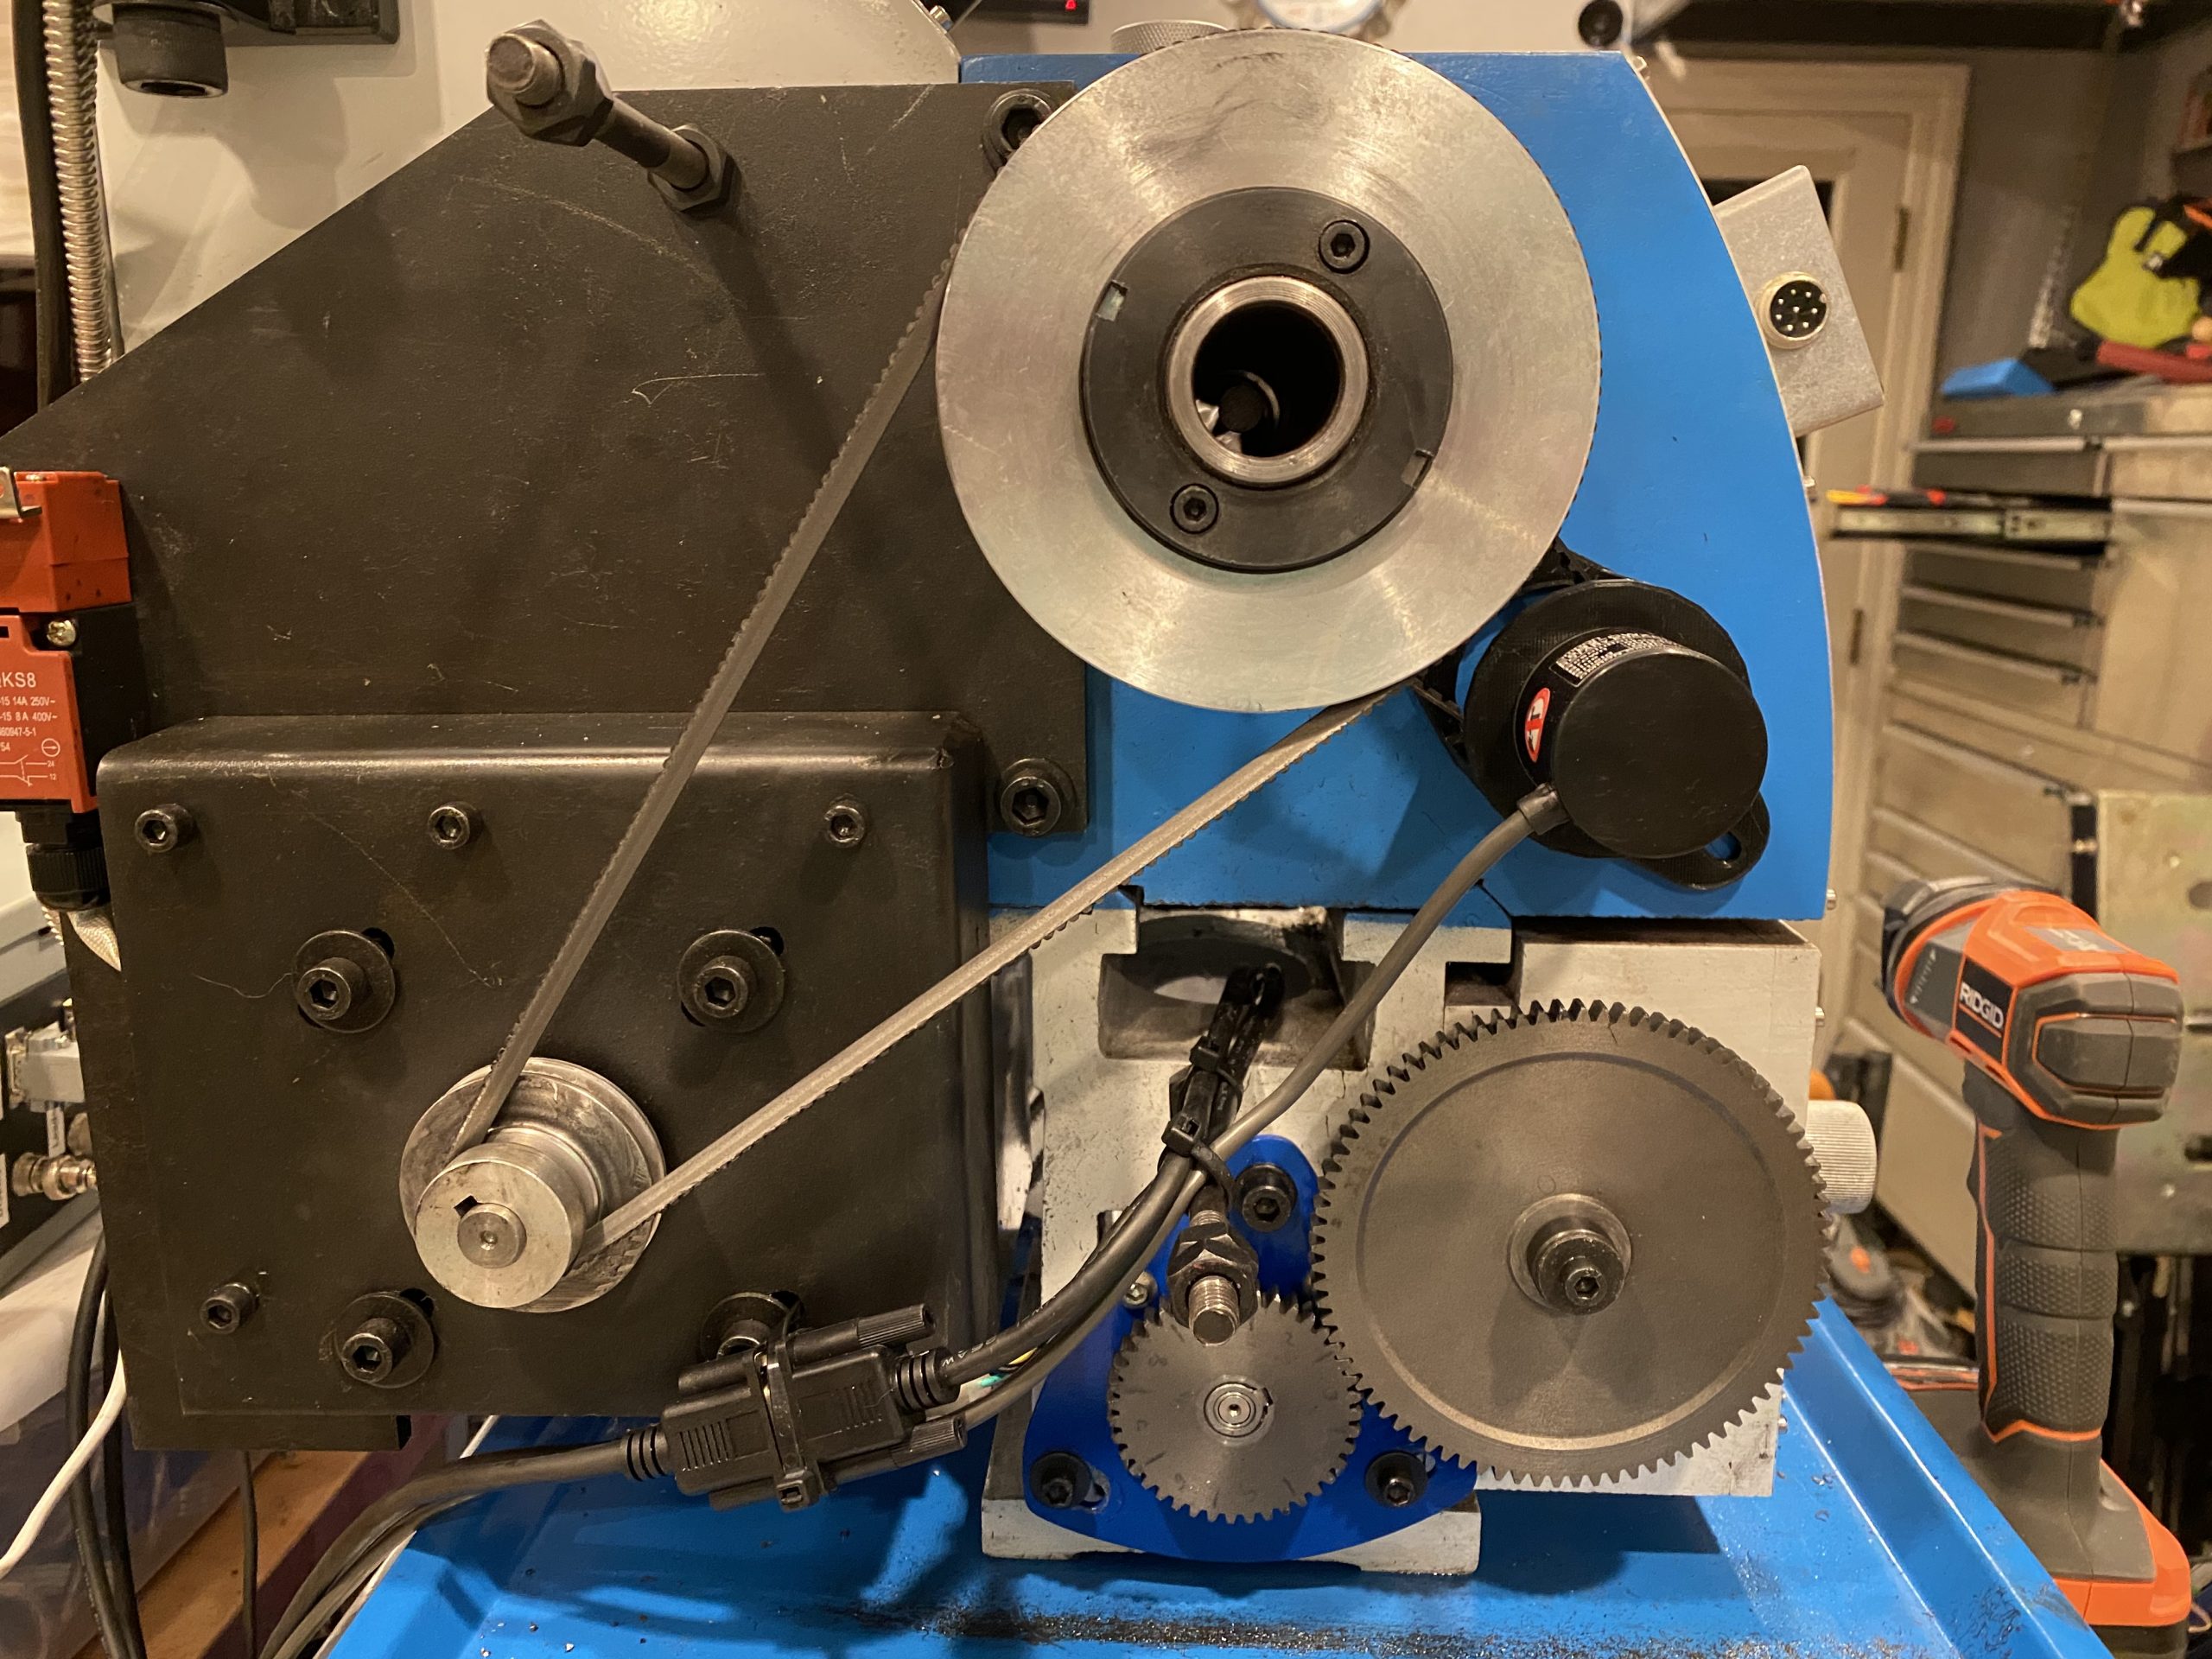
These small lathes have relatively simple gearboxes, so they use a set of change gears that must be swapped to change the feed rate or for any threading operation. I didn’t like the thought of having to mess with that, so I installed an electronic lead screw. This was designed by James Clough but requires a custom installation on each machine. It uses an optical encoder to read the spindle position and then a microcontroller controls a servo to drive the leadscrew.

This lets you switch between forward/reverse, feeding/threading, and inch/mm units at the touch of a button and change the feed rate on the fly as well as simply selecting the threading pitch on the screen (for both SAE and metric threads). This should be a nice upgrade for this little lathe.

Piston Weight and Oil Pan Prep

Since our connecting rod was slightly twisted, we decided to order a new one. My dad took care of talking to Ford Racing and Scat about exactly which part to order. That led to an interesting conversation about the piston and connecting rod weight. I weighed the existing rod, and Scat manager to find one that is very close. However, they mentioned that it was important to get the combined weight of the connecting rod and piston assembly within 4 grams of the old weight (preferably with 2 grams).

I was concerned that I couldn’t get an accurate weight from the old piston since I ground some of the damage off and additional wear had occurred on the side of the piston. However, when I flipped the piston over, there was a number written on the bottom that looked like it might be the weight.

I weighed the piston and it was significantly heavier than the number written on the bottom. I figured the weight must be without the piston rings, so I removed as much as I could. There was 2-3″ of the top two rings stop stuck in the piston, but this brought the weight down to 439 grams, so 433.5 grams must be the weight of the bare piston.

While I have the oil pan off, I decided to go ahead and paint it black to match the engine. I spent awhile cleaning out the inside and scuffing the outside with a scotchbrite pad.

Installed Steering Wheel Hub

The upper steering shaft has two flat sides that can only fit into the steering wheel hub two ways, but the steering wheel can install in six different positions. Normally it’s not particularly important how the upper steering shaft is oriented since any misalignment of the steering wheel can easily be adjusted at the tie-rod end during wheel alignment.We’re using

We’re using Russ Thompson’s Turn Signal System which requires machining the hub so that it has protrusions to trip the self-canceling feature of the steering column. This means that the upper steering shaft’s two flat sides need to be oriented vertically when the steering rack is centered. Just my luck that it was oriented exactly 90º out from that. While I might have been able to adjust the tie rods enough to center the steering wheel, I really didn’t want the tie rods adjustment to be that uneven between sides.

Instead, I loosened all of the splined joints and bearings on the steering shaft enough that I could uncouple the upper spline joint (just forward of the driver side foot box) and rotated the upper steering shaft 90º. I then tightened everything back down and installed the steering wheel hub. I fully seated it on the shaft by using the center bolt to draw it down and then tapped the shaft in until the gap between the steering hub and steering column was about 1/8″. Finally, I verified that the self-canceling feature works as expected. All I need to do now is install the steering wheel and the steering system will be complete. I’m going to hold off on installing the steering wheel for a while though to avoid scratching it.