Prototype Dashboard

We’re still working on our final dash shape and layout, but we need to move forward with wiring. I used a piece of hardboard to make a prototype dash that we can use to do the preliminary wiring and evaluate our initial layout. A single piece of 4×8 hardboard costs about $12 and includes enough material to make about 8 prototype dashes.

I laid out and cut the holes in the dash. We haven’t decided where to put the ignition switch yet and I’m sure some of the other items will move, but this is a good starting point. One issue I noticed right off the bat is that the top center hole is too high. There is a 3/4″ square tubing along the top of the dash and the top of the hole just lines up with the bottom of the tubing. The gauge fits in fine, but there’s not enough room to thread on the ring that secures the gauge in place.

I pulled the dash and then installed most of the components.

Here’s a closeup of the gauge cluster. The empty hole at the lower left of the cluster will be for an oil temperature gauge. This doesn’t come with the gauge set from FFR, but we’ll either buy one to match or will be buying a whole new gauge set to match our interior.

We installed the alarm light in the middle of the gauge cluster. I’m not sure I like it here, but we’ll sit with it for now and see how we feel about it.

Just over the steering wheel are the indicators for the high beams and turn signals.

Just to the left of the steering wheel is the high beam toggle. When the headlights are off, this will function as a flash-to-pass button where the headlights will be on while the button is held down. When the headlights are on, this will toggle between the low and high beams.

To the right of the steering where is the power steering adjustment knob. This will let us adjust the power steering from completely off to maximum assistance.

Finished Passenger Seat and Electrical System Components

I wrapped up the passenger seat by trimming the bolts and installing the wire that connects the mechanisms on the two tracks.

I then cut some pieces of 1/2″ steel tubing and welded them into the chassis then ground them flat.

I finally determined the location for the master cell (left) and front load cell (right). The load cell will actually install on the other side of the firewall, but I’m drilling it on this side because I don’t have drill access on the other side.

After deburring the holes, I temporarily bolted the mastercell to the aft side of the firewall.

The front load cell is mounted on the right side of the firewall. This should keep it clear of the throttle mechanism on the left side and allow easy access if I ever need to access it.

I’ve been playing with the location of the heater assembly. This is quite a bit bigger than the one Factory Five sells, so it can’t install on the firewall. I think I’m going to end up installing it at an angle as shown and then run a pair of 3″ diameter pieces of ducting from the heater to the firewall. A plenum on the other side will distribute the air to the foot boxes and defroster vents.

The ducting will connect to the plenum through this pair of 3″ diameter holes. There will be flanges installed to the firewall here.

Coolant Reservoir Overflow and Passenger Seat

I ran a piece of silicone tubing from the coolant reservoir overflow down to the bottom of the chassis. This is probably only temporary, but I need to have something in place before we fill the coolant system.

Next, I resumed installing the passenger seat. I bolted the seat tracks to the bottom of the seat and then installed the bolts that attach the inner track to the floor. I then drilled the forward hole in the outer track, dropped in a bolt to lock the track in place, slid the seat forward and marked for the rear hole.

After removing the seat, I drilled the final hole in the floor.

Finally, I removed the seat pans and enlarged the holes to 1/2″ in preparation for welding in the spacers. It’s too loud to run the grinder tonight, so I’ll do this tomorrow.

Finished Driver Side Floor Pan and Radiator Plumbing

I cut a couple of 2.5″ pieces of 1/2″ steel tubing. I’m going to weld them in a little proud of the upper and lower surfaces and then grind them flat.

I used a couple of welding magnets to hold the tubes in position.

After an ugly weld job, I ground the tubes flat and cleaned up the hole. I also did the same thing on the underside of the floor.

I reinstalled the seat pan and drilled the left side to the transmission tunnel.

I picked up some silicone couplers from HPS Performance Silicone Hoses. I removed the upper radiator tube and swapped in the silicone couplers.

These are much nicer than the cheap rubber hoses that came with the radiator tubes and shouldn’t suffer from cracking as they age like the rubber hoses.

The hose connection under the radiator cap on the water neck will connect to the hose fitting on the bottom of the coolant reservoir. I’m using the same silicone tubing that I used for the PCV valve and breather connections. I’m using one of the decorative ends which covers a standard hose clamp, but I had to trim part of it because of hose close the radiator comes to the hose fitting.

I need to route the hose along the top of the upper radiator tube and then down the x-frame and up to the reservoir. I haven’t figured out exactly how I’m going to secure this yet.

Finished Drilling Floor for Seat Tracks, Wheel Spacers and Brake Hoses

I removed the seat and drilled the final hole through the floor and rear 2″x2″ square tubing.

Afterward, I removed the aluminum floor to get access to the steel floor underneath.

The bolts that attach the outer seat track will go all the way through the lower part of the square tubing. I used the bubble level in the rear of the drill to ensure I was drilling perpendicular to the top surface and then drilled through the bottom surface.

I also drilled through the lower floor the same way.

Afterward, I used the unibit to enlarge these holes to just over 1/2″.

I’m going to be putting pieces of 1/2″ OD steel tubing through these holes and welding them to the upper and lower surfaces before grinding them flat. It’s too late to run the grinder tonight, so I’ll take care of that tomorrow. The spacers will allow me to tighten the bolts properly without deforming the metal. This isn’t much of a concern with the rear 2″x2″ tubing since it has fairly thick walls, but it’s really important with the forward hole through the two thin pieces of sheet steel.

I’ve been concerned with how little space there is between the front brake calipers and the inside of the wheel. If there is even the smallest amount of flex in the wheel, the wheel could hit the caliper. To pick up some extra space, I picked up some new 0.125″  aluminum spacers. These are nearly 0.040″ thicker and quite a bit lighter.

Here is one of them installed. The only disadvantage is that these are made from shiny aluminum and are visible between the spokes of the wheel.

I noticed a while back that my front brake hoses are hitting the tires when turned to the steering stops, so I need to replace these. They’re also 18″ long which is longer than is necessary.

I picked up a couple of 16″ brake hoses with a 90º fitting at one end. Even with the wheel all the way to the stop, there’s plenty of room between the tire and hose.

The hose misses the tire and chassis as they wheel is turned from stop to stop.

When the wheel is at the other stop, there’s plenty of slack in the cable.

Coolant Reservoir and Seat Tracks

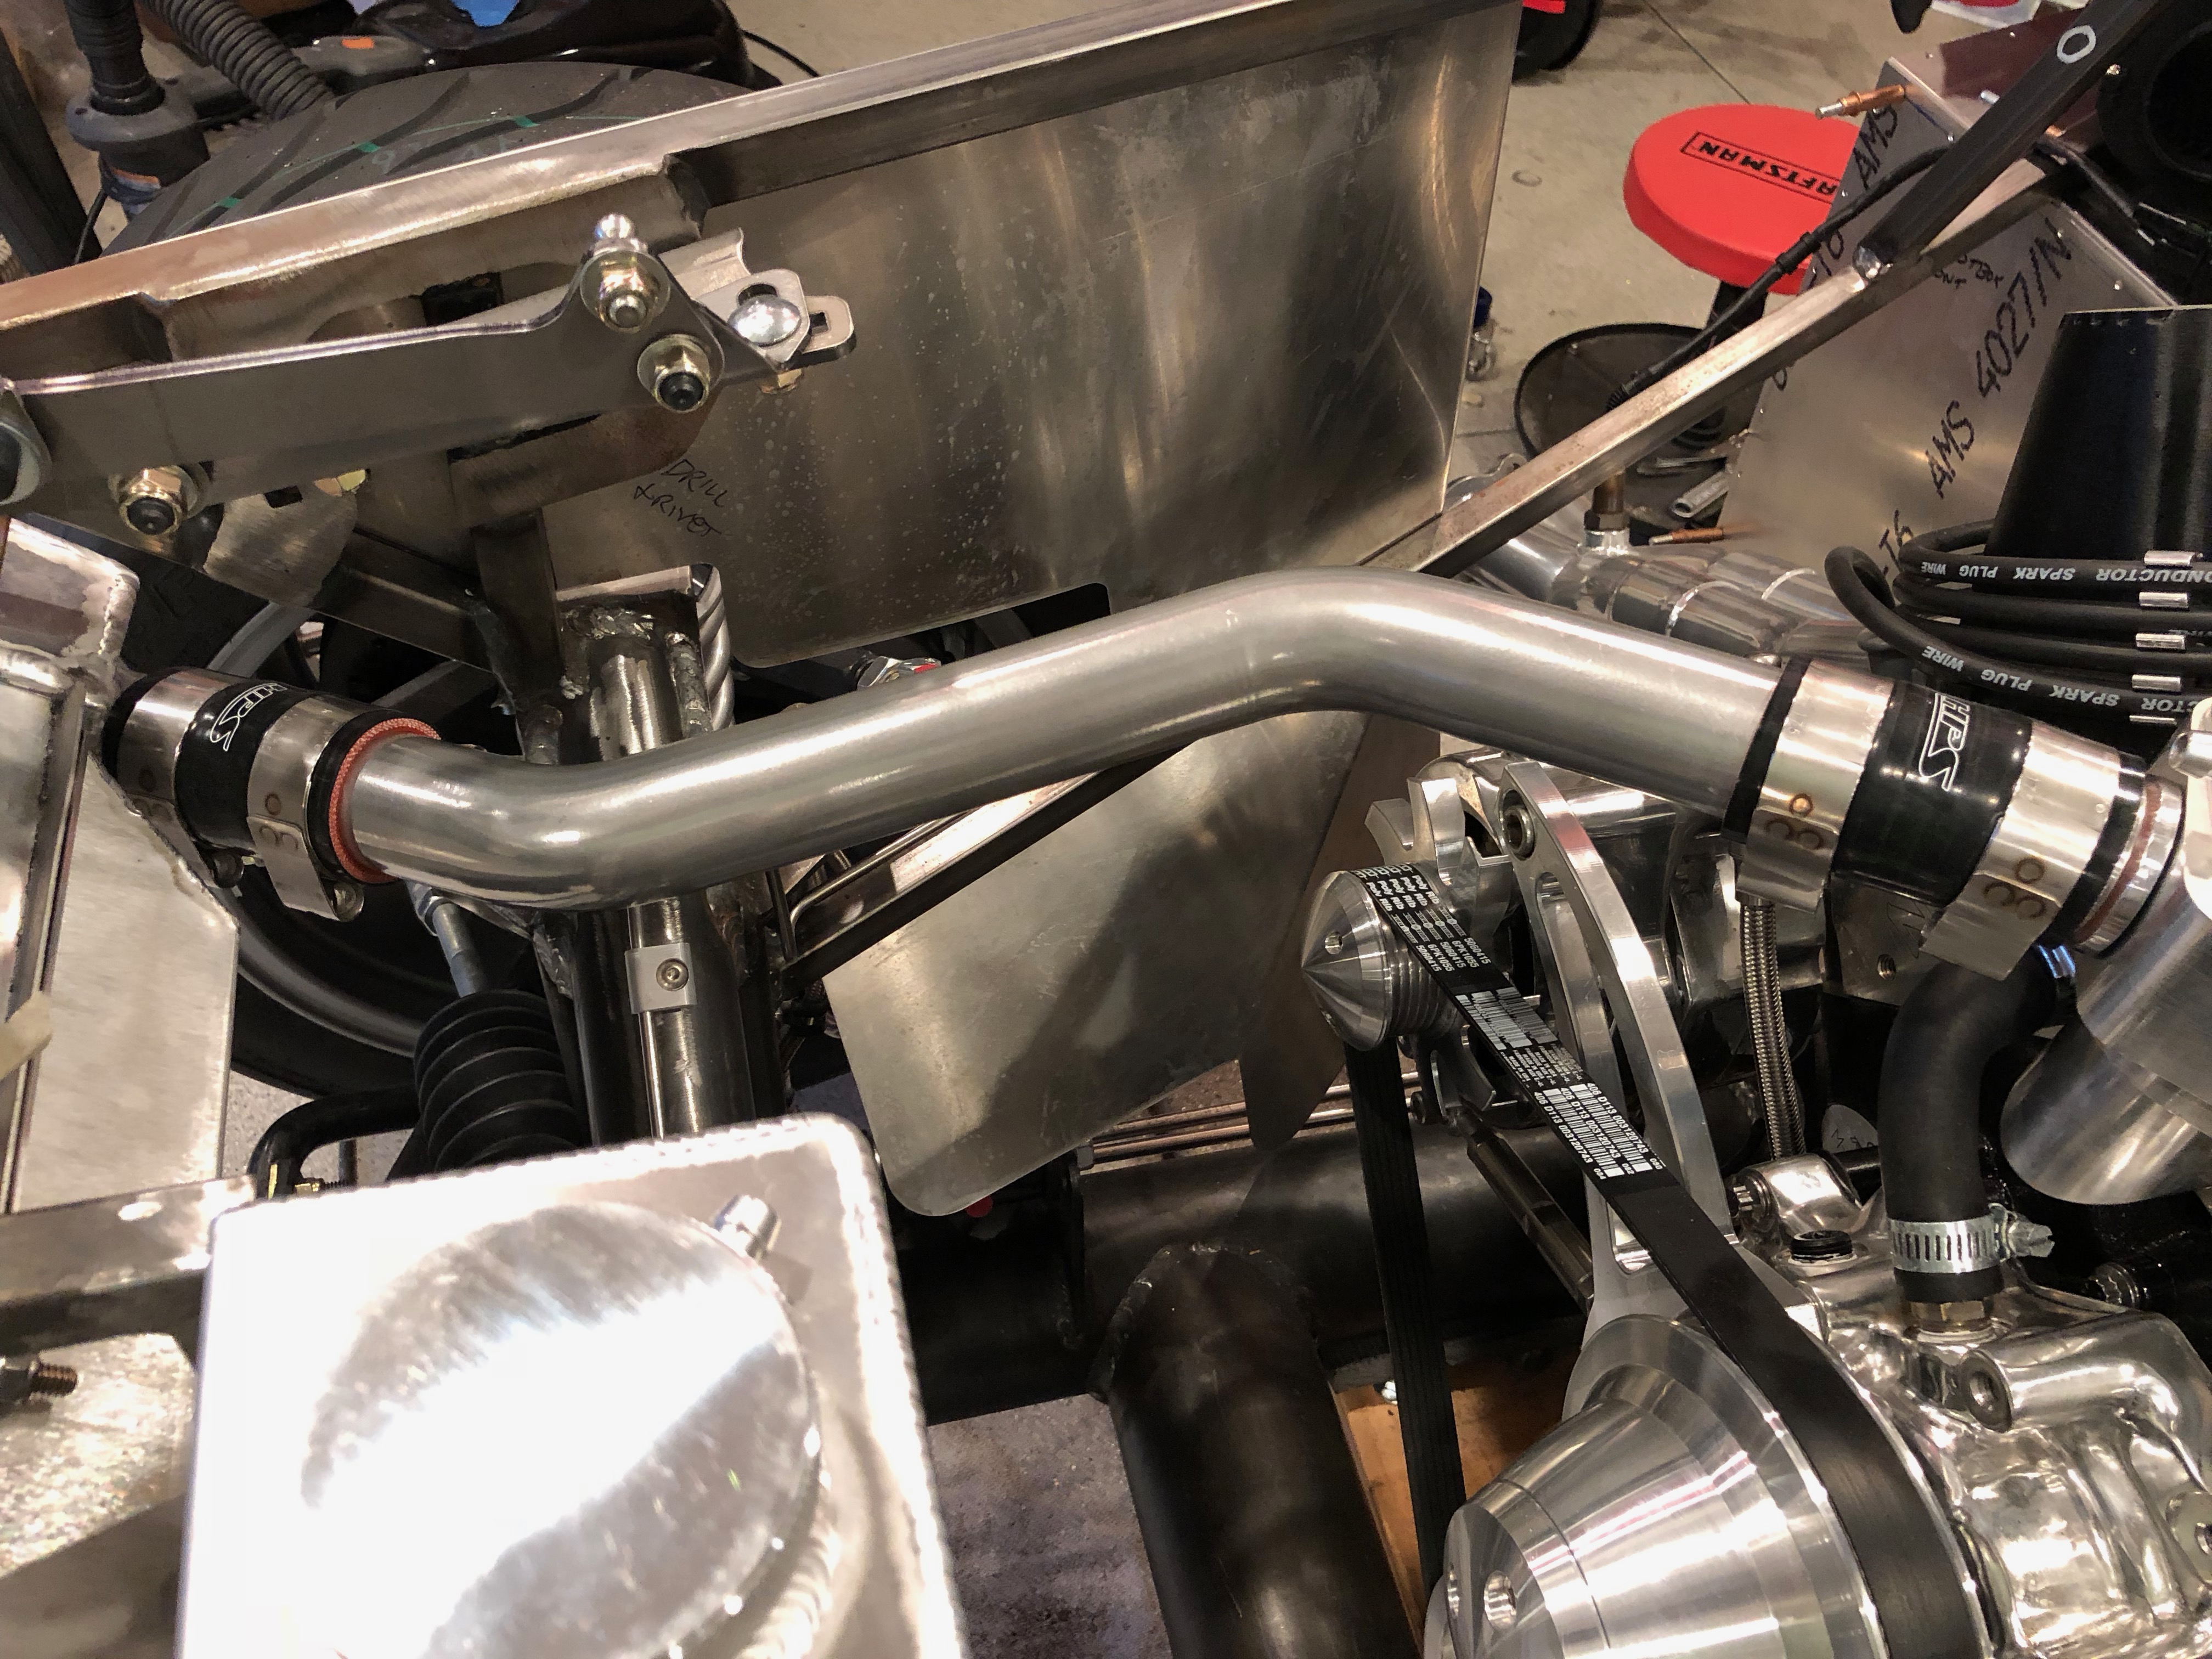
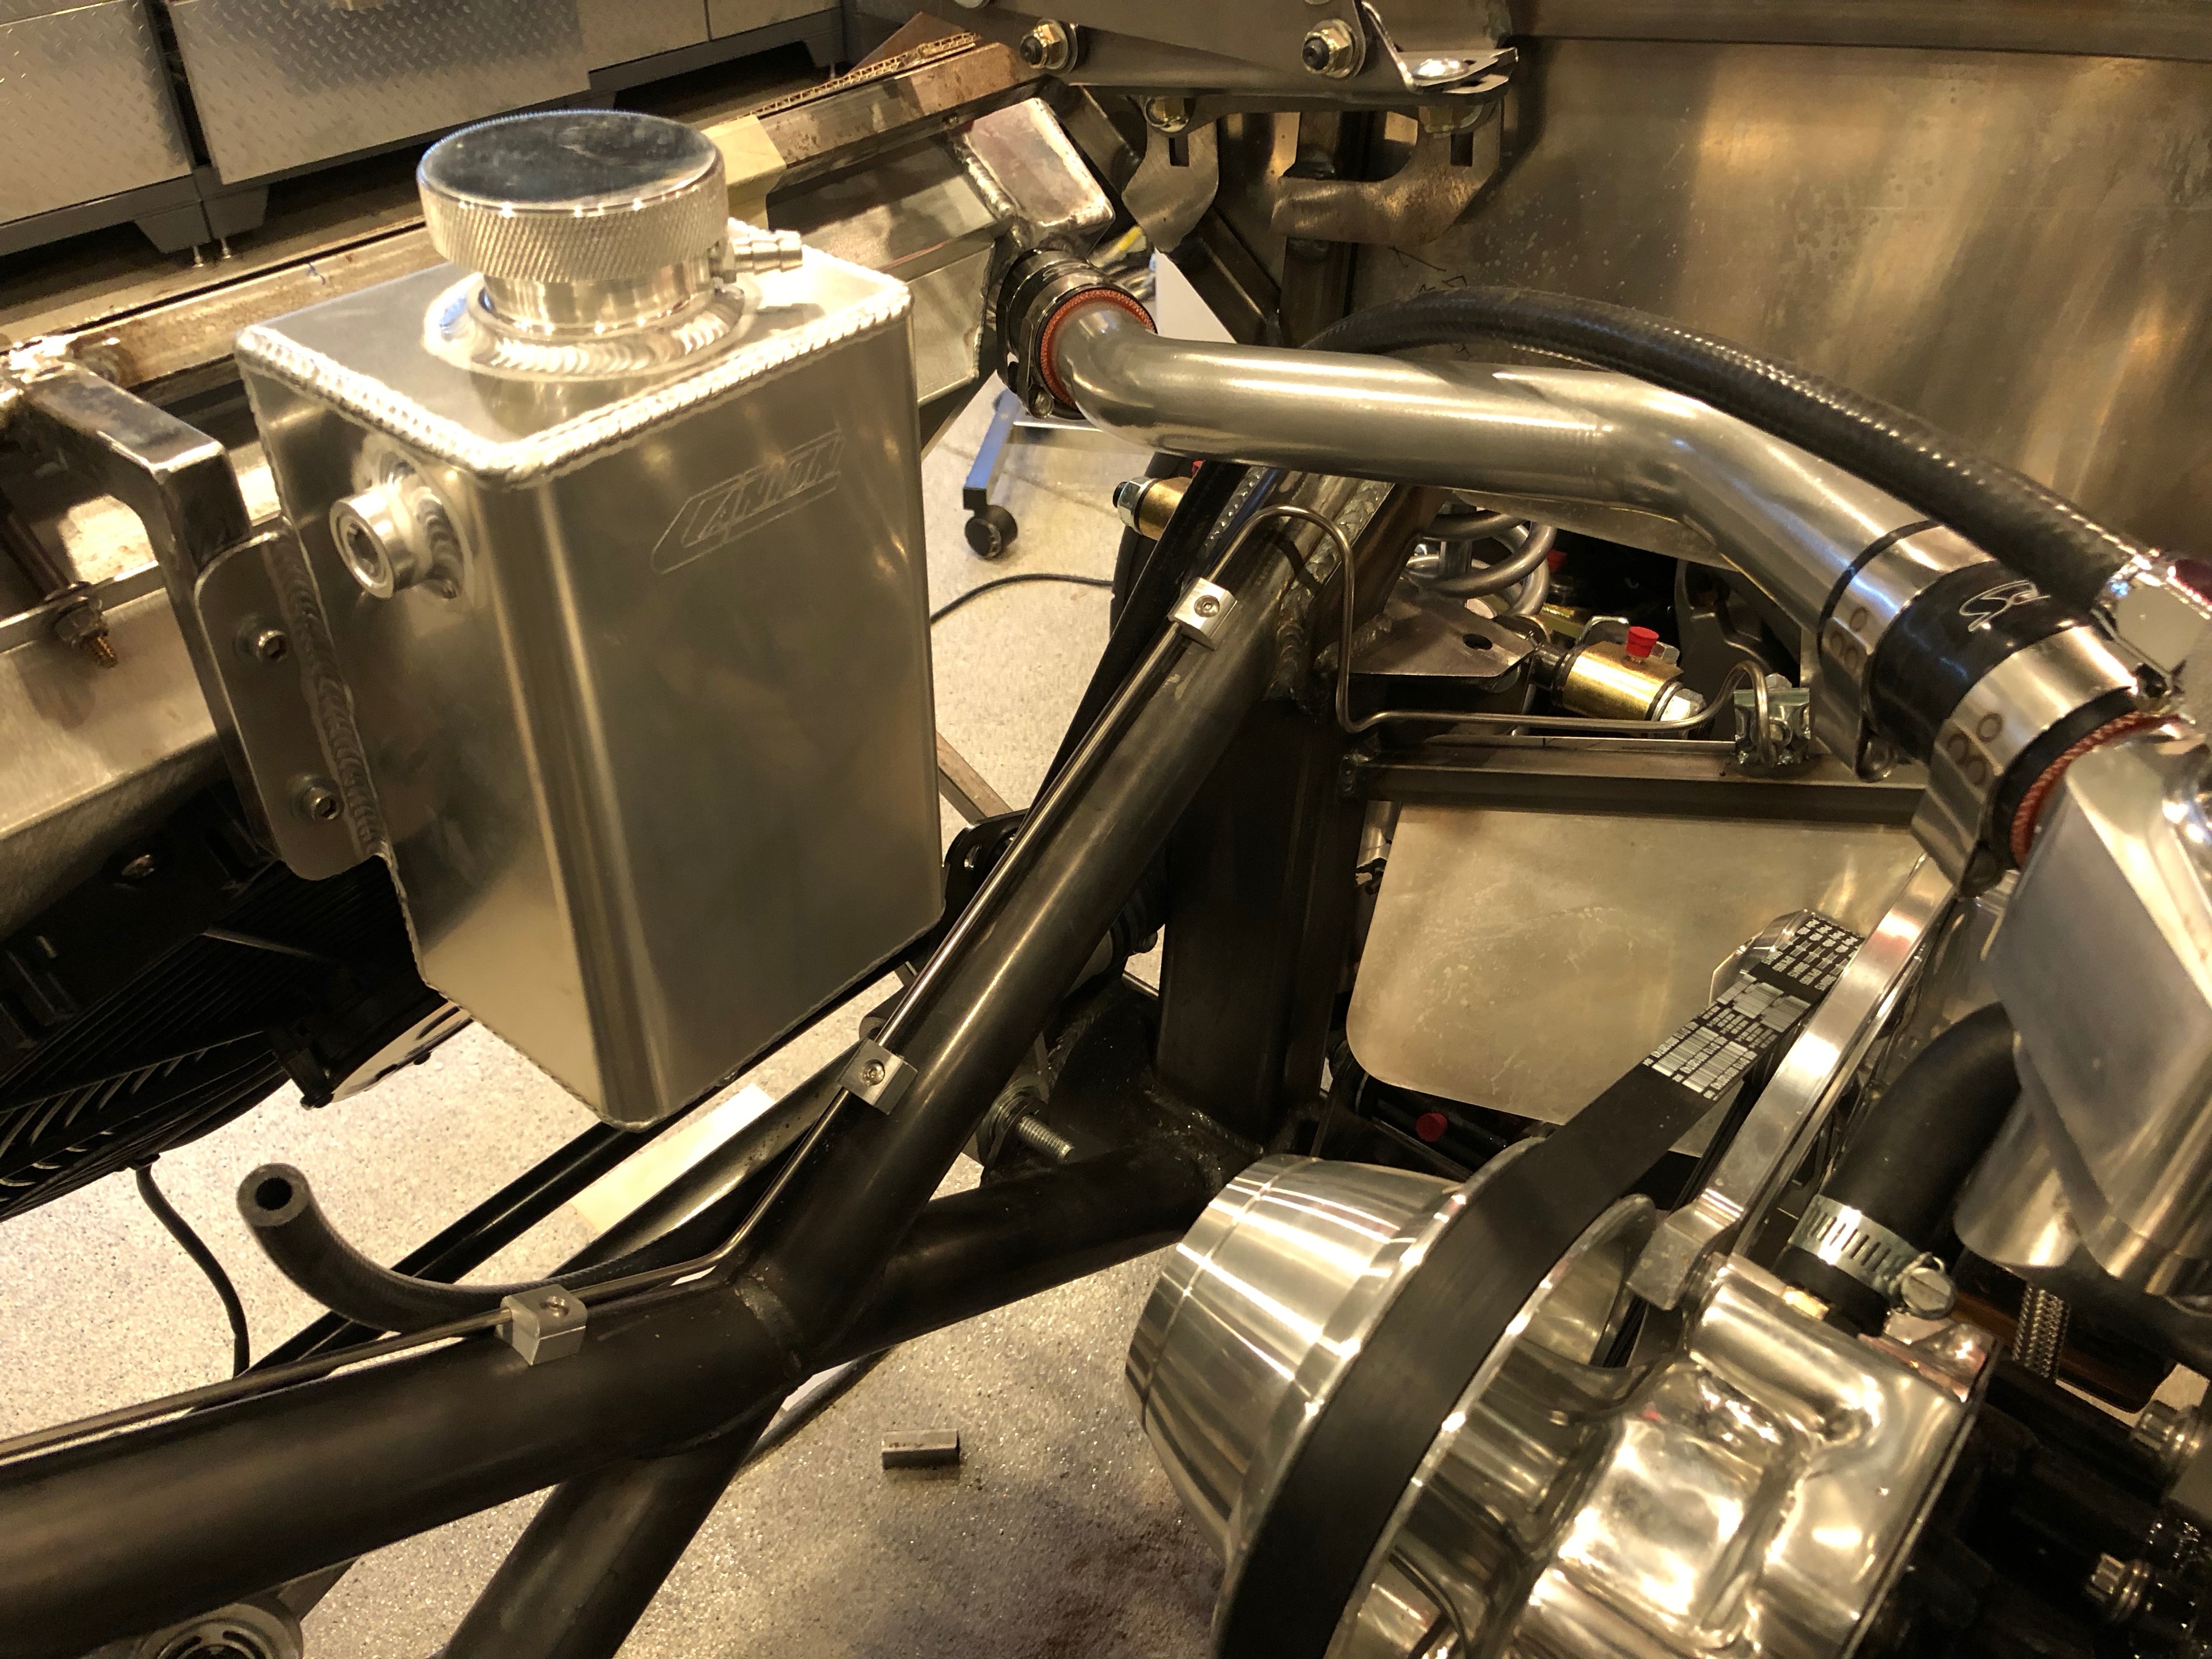
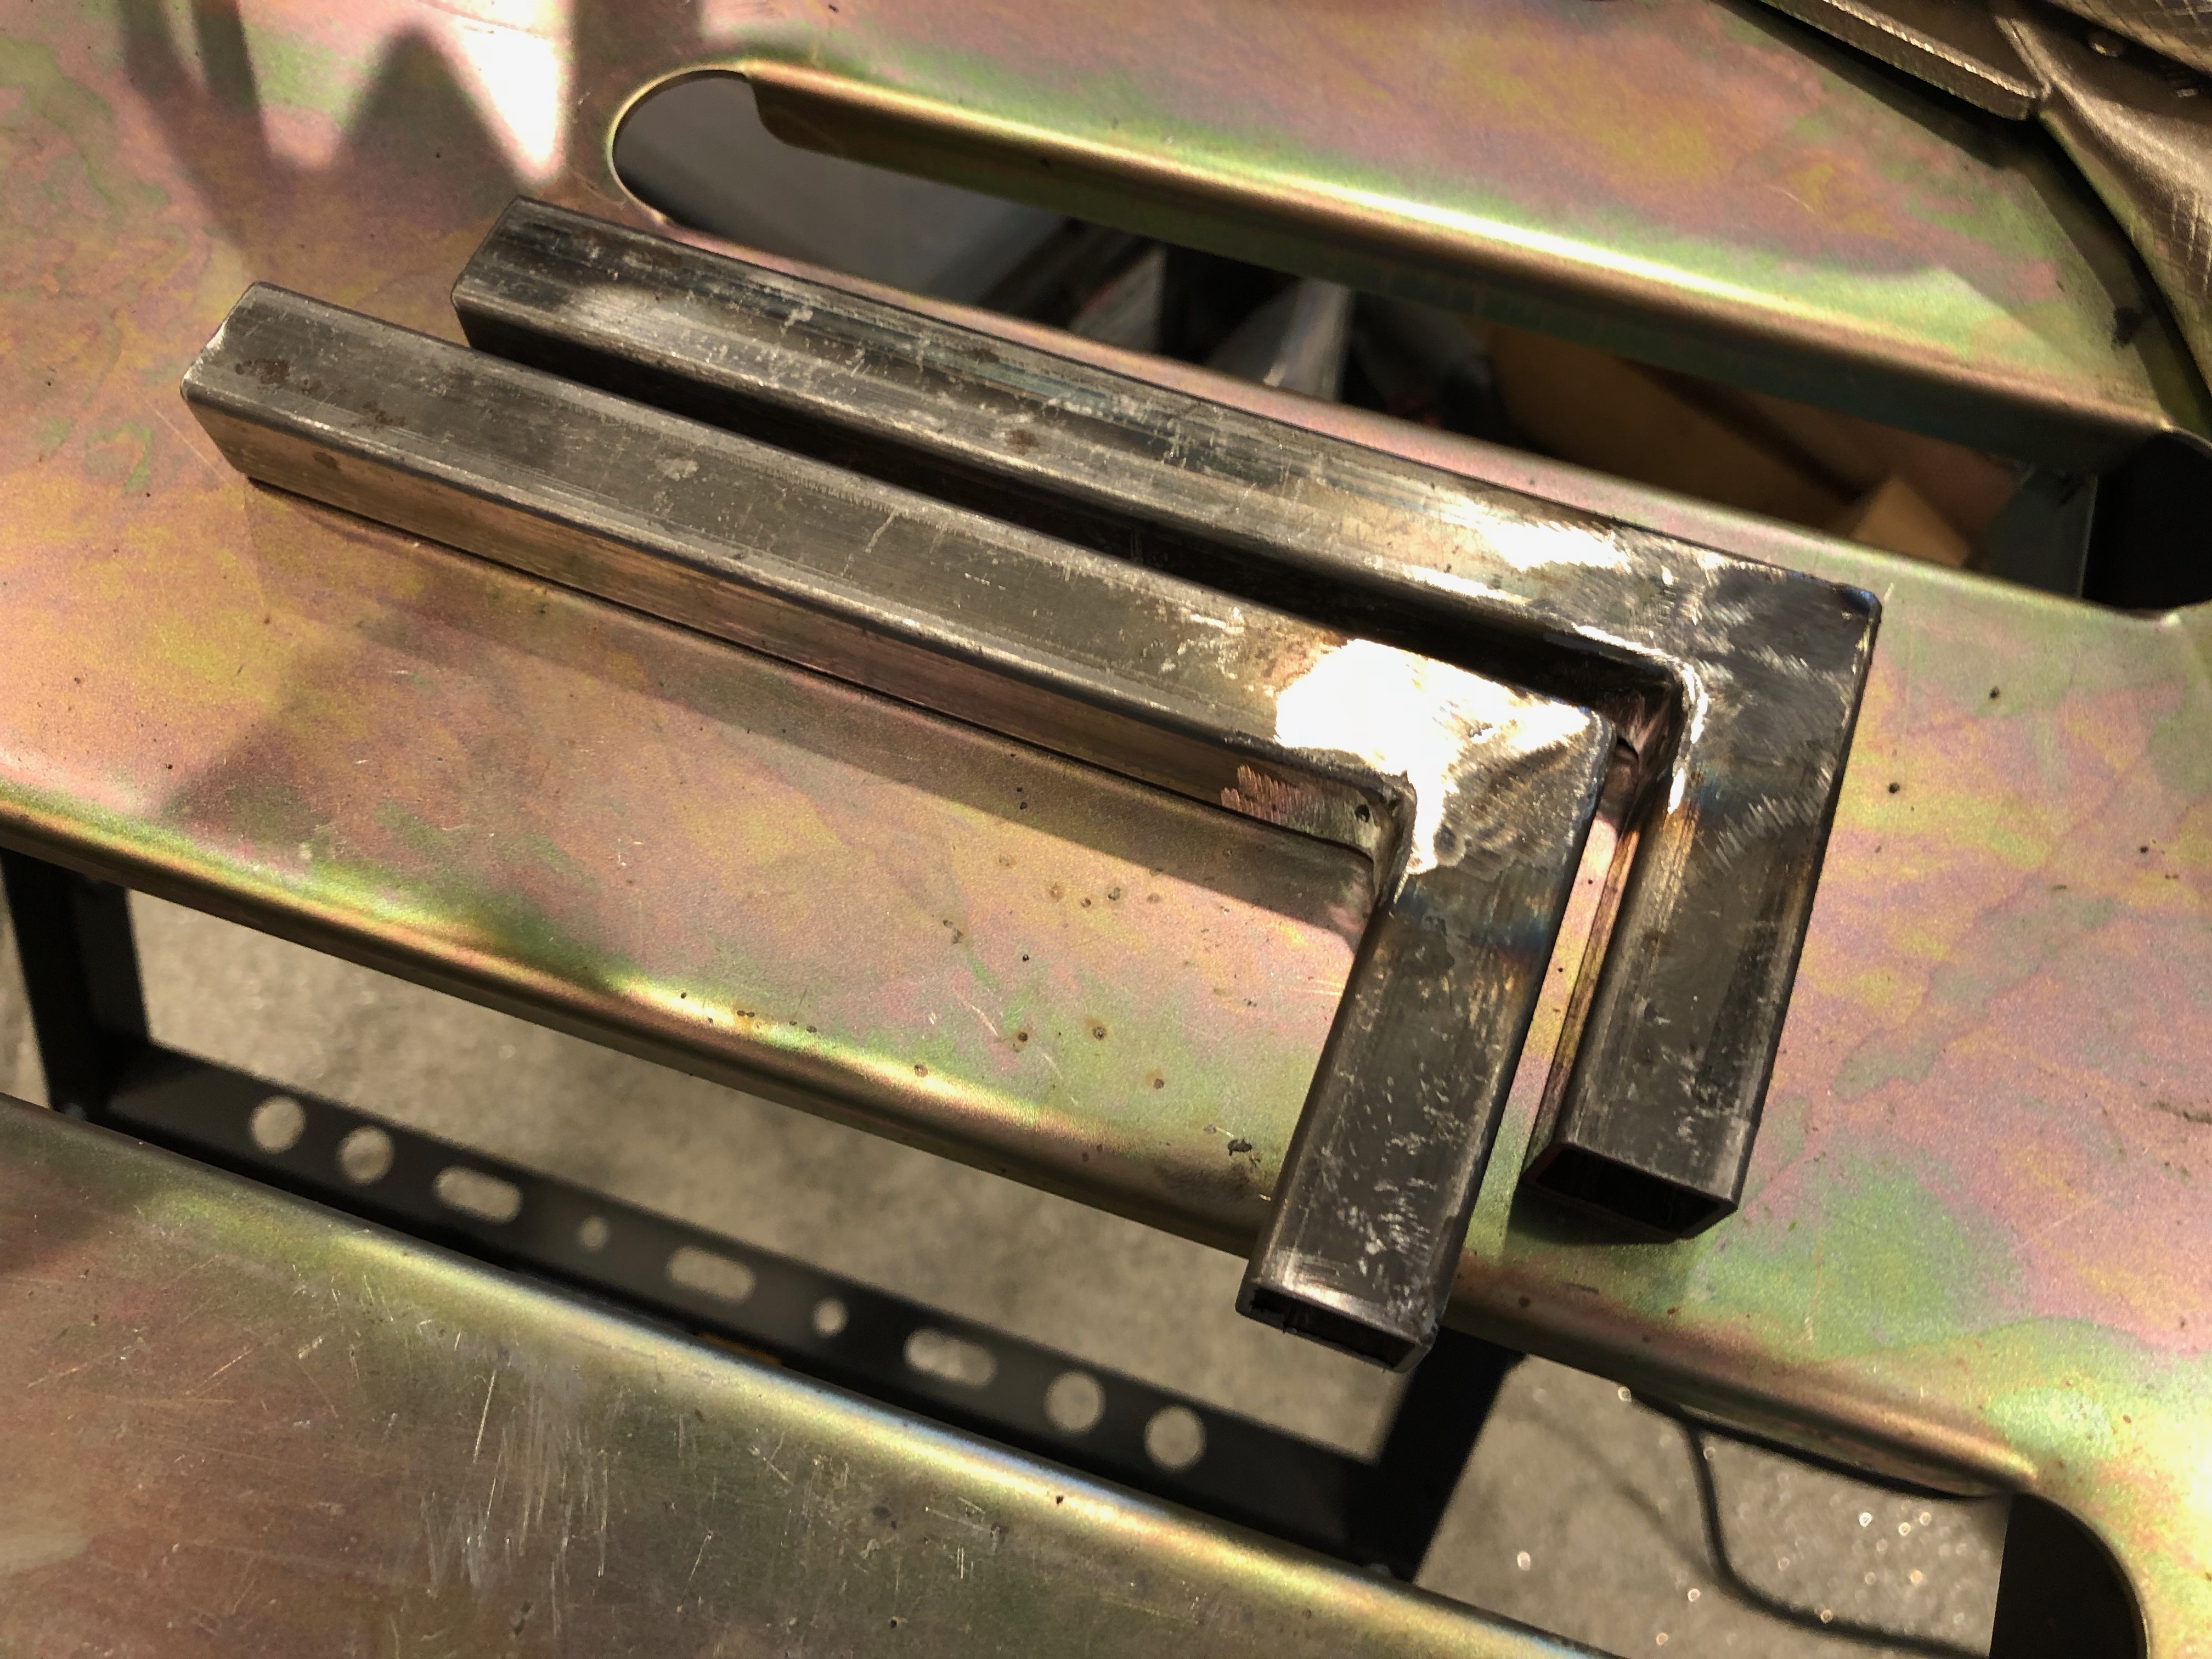
Last week I started thinking about where to mount the new coolant reservoir and I settled on mounting it just behind the radiator, centered over the x-frame. I needed a way to cantilever it out from 3/4″ cross tube that supports the upper end of the radiator, so I welded up some additional 3/4″ tubing to form a couple of L shaped pieces.

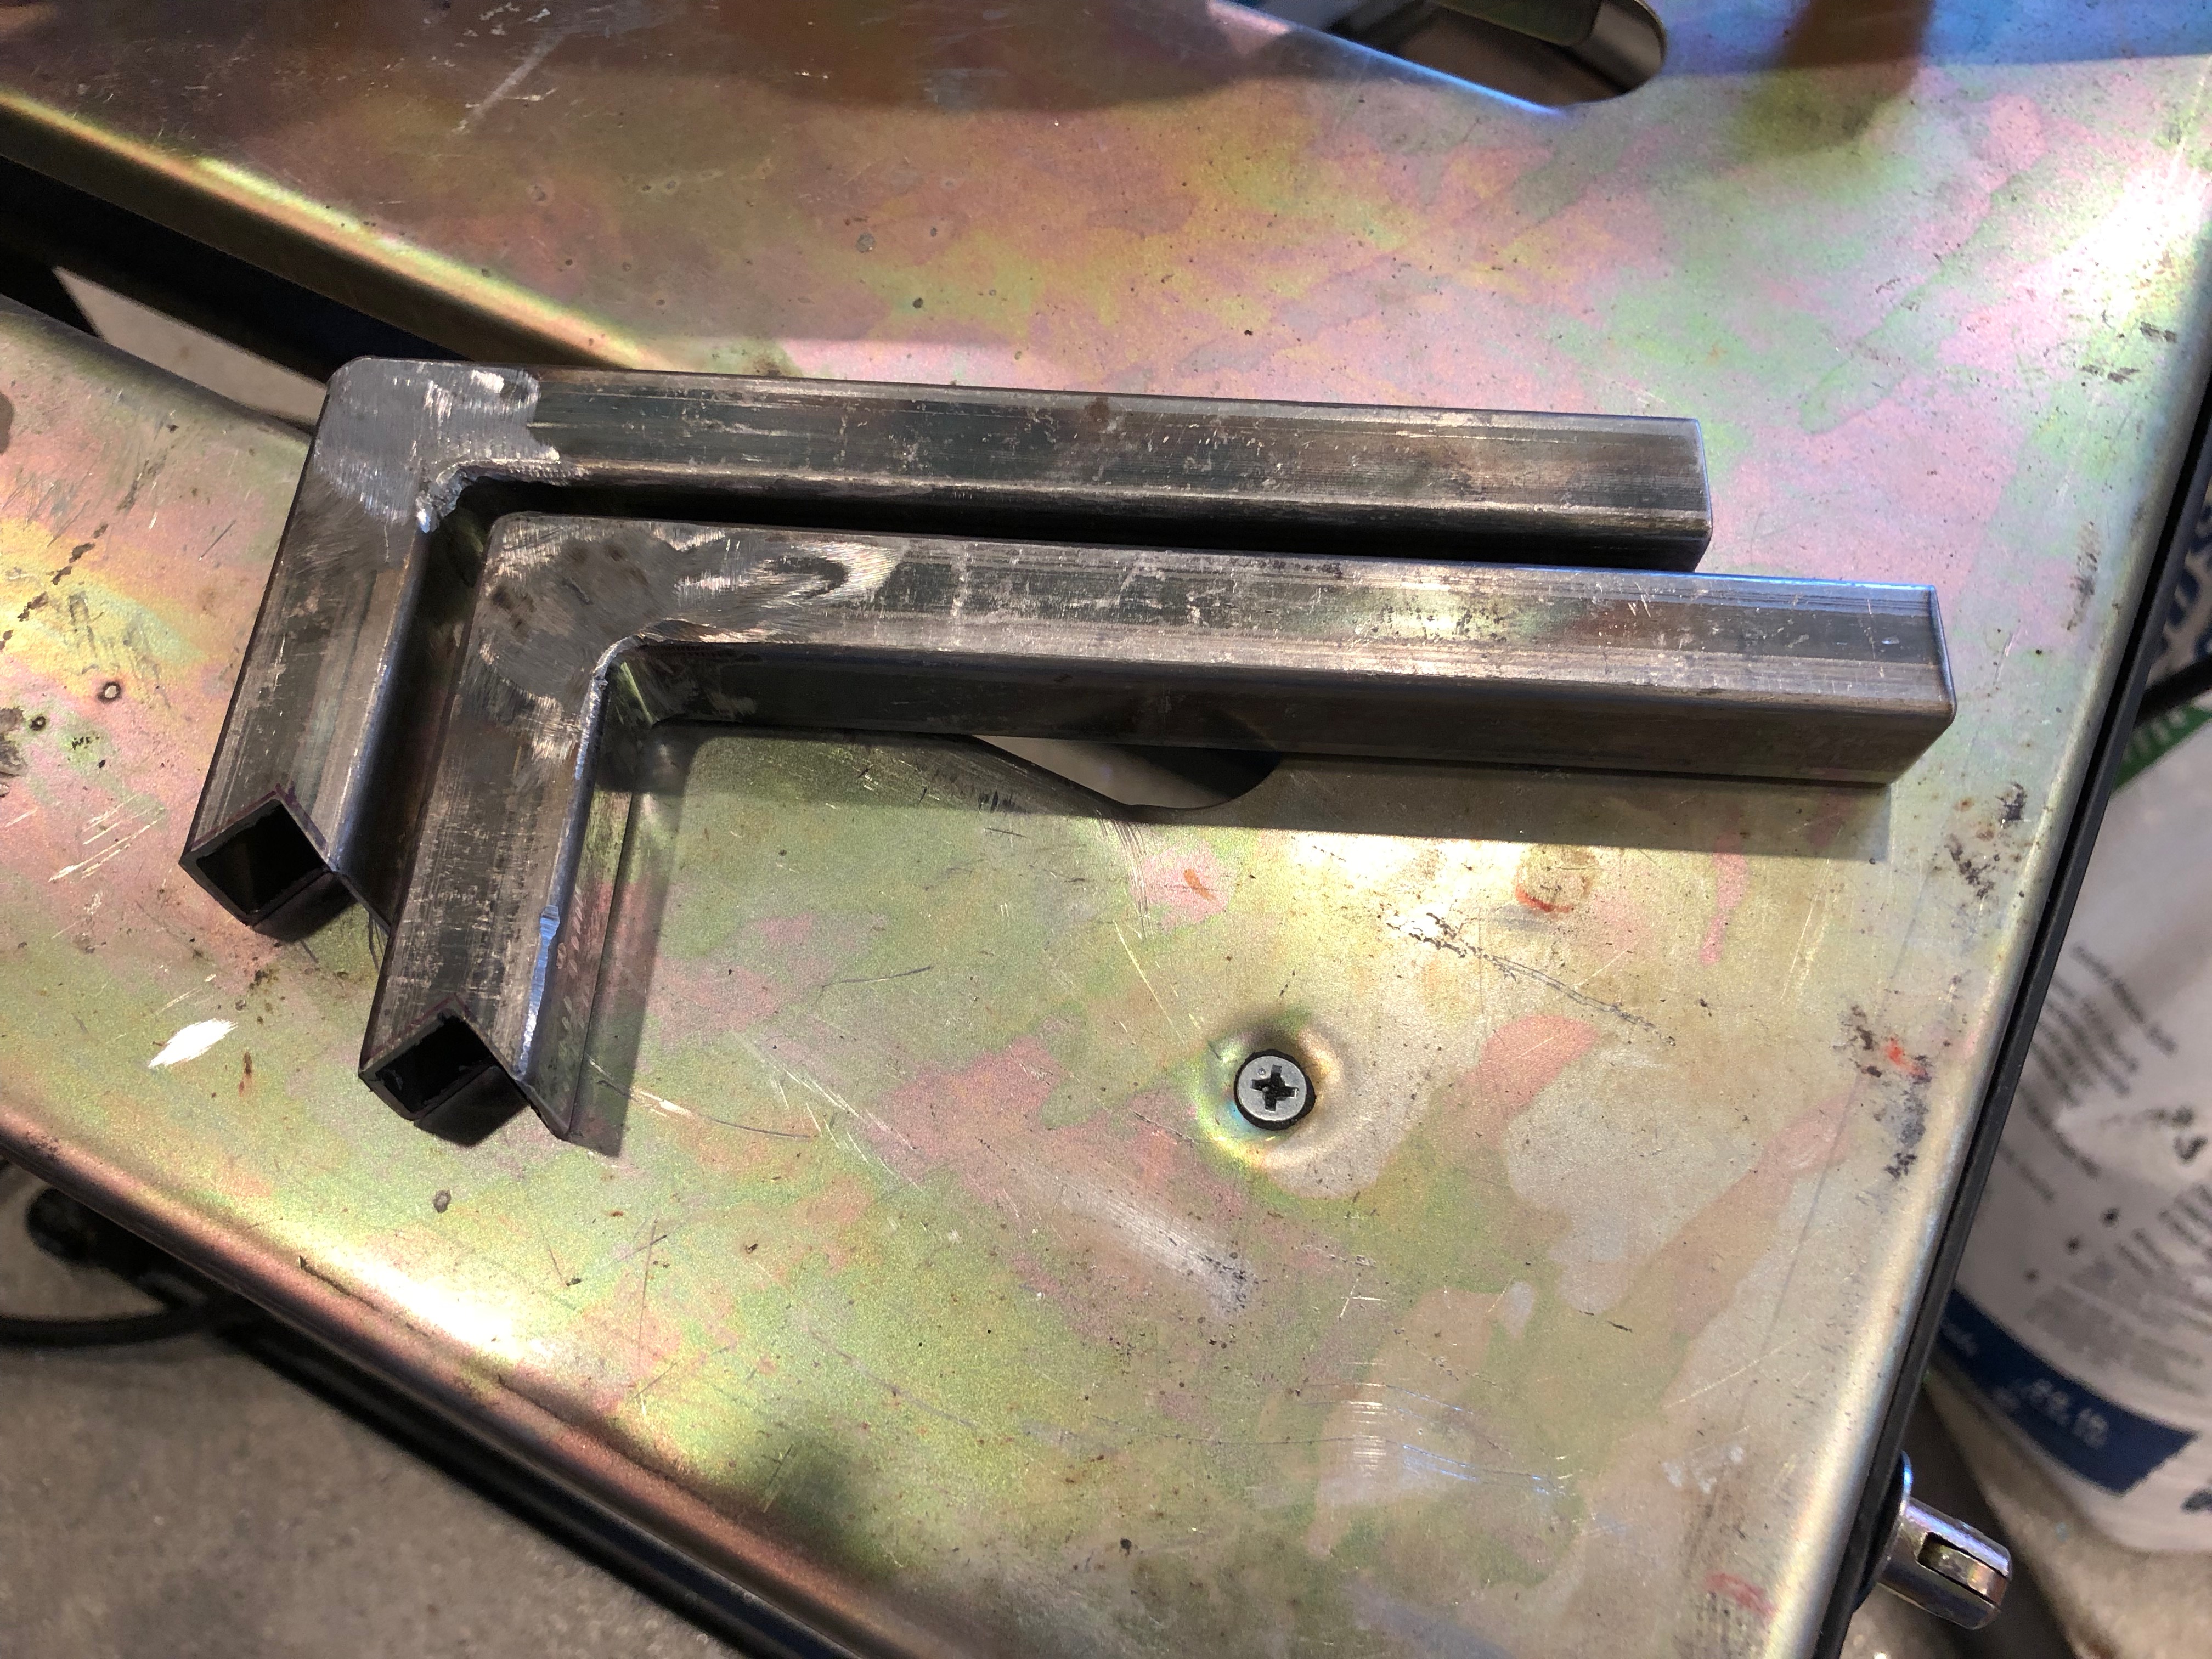
These will be welded to the upper 3/4″ tubing, but that’s mounted at a 45º angle, so I need to cut some notches in the forward end of these.

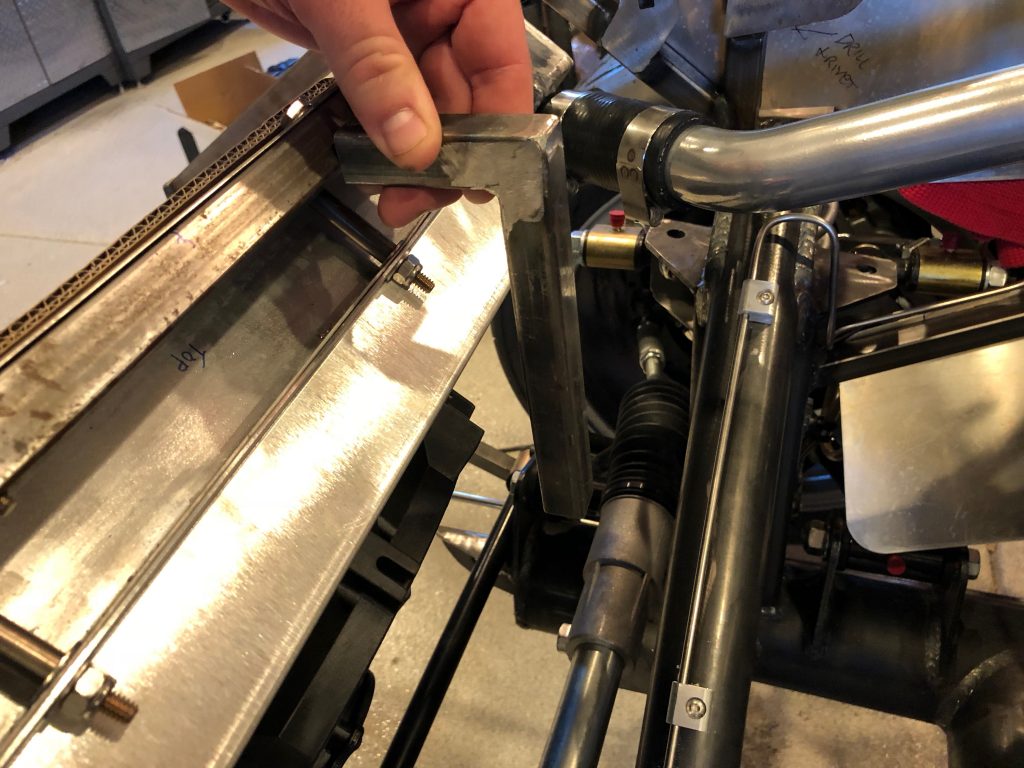
These notches should let the supports fit tight against the tubing and be perpendicular to the ground.

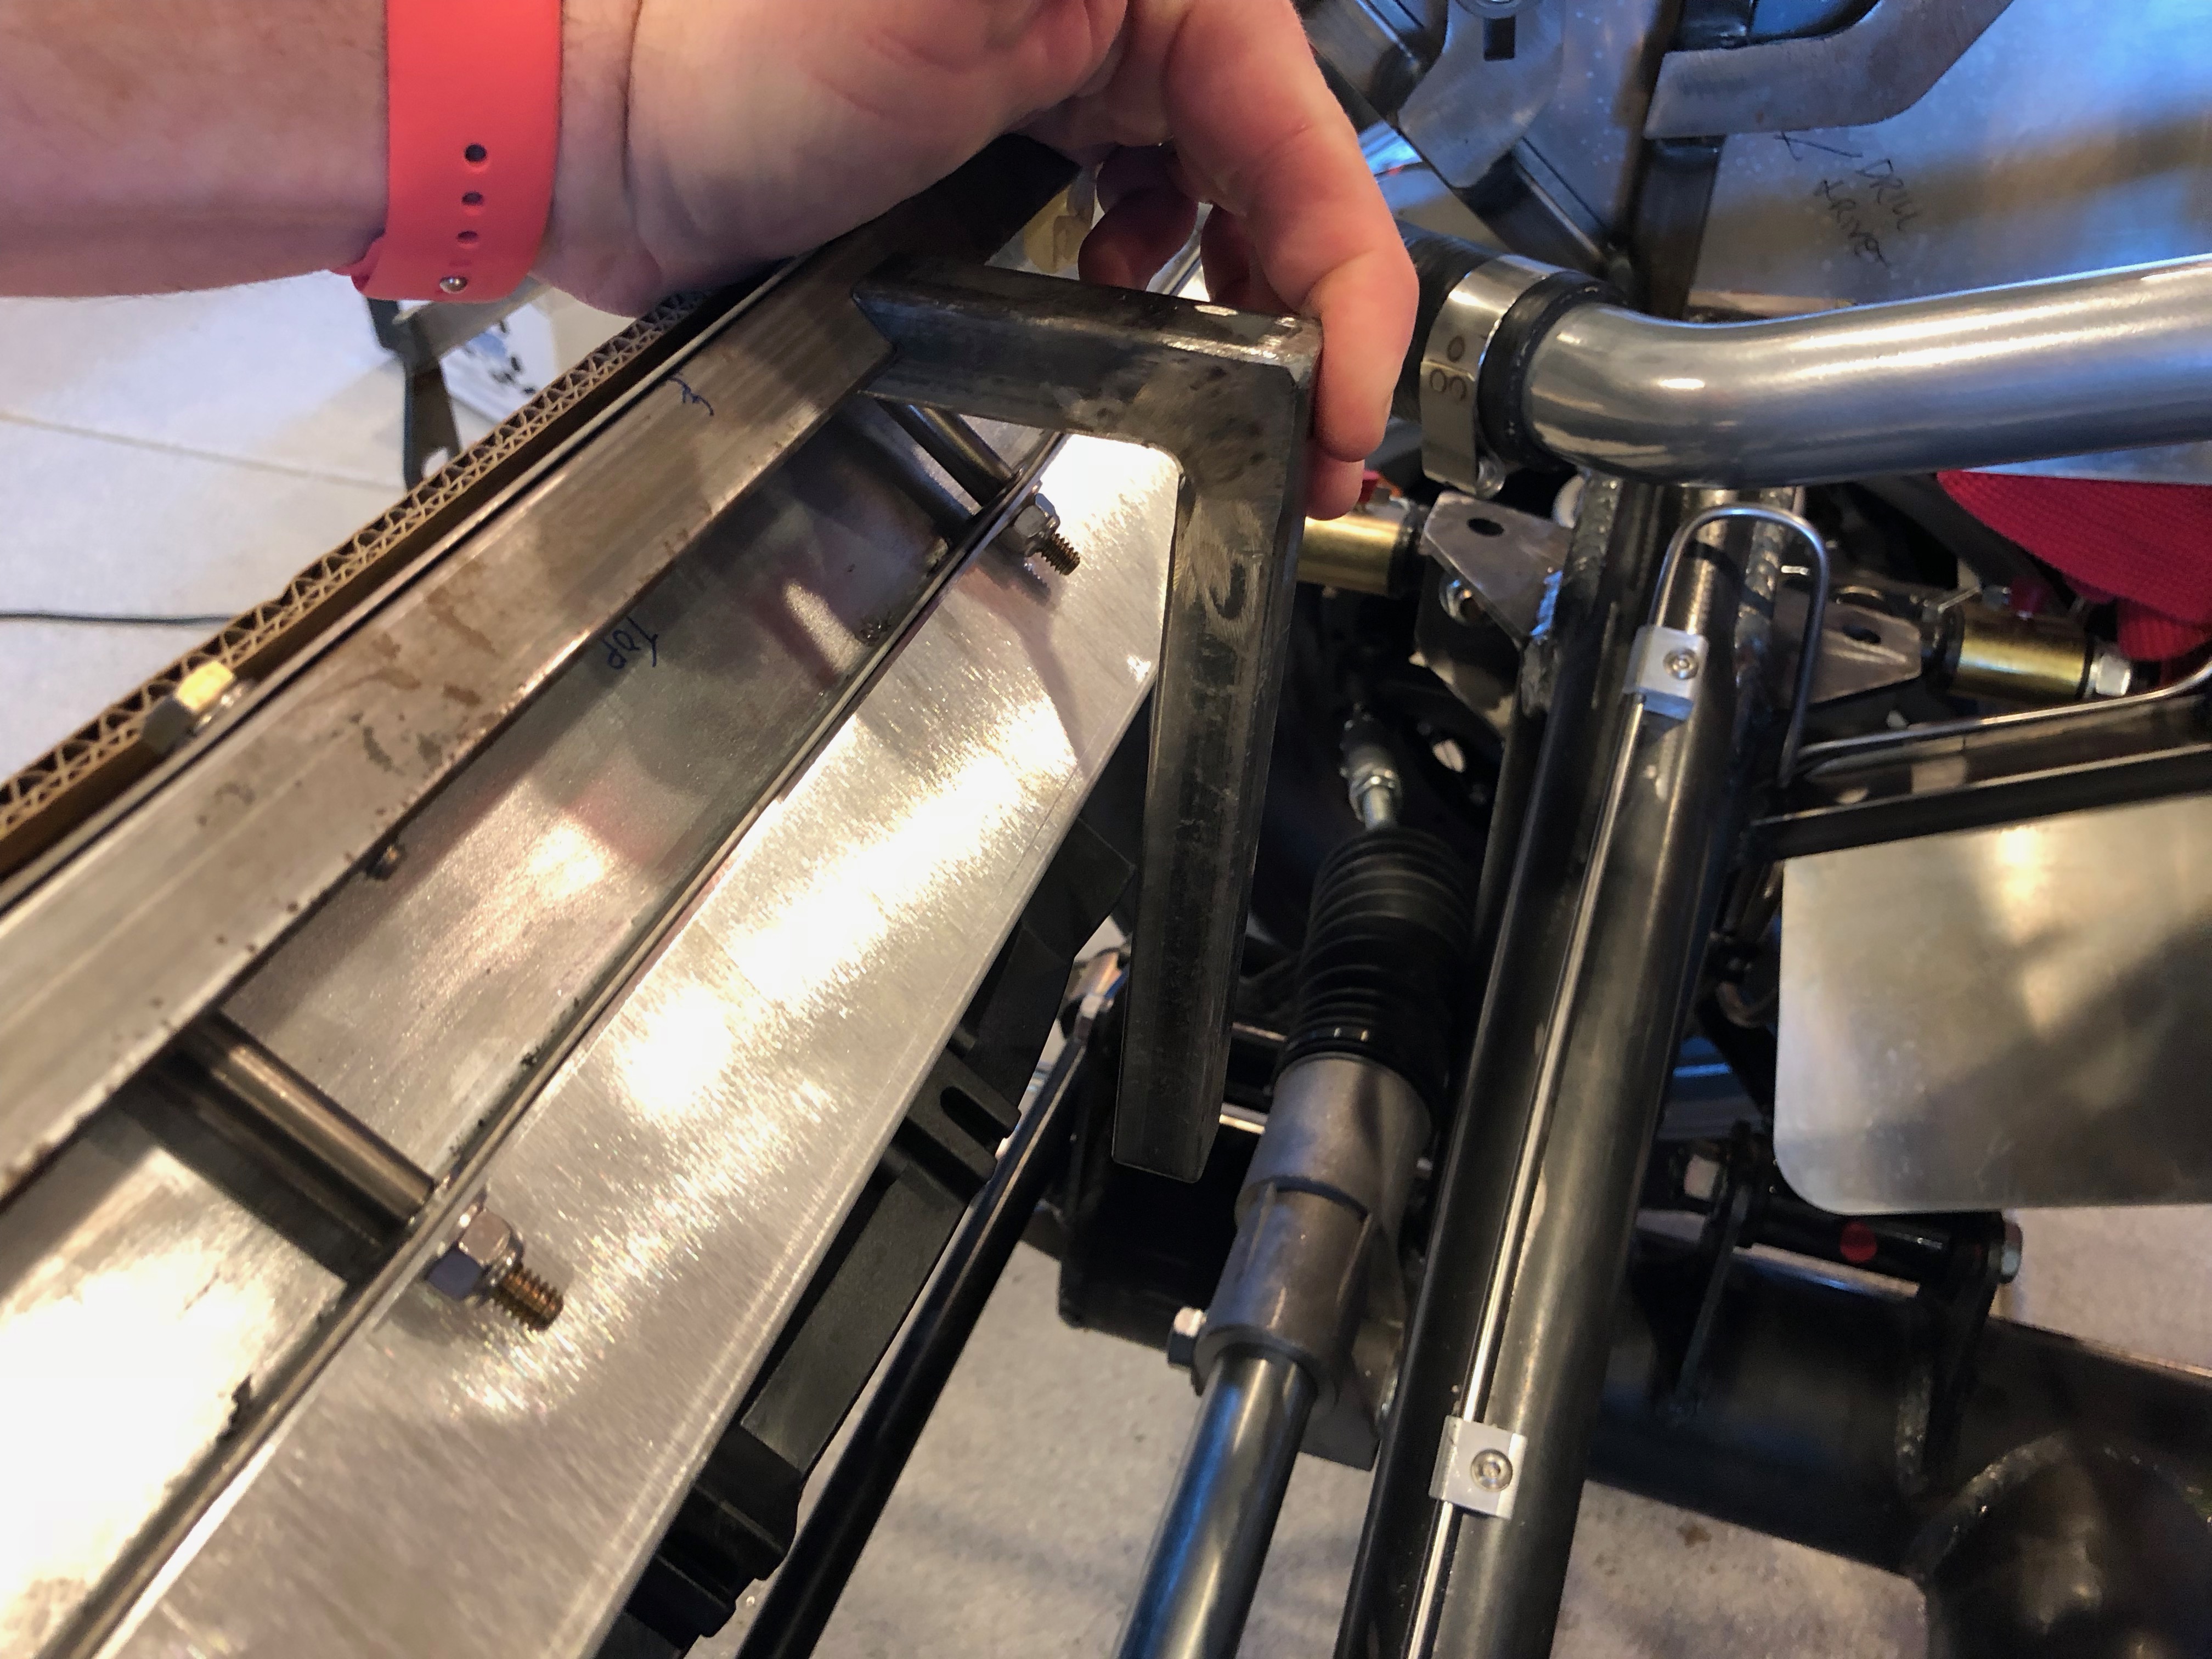
Here’s how they’ll fit against the support tubing.

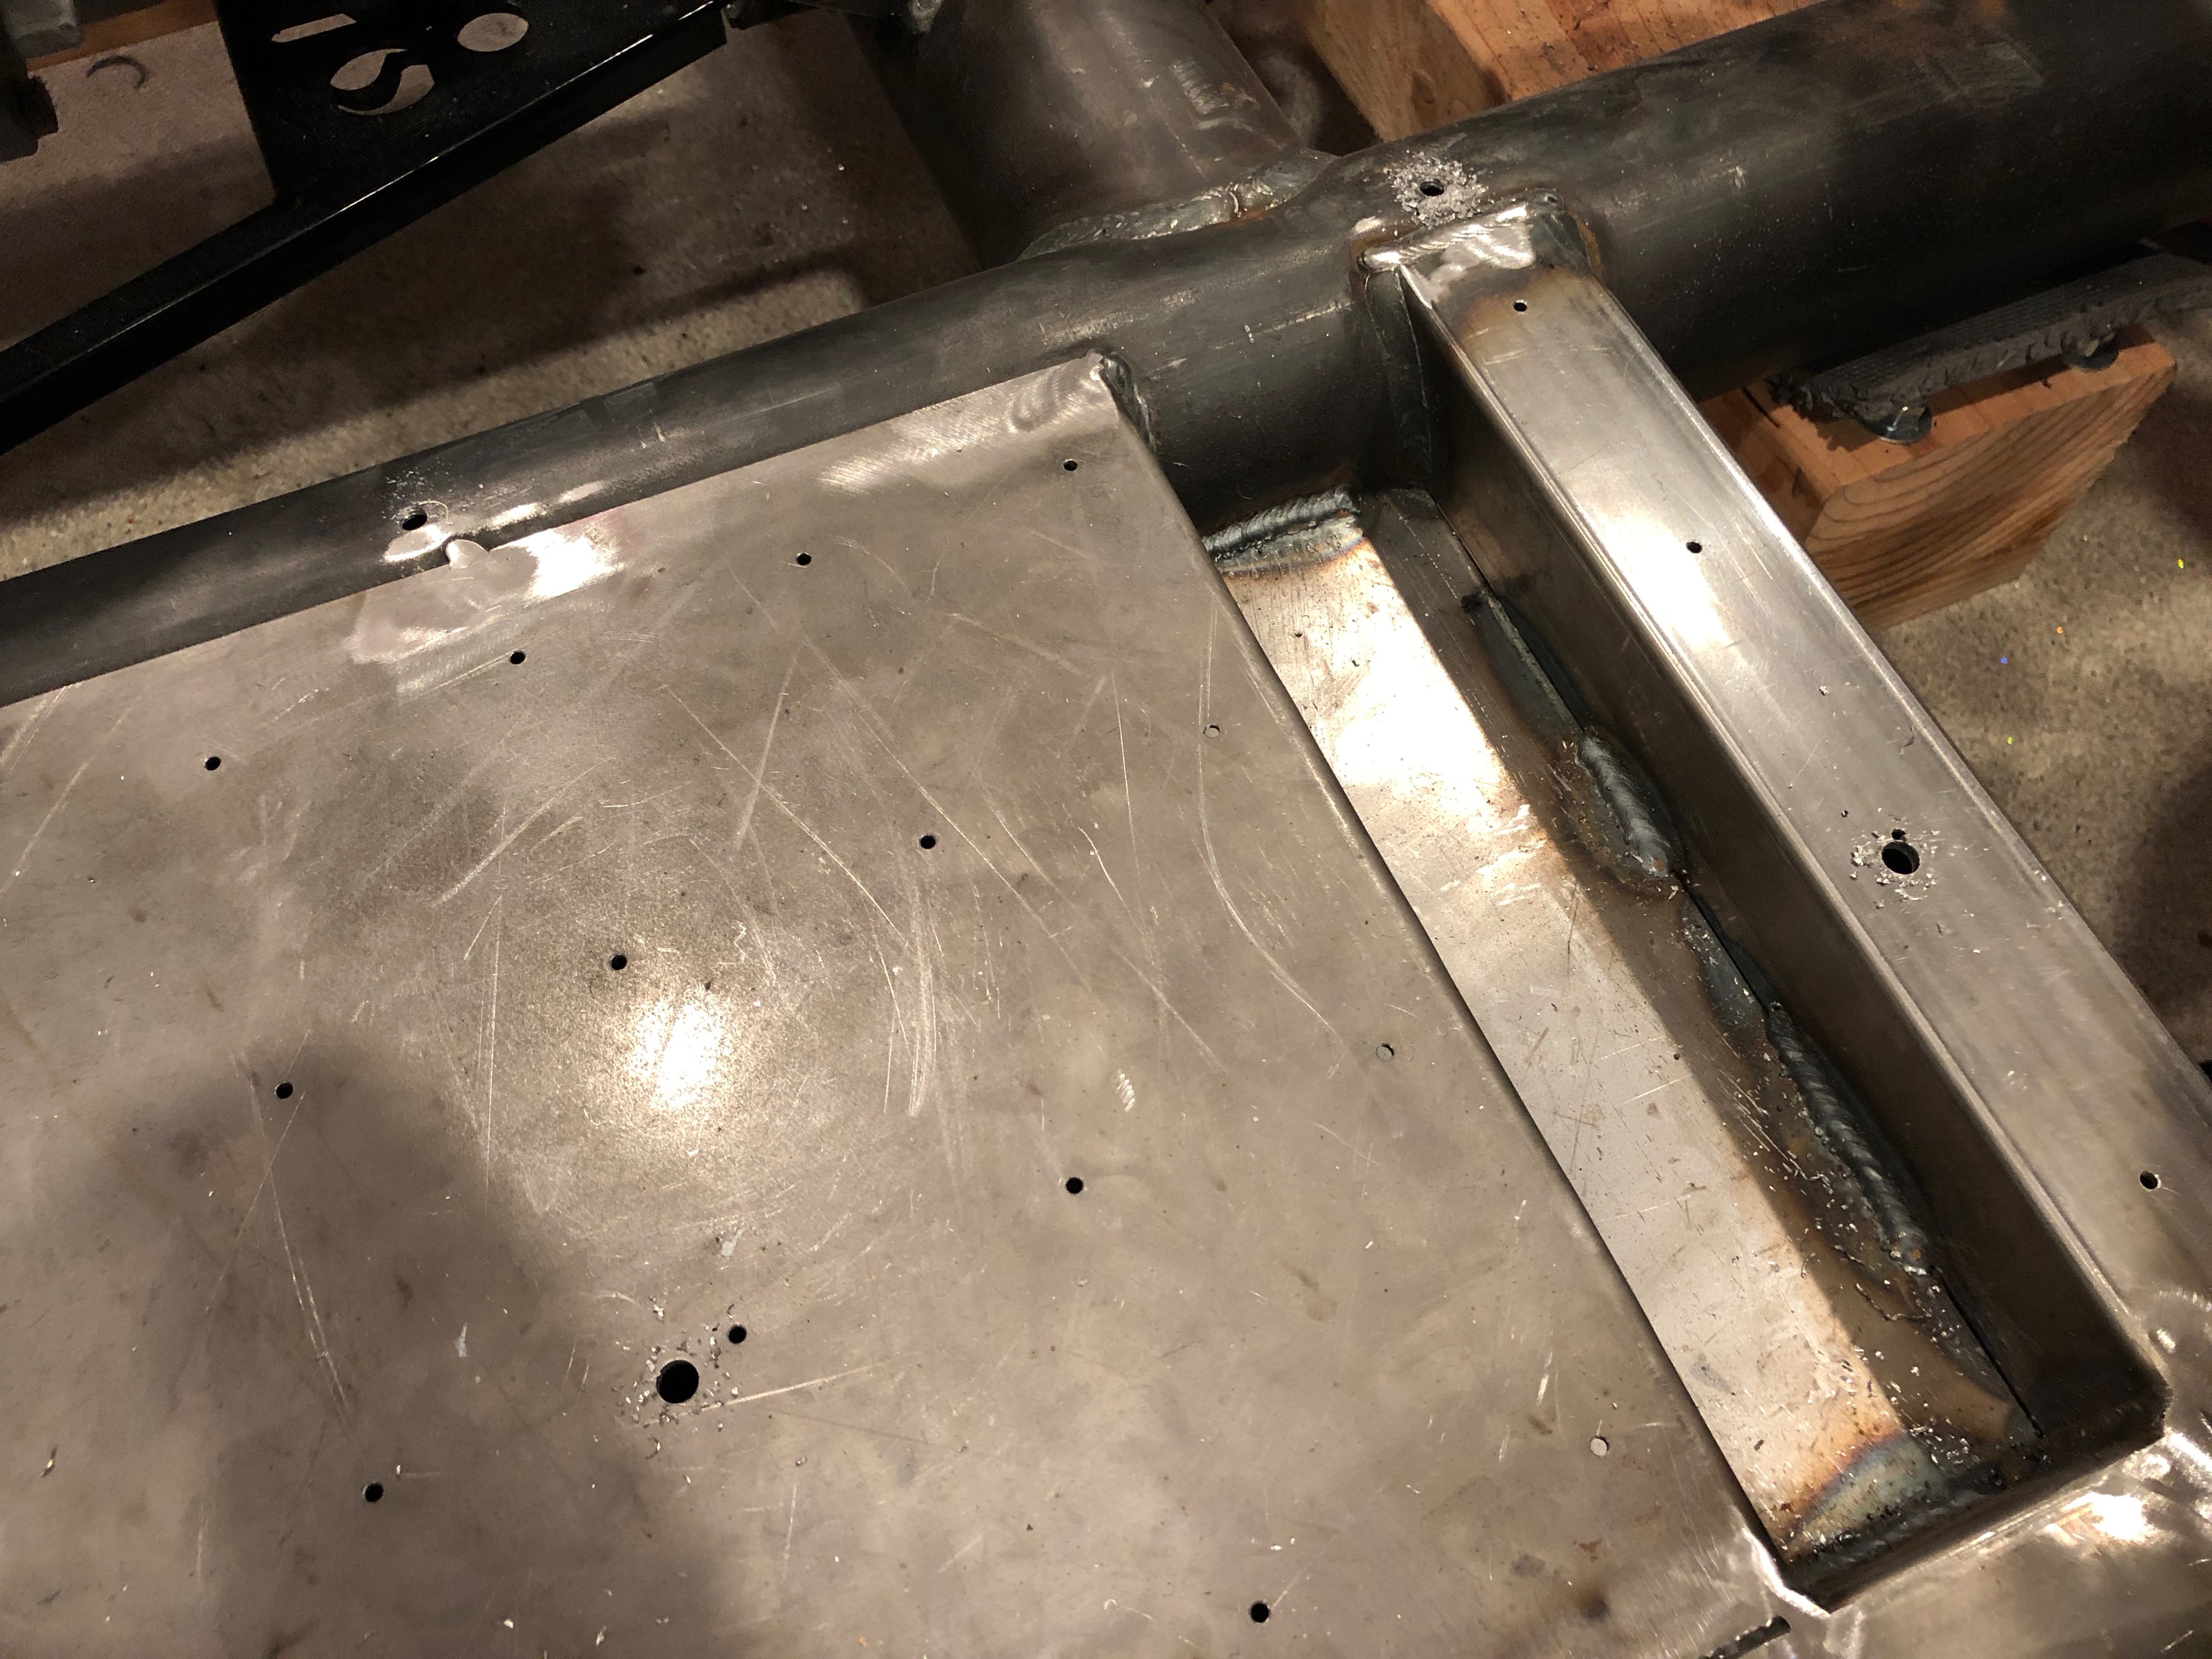
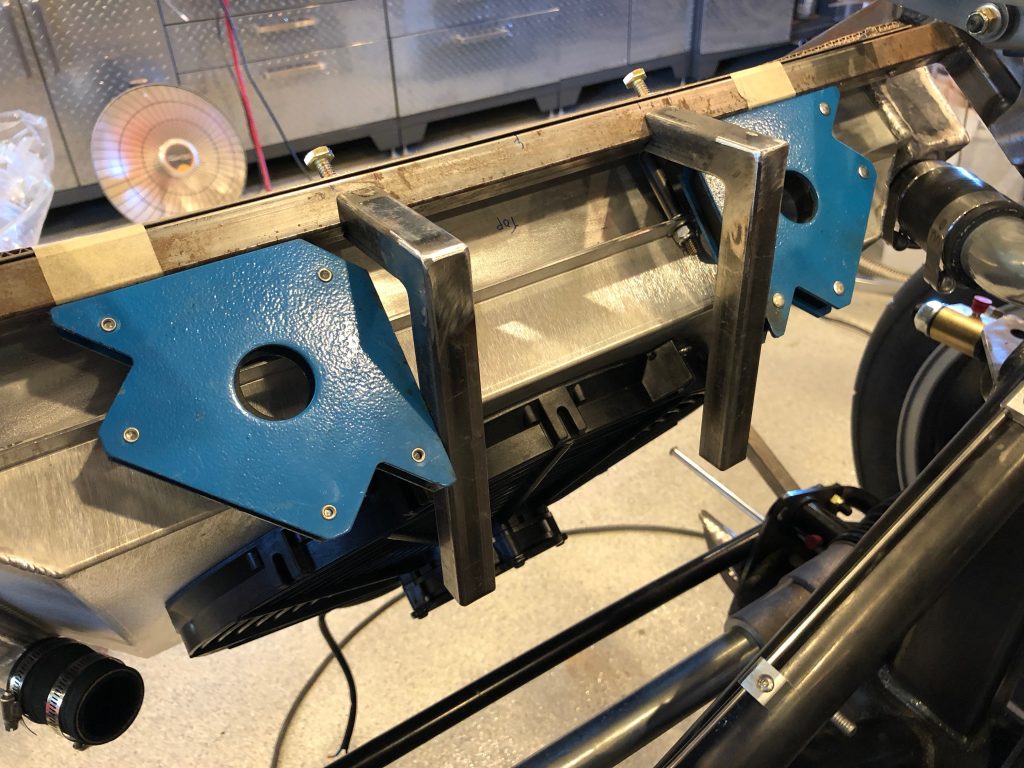
I took some careful measurements to ensure these were centered, the right distance apart, parallel with each other in both axes and perpendicular to the 4″ round tubes in the chassis (so that this will be completely vertical).

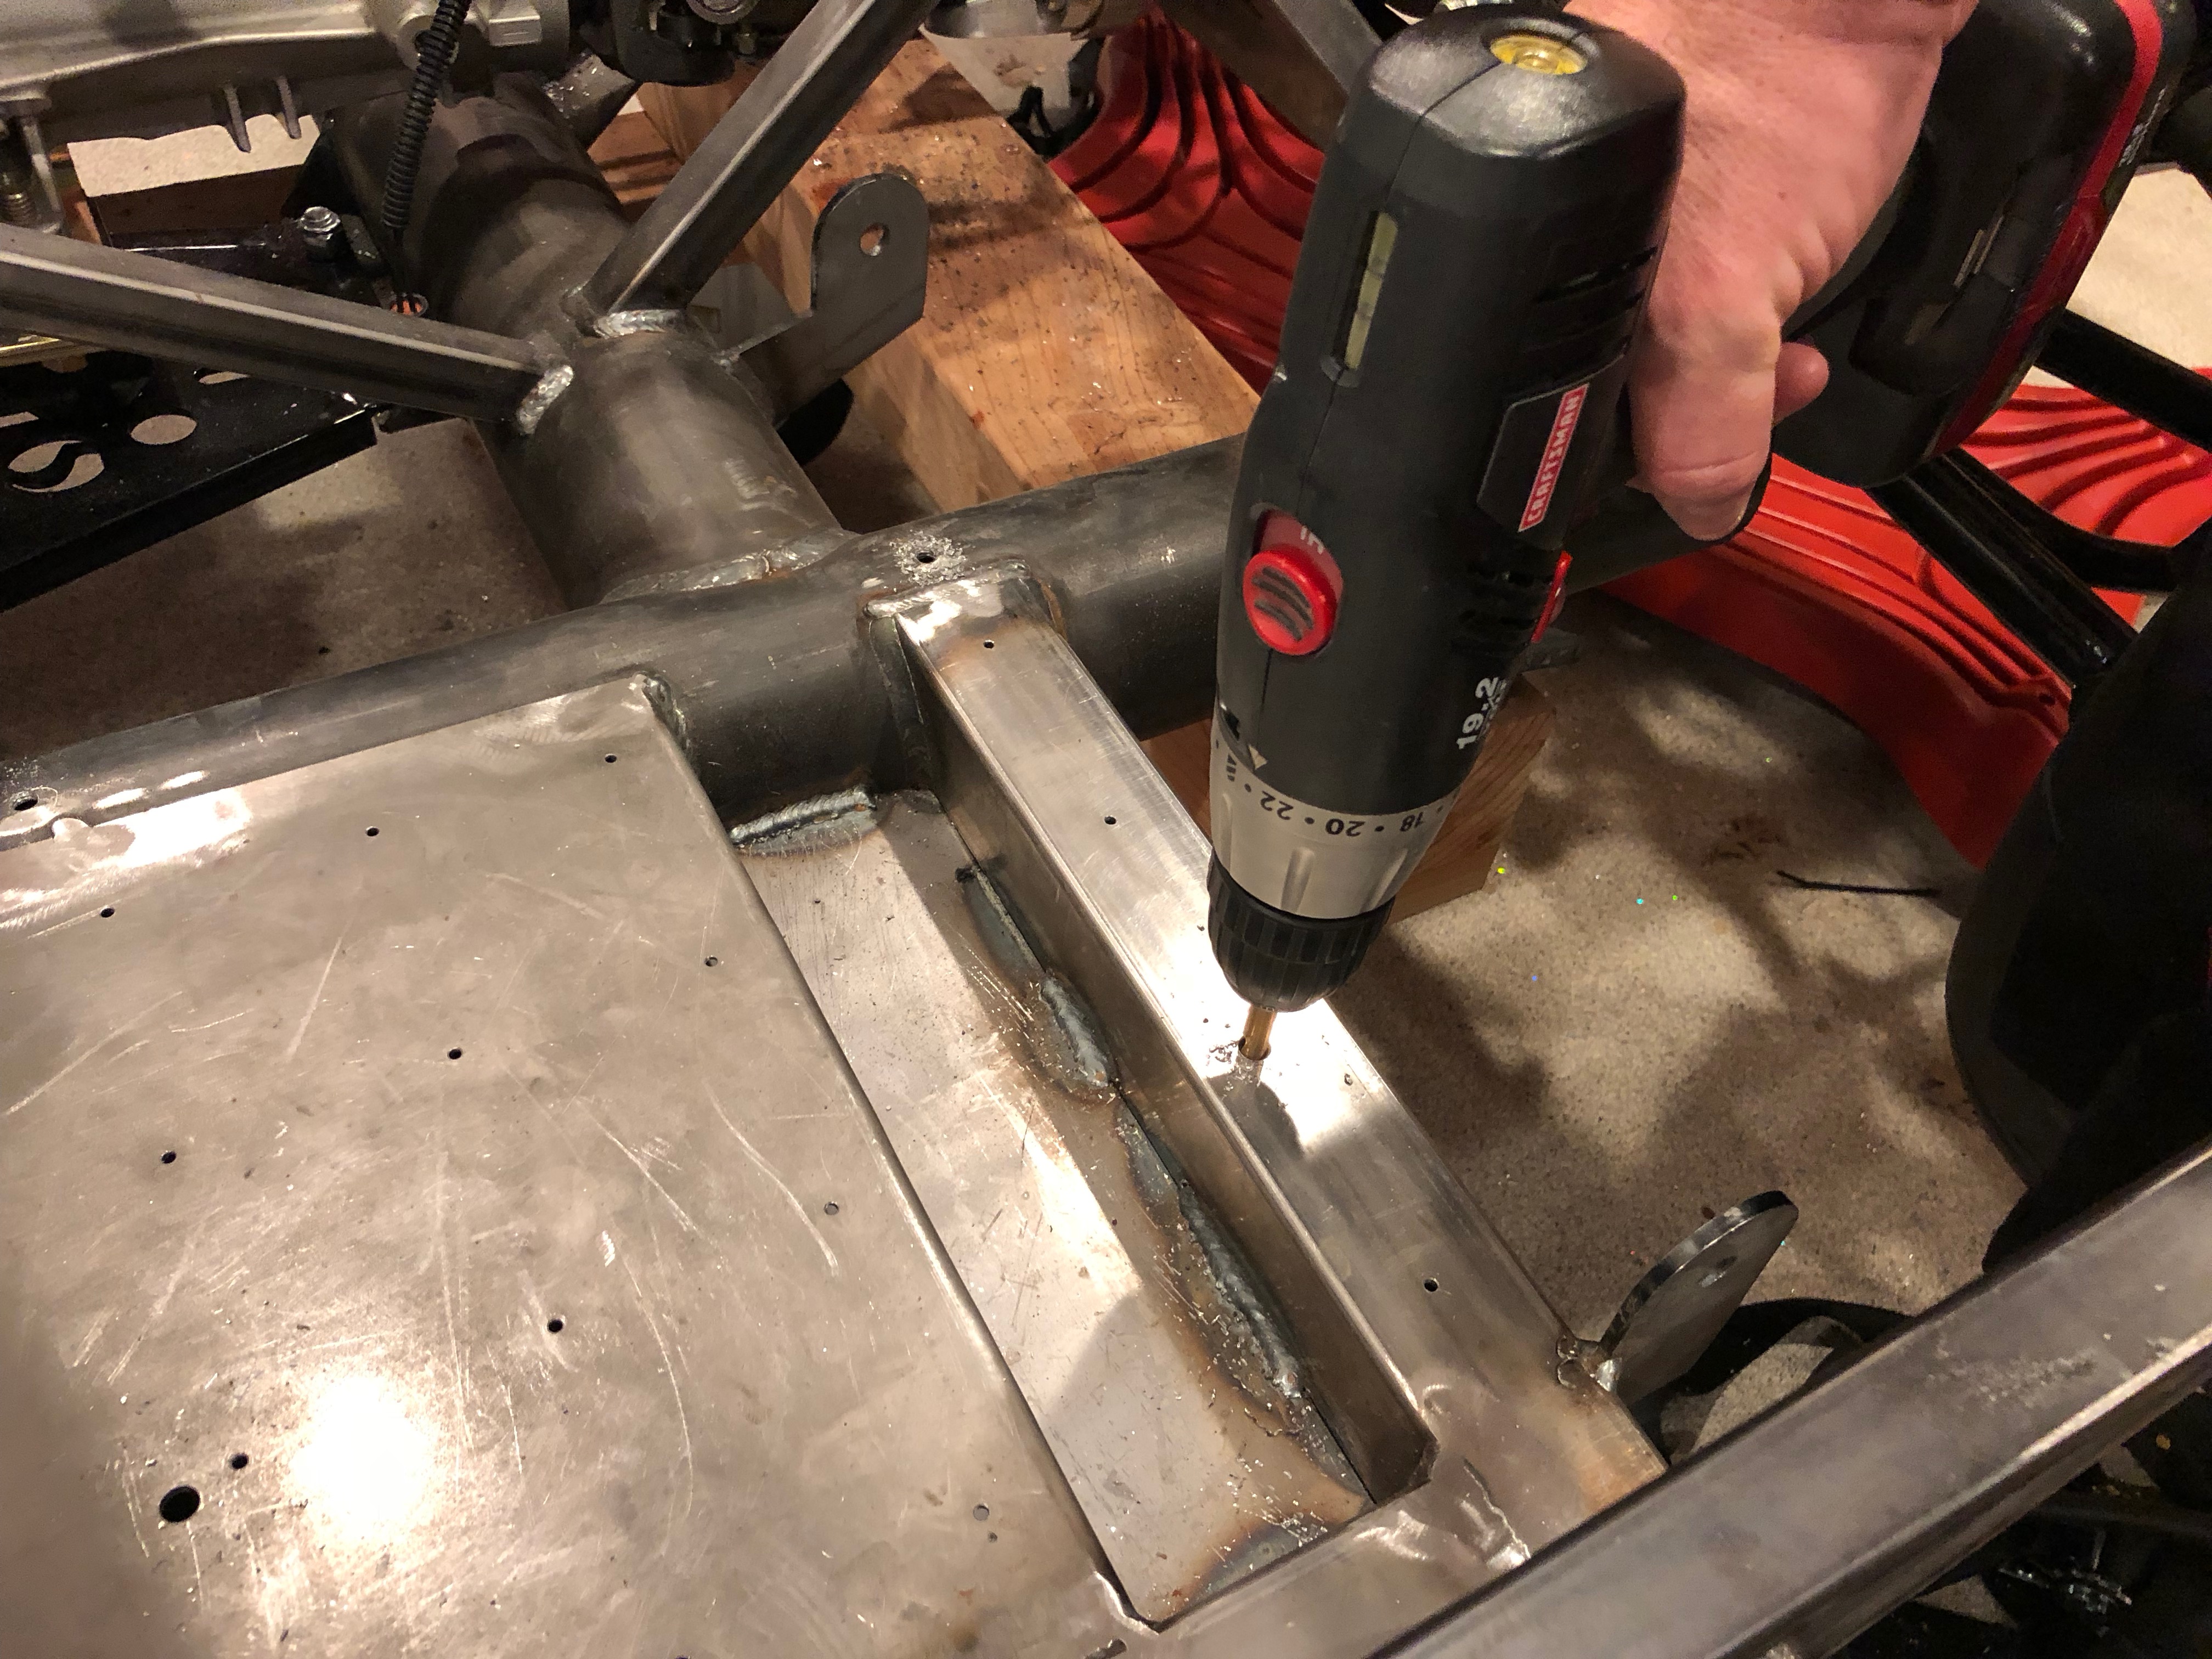
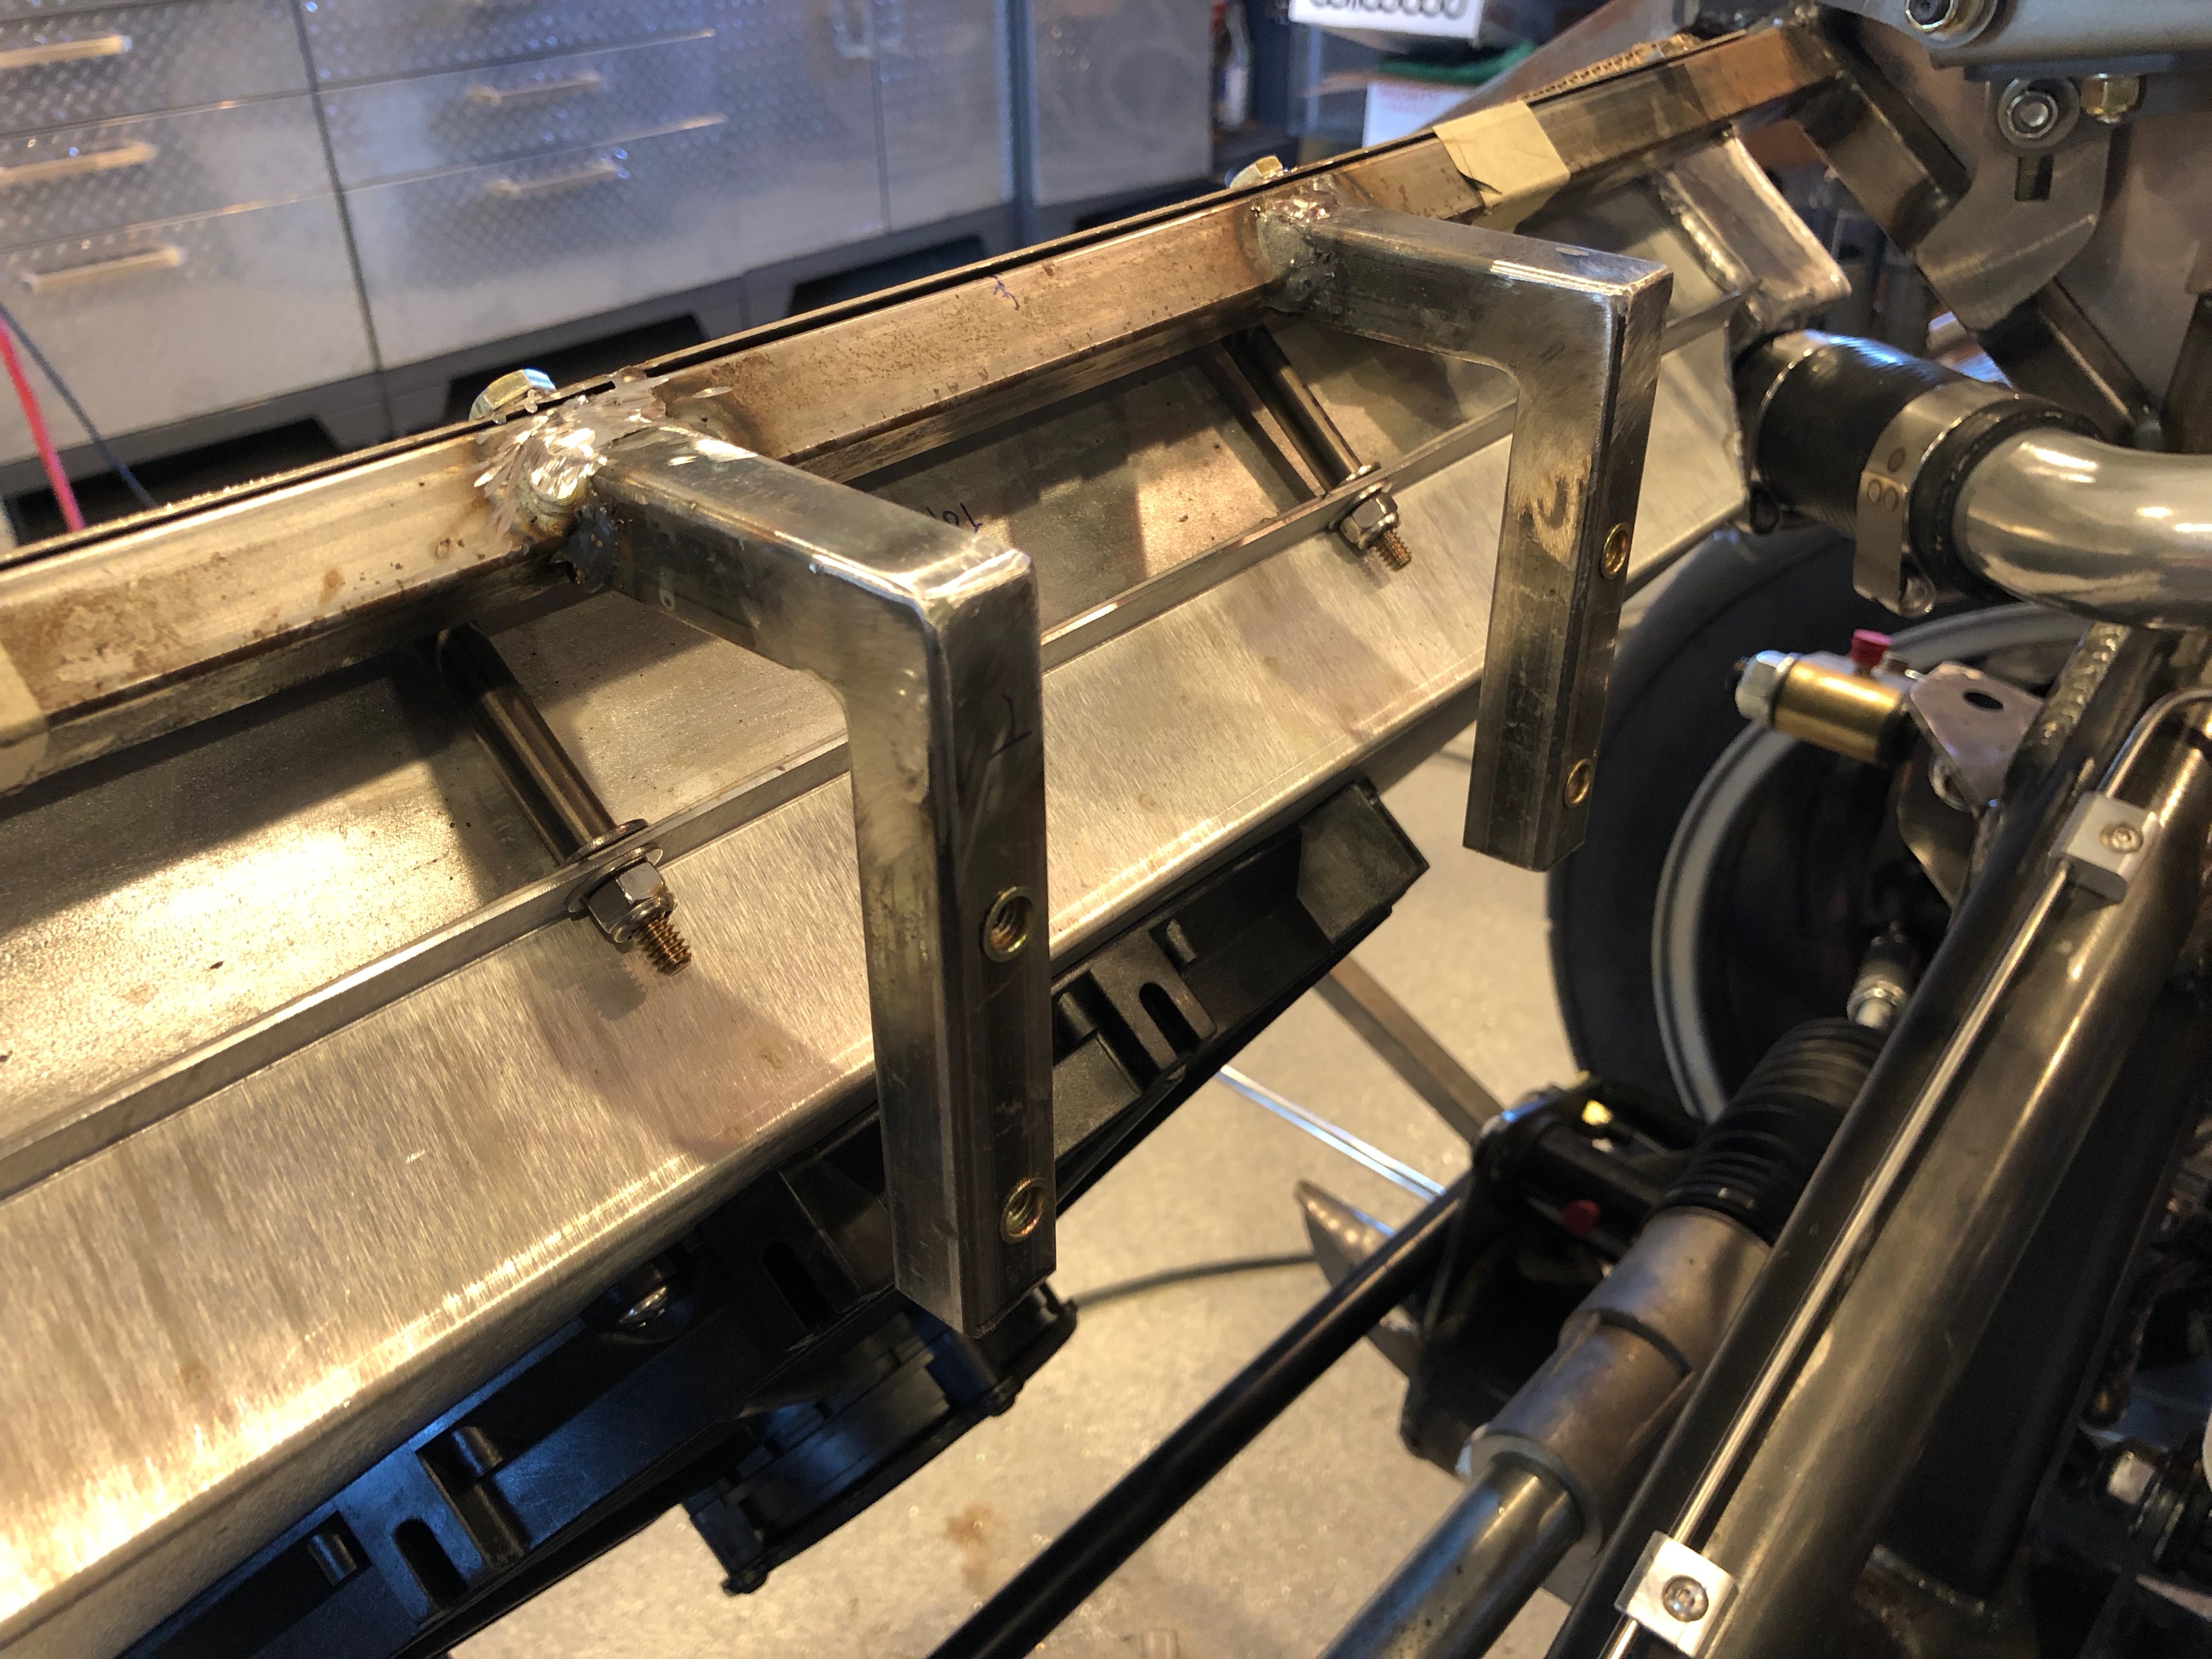
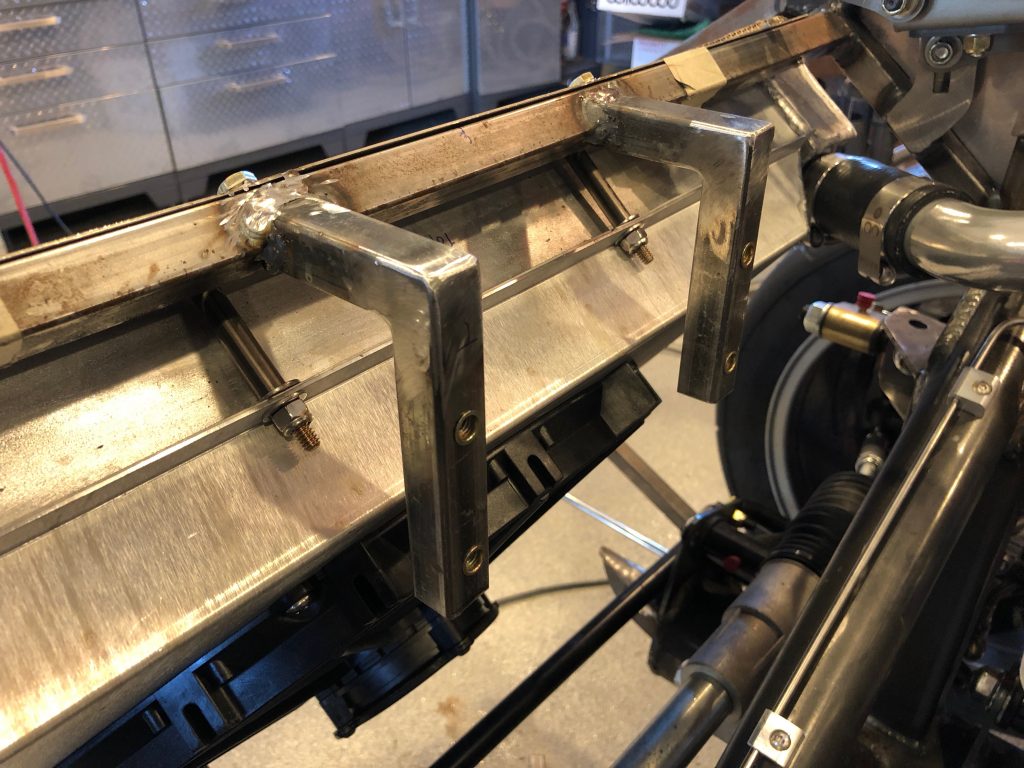
I then welded them in place and installed 4, 1/4-20 rivnuts. I also cut off a bunch of the extra tubing since I left them long initially.

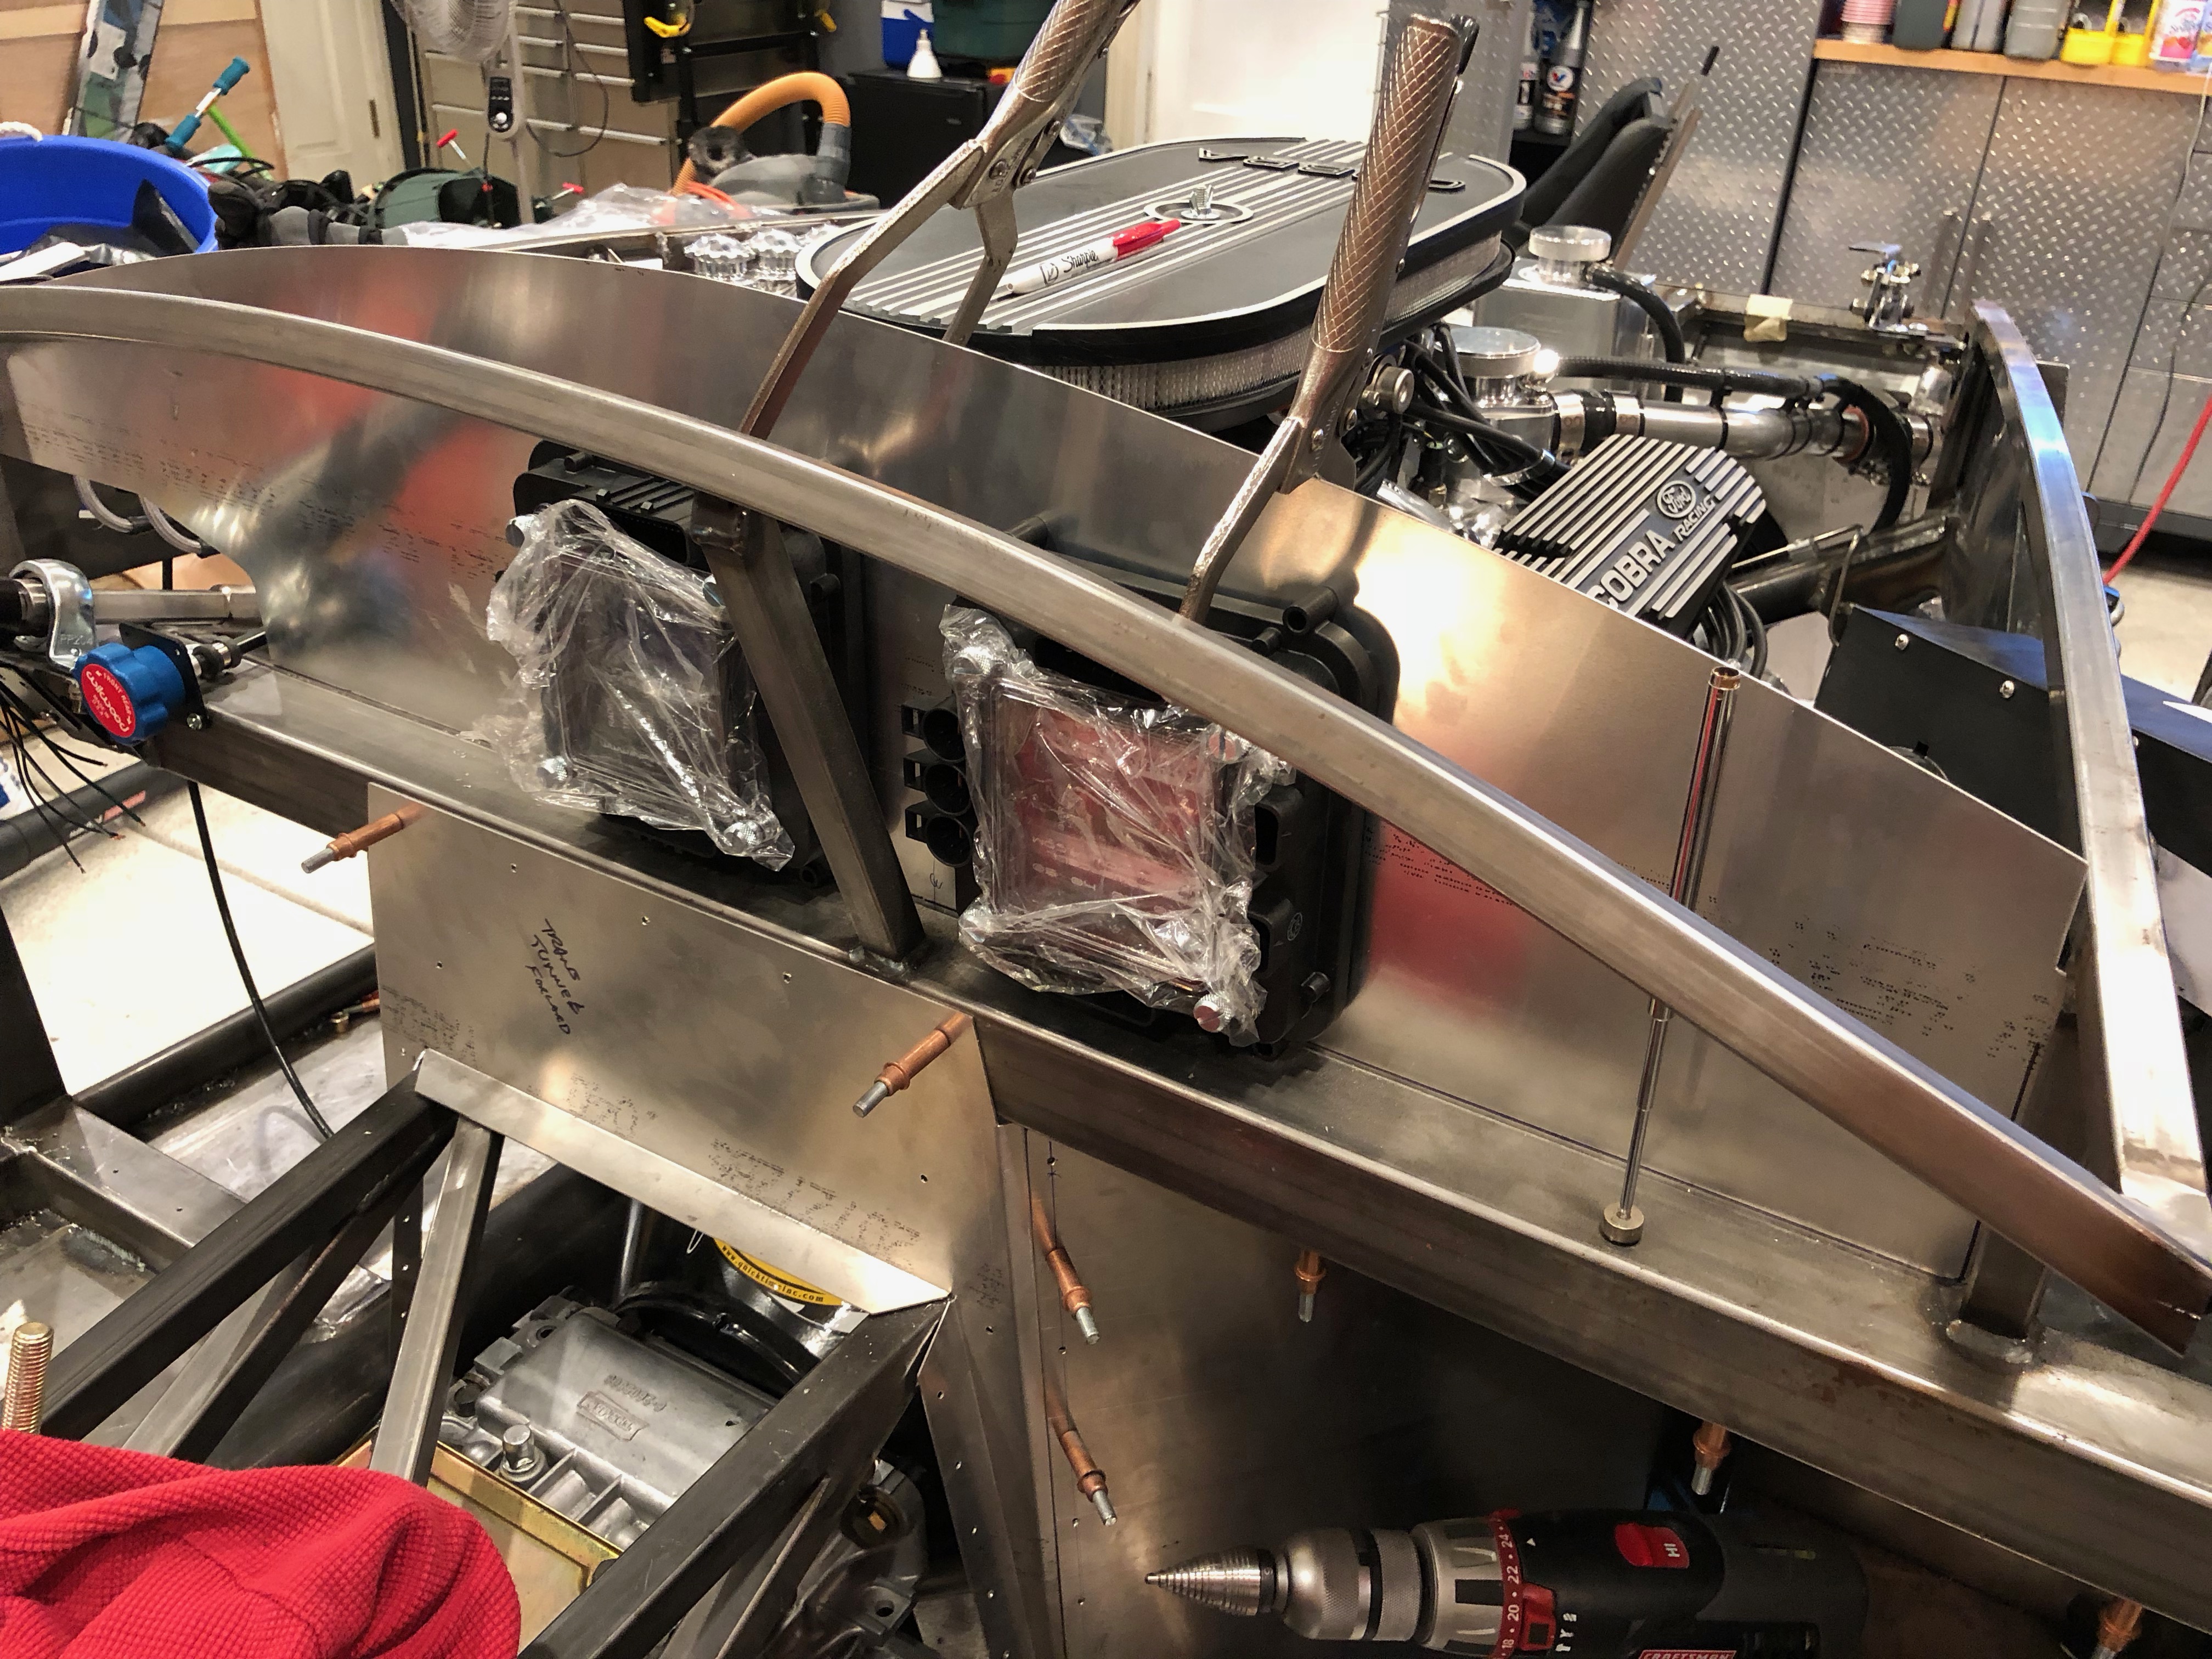
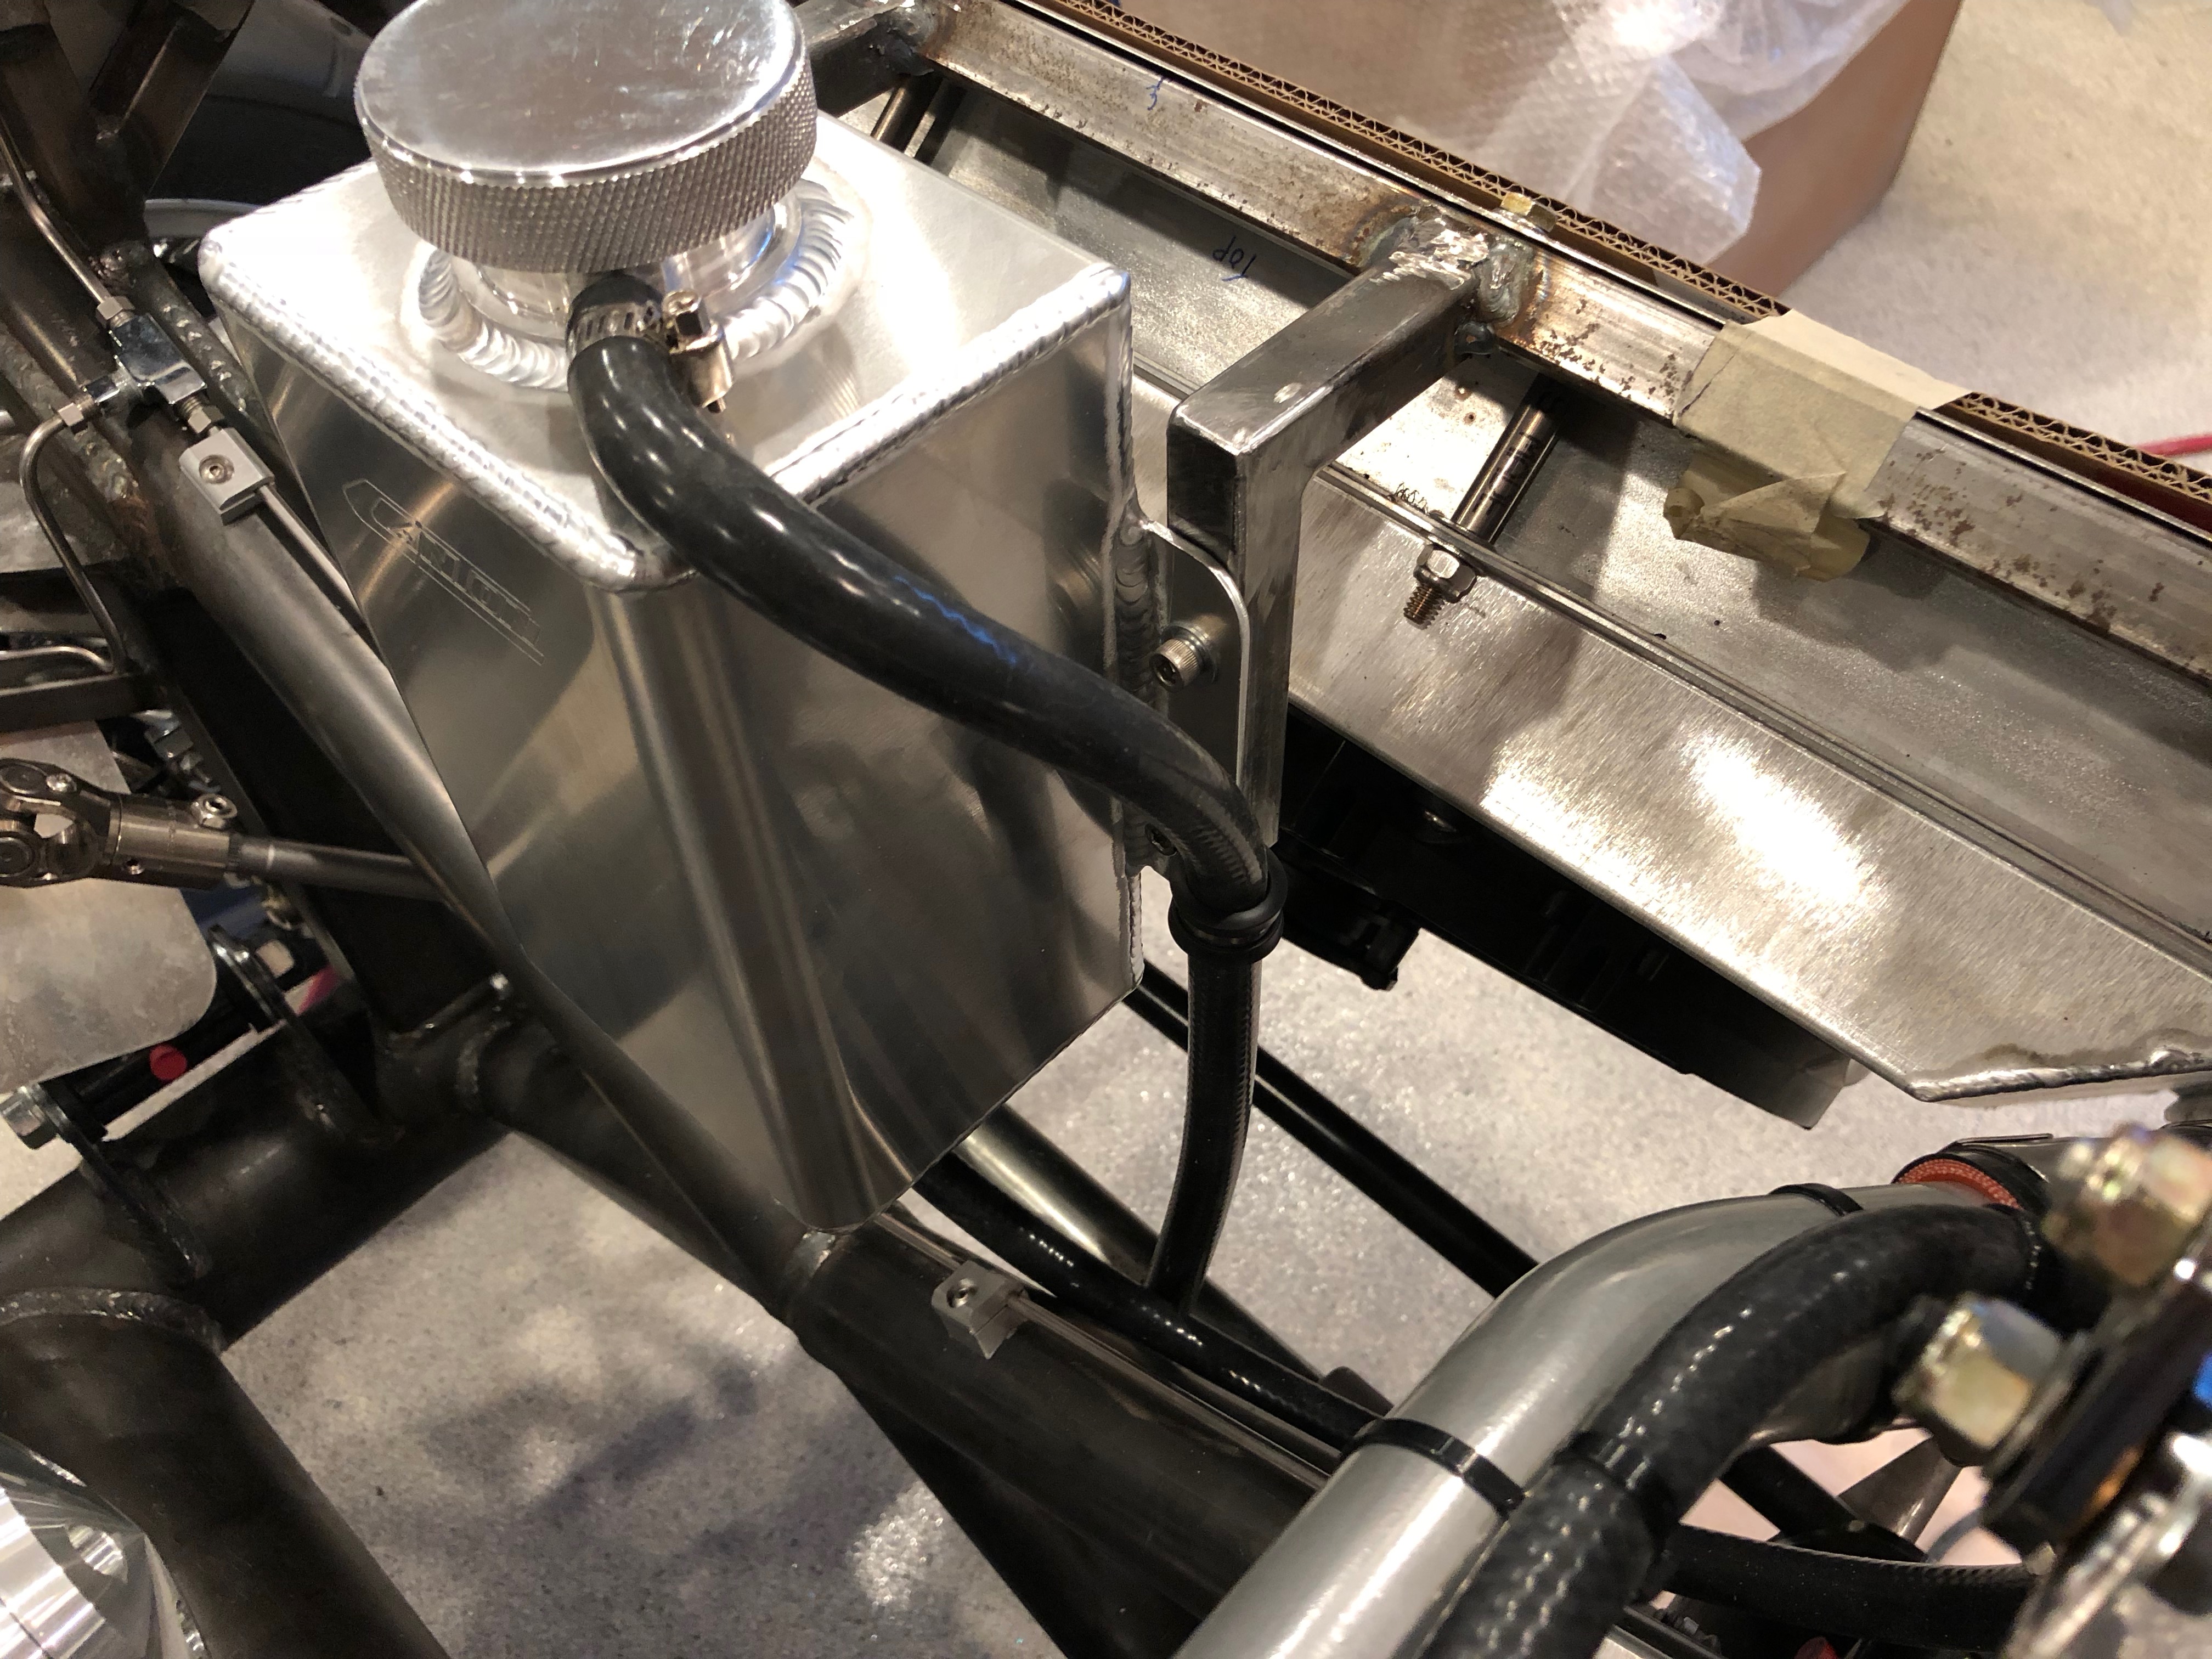
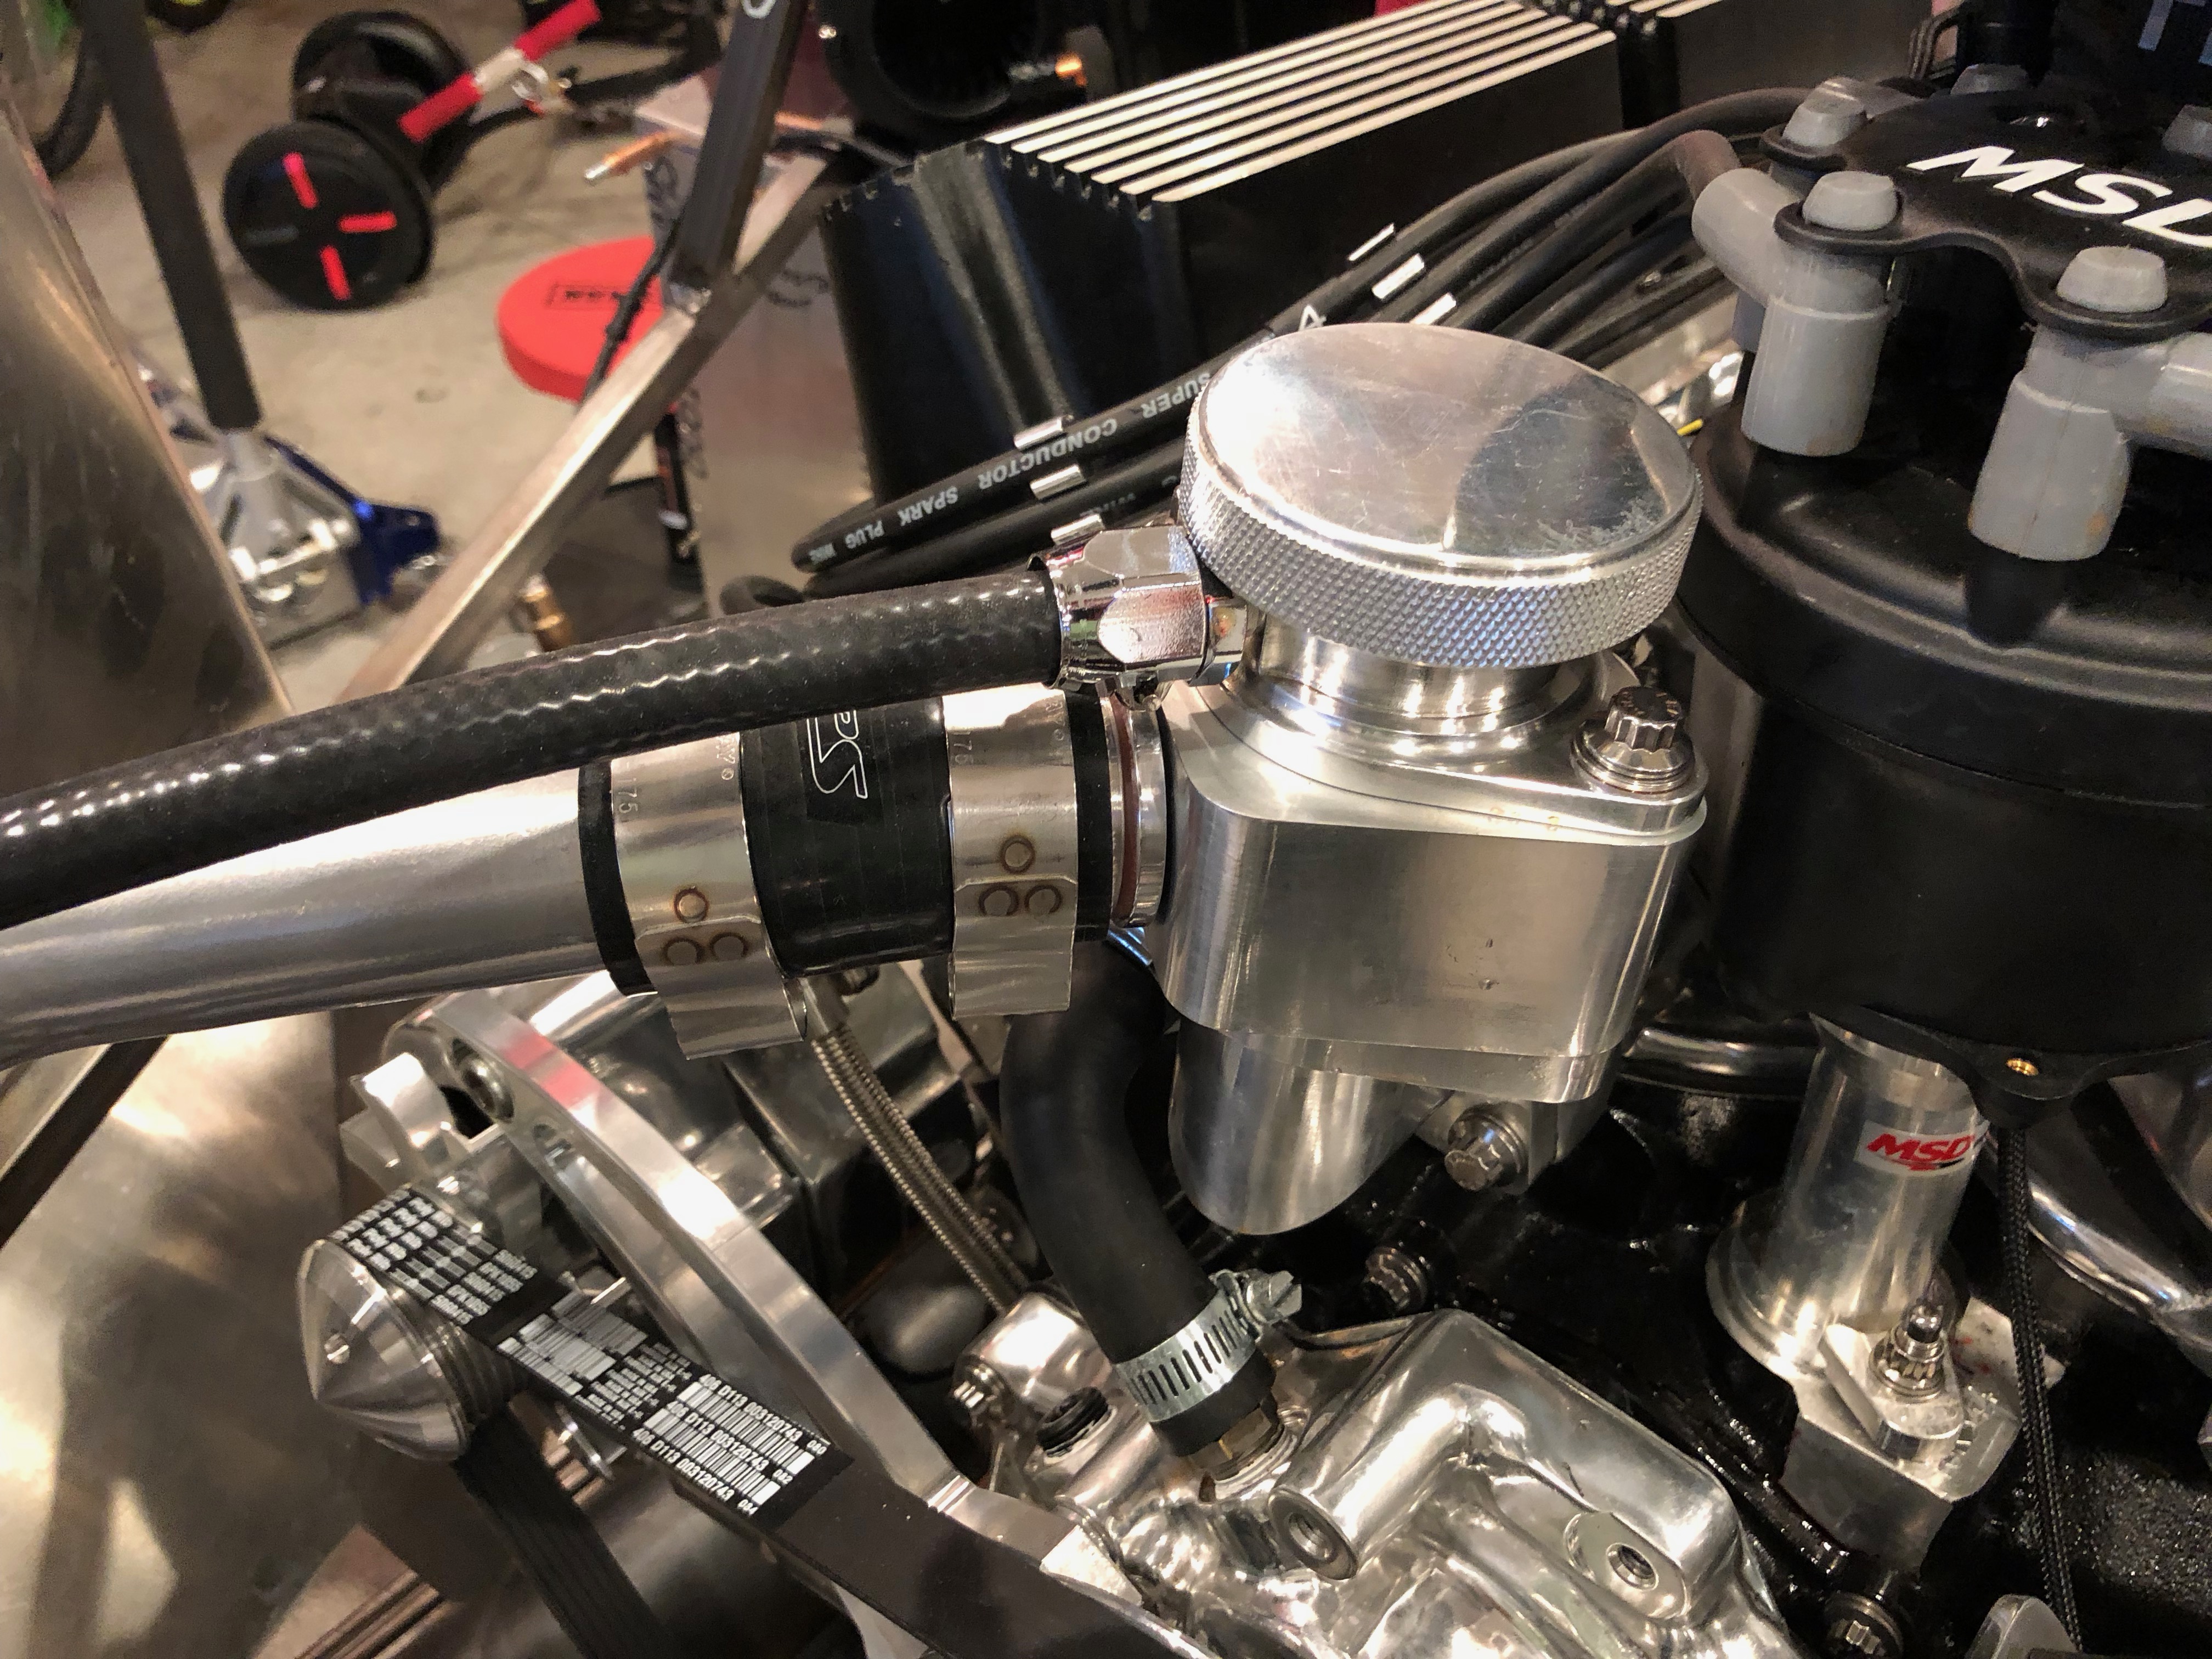
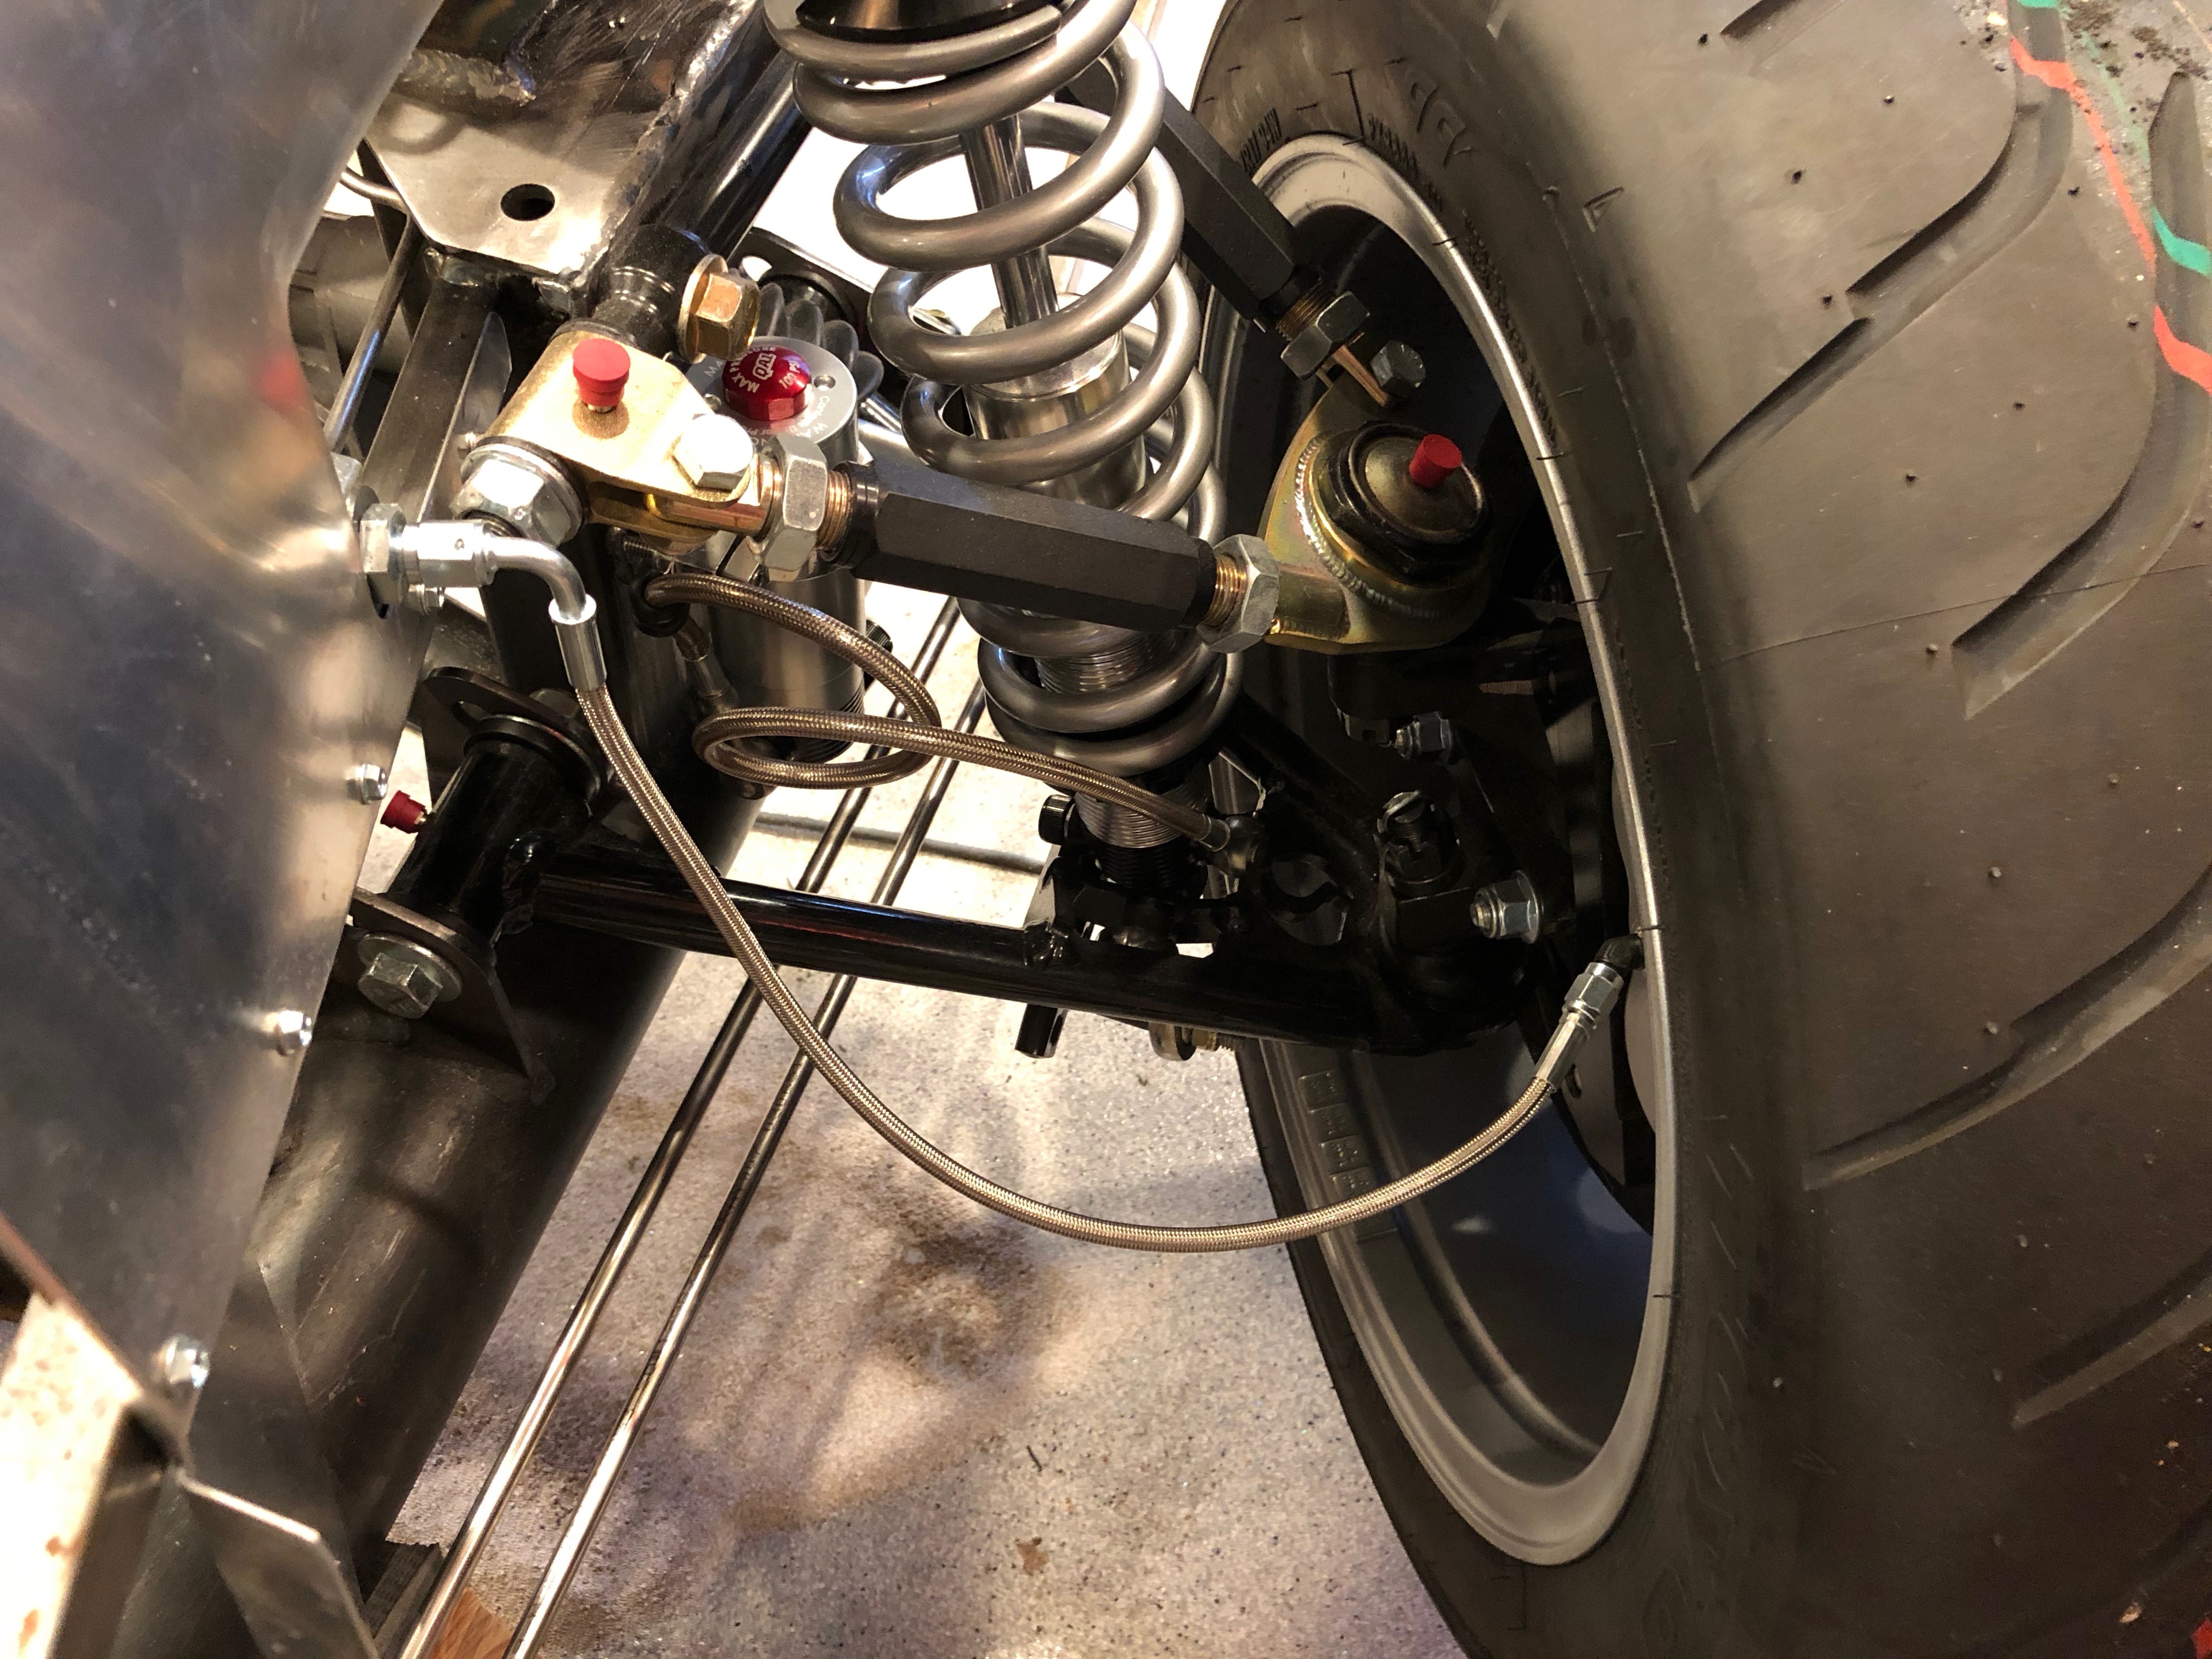
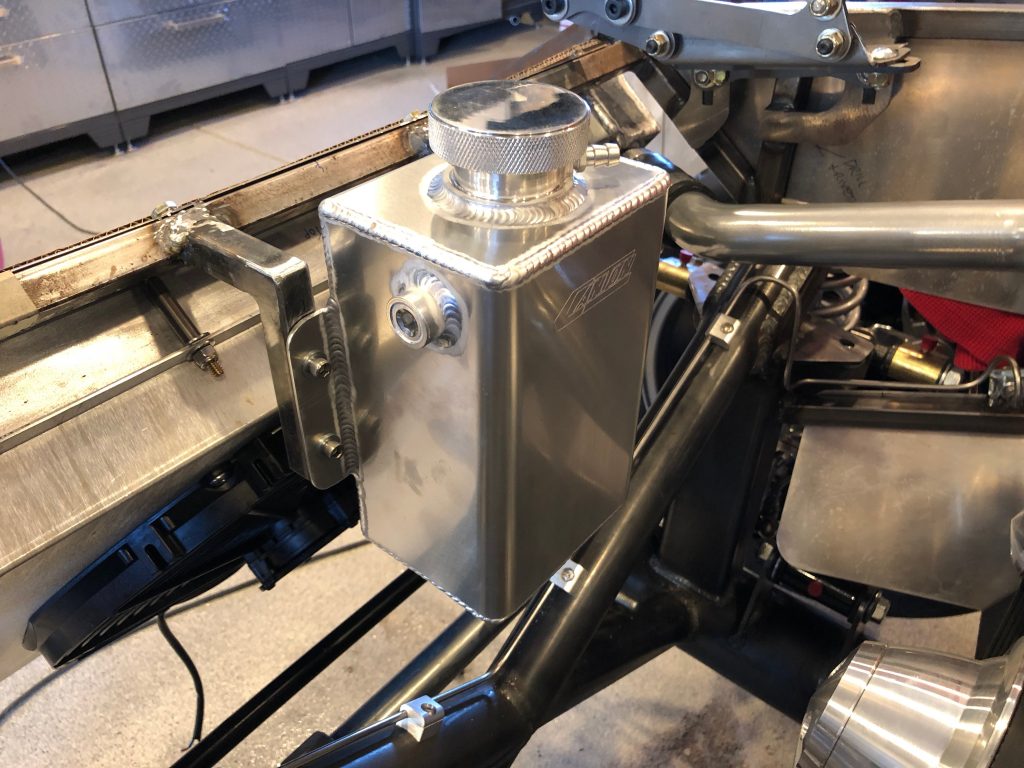
Here’s the installed coolant reservoir. I set the height of the reservoir so that the cap is slightly higher than the cap in the thermostat housing so that this is the high point in the coolant system. I also installed a plug in the side of the reservoir and a hose fitting in the bottom that will tie to the hose fitting under the cap in the themostat housing. The hose fitting just under this cap will connect to an overflow hose that will just run down to the bottom of the chassis to vent any excess coolant.

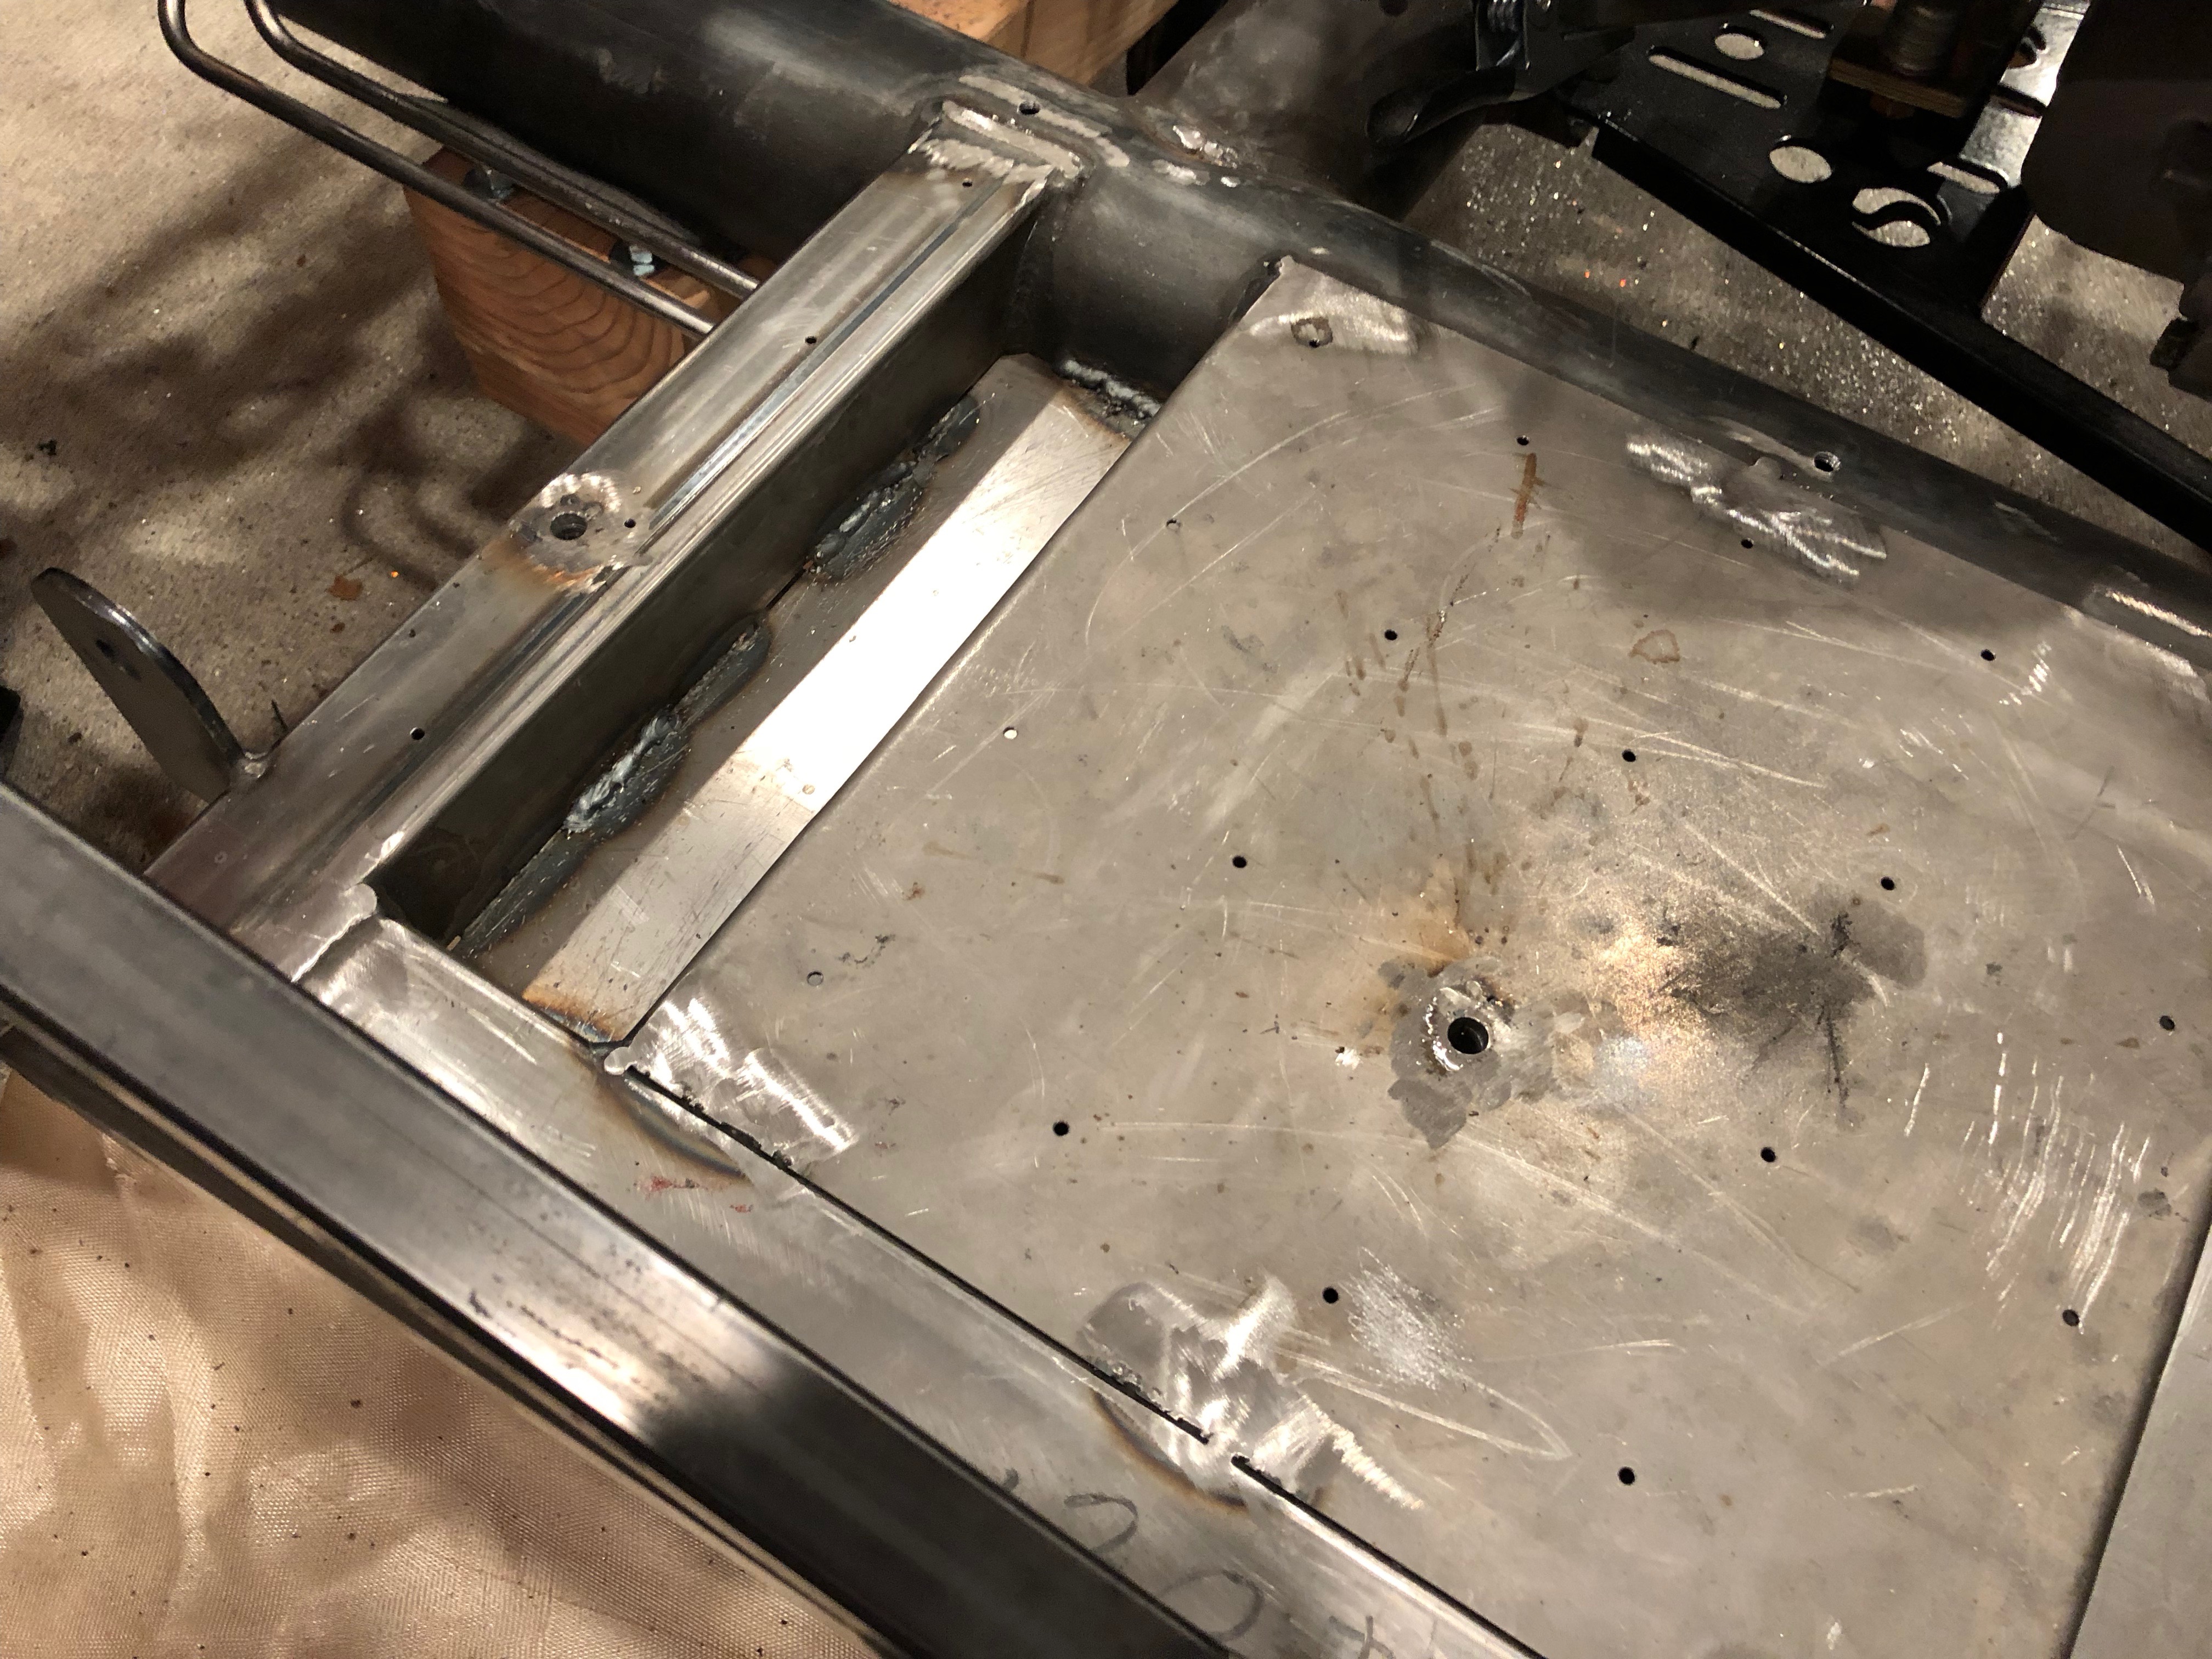
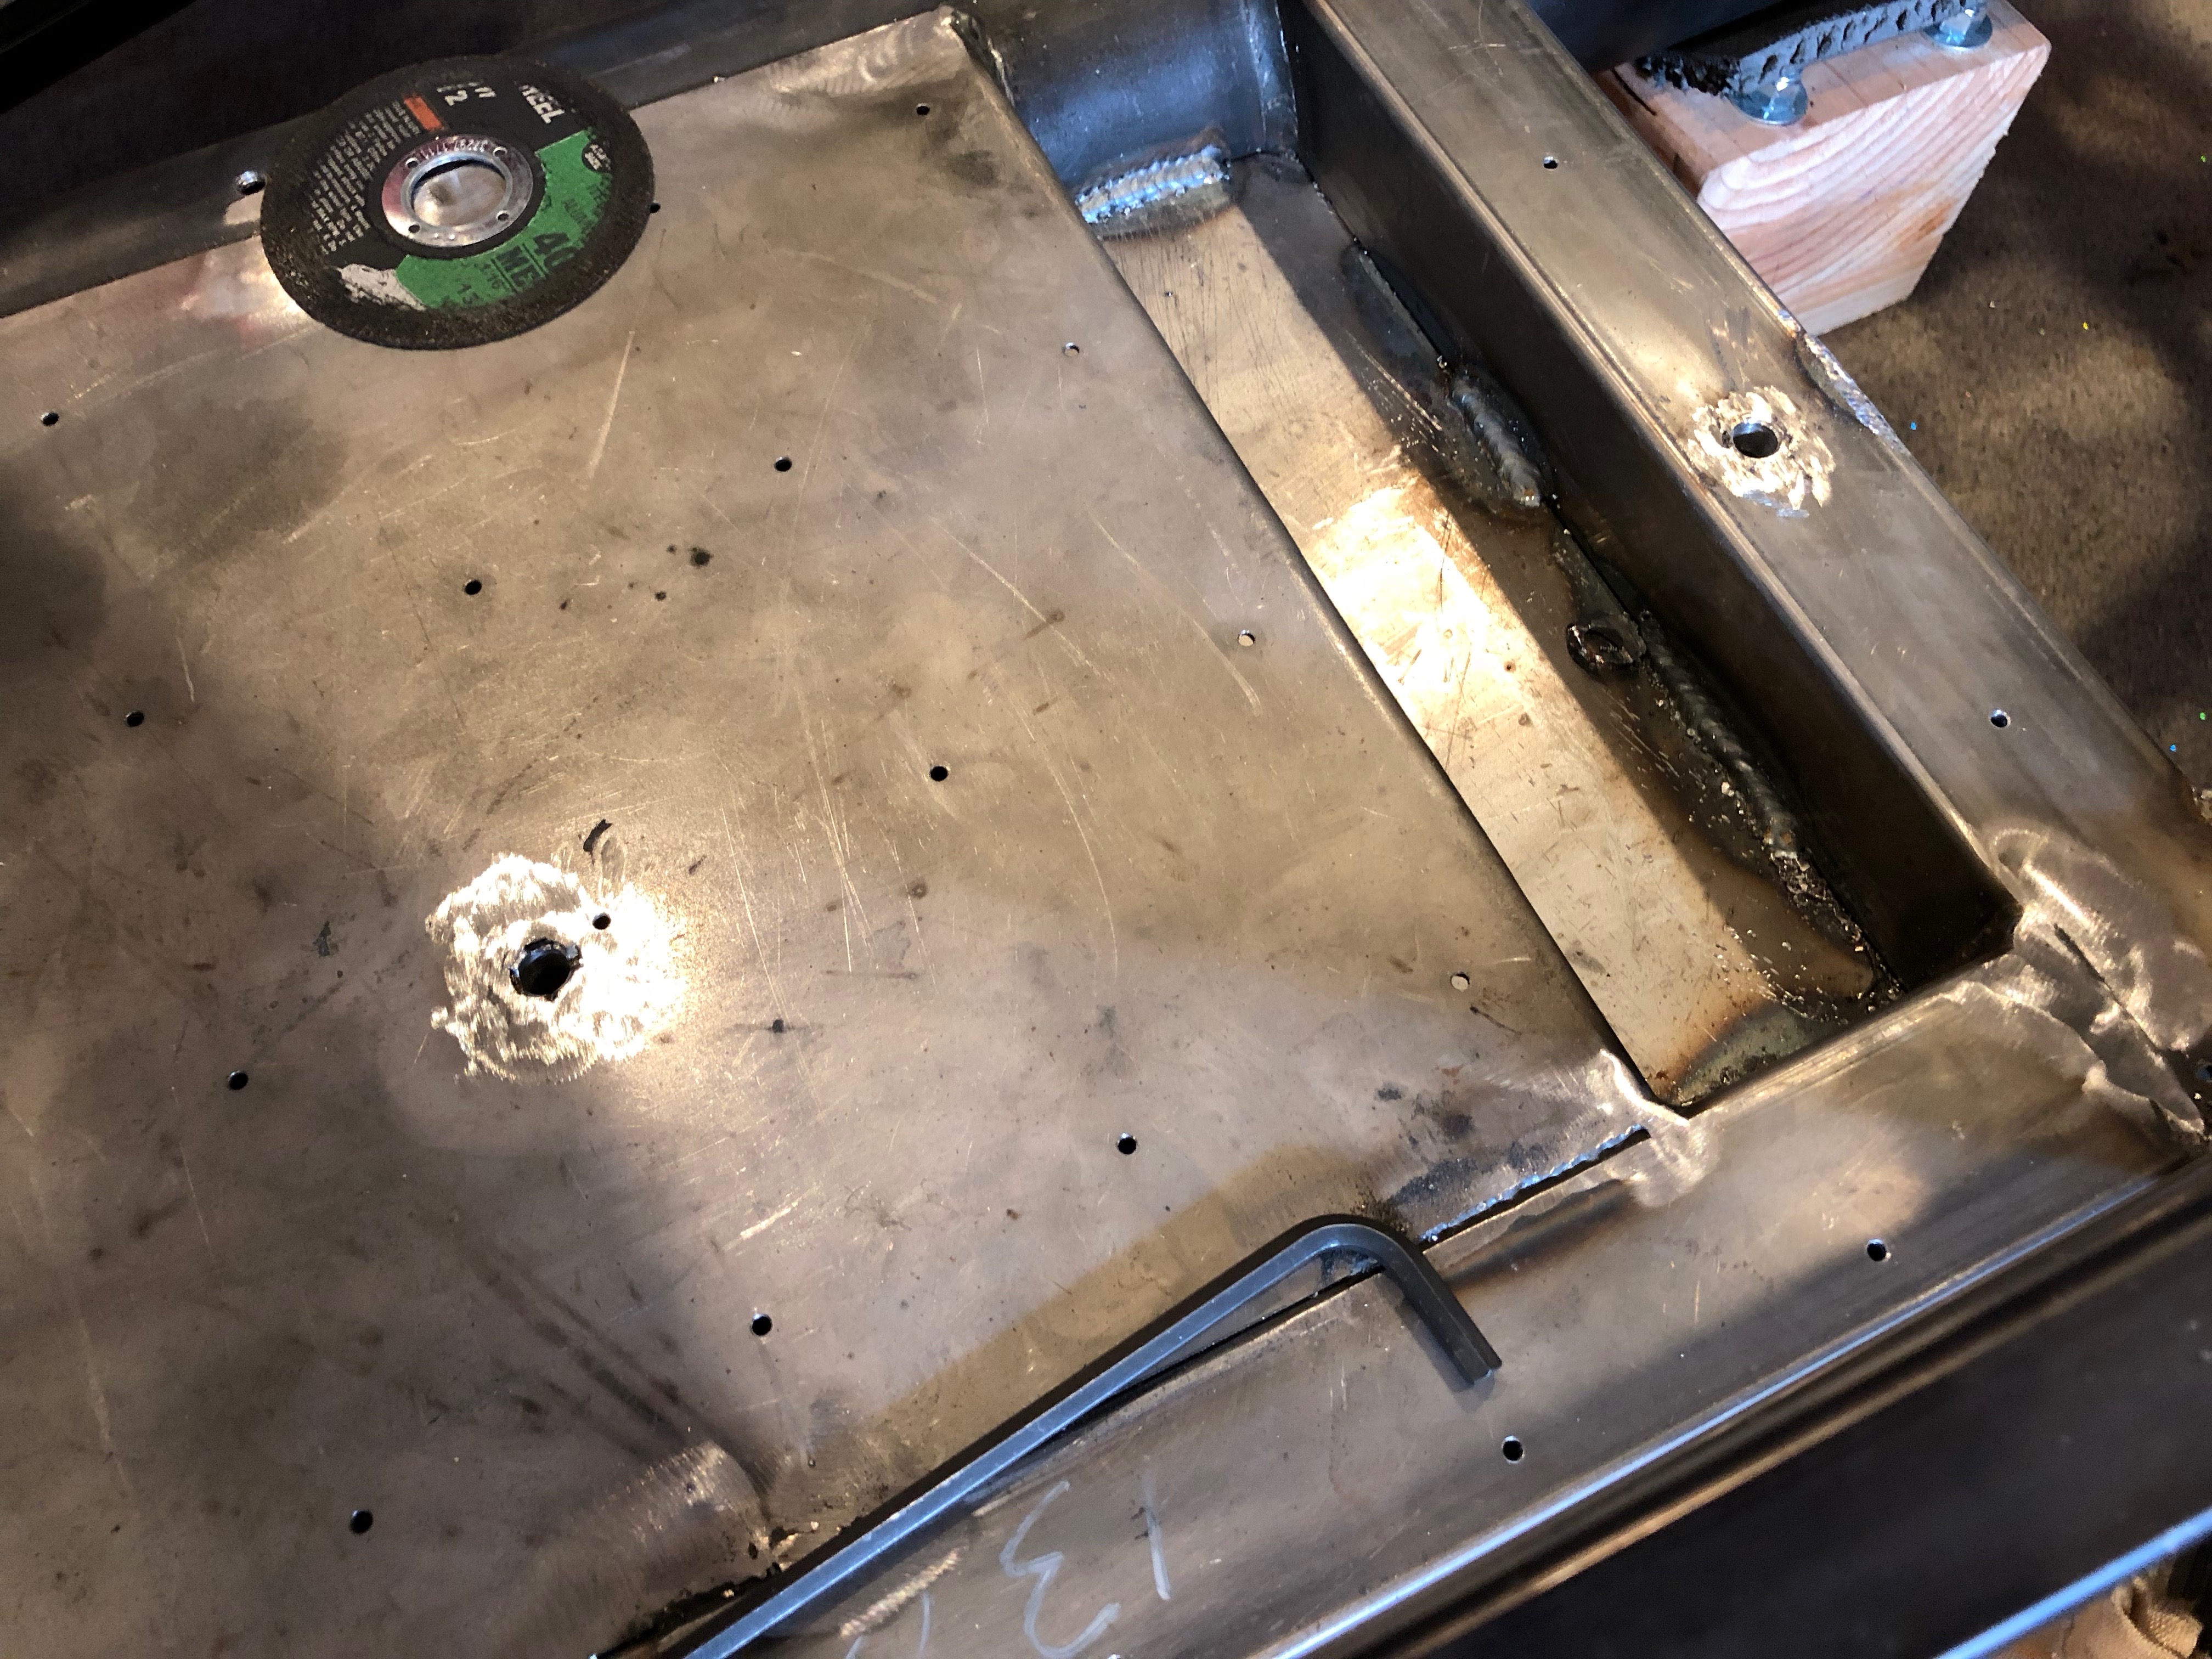
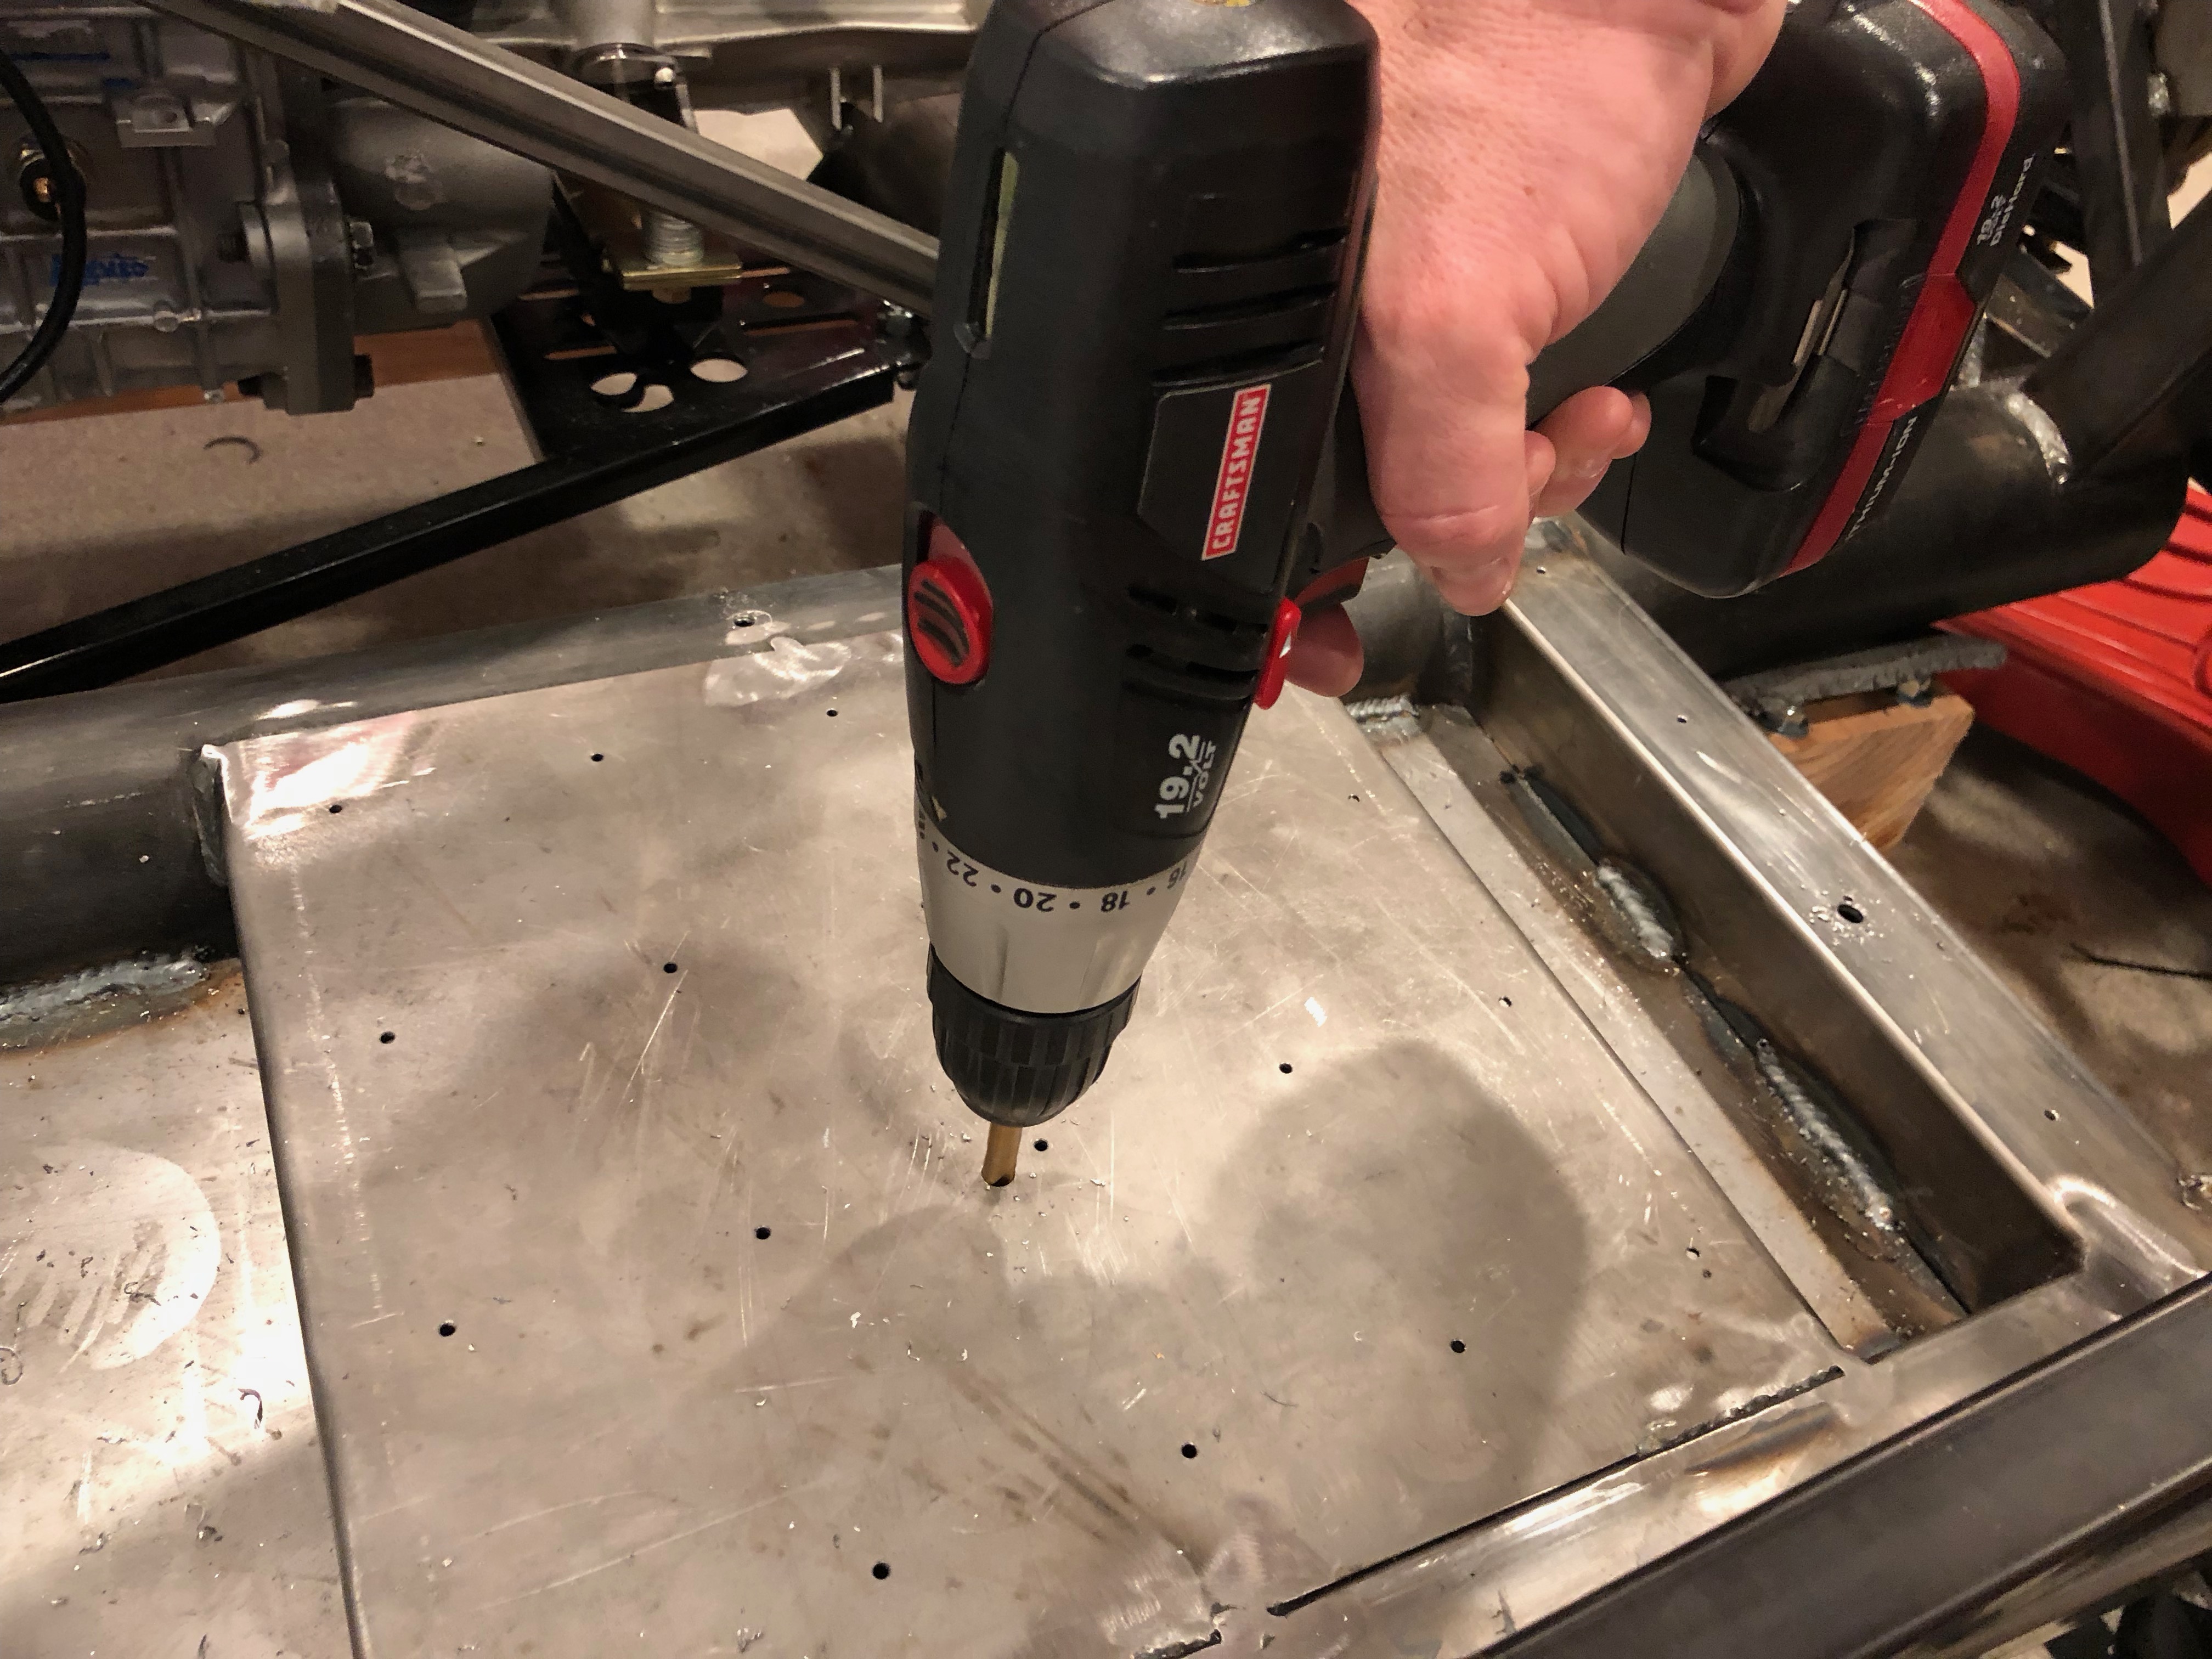
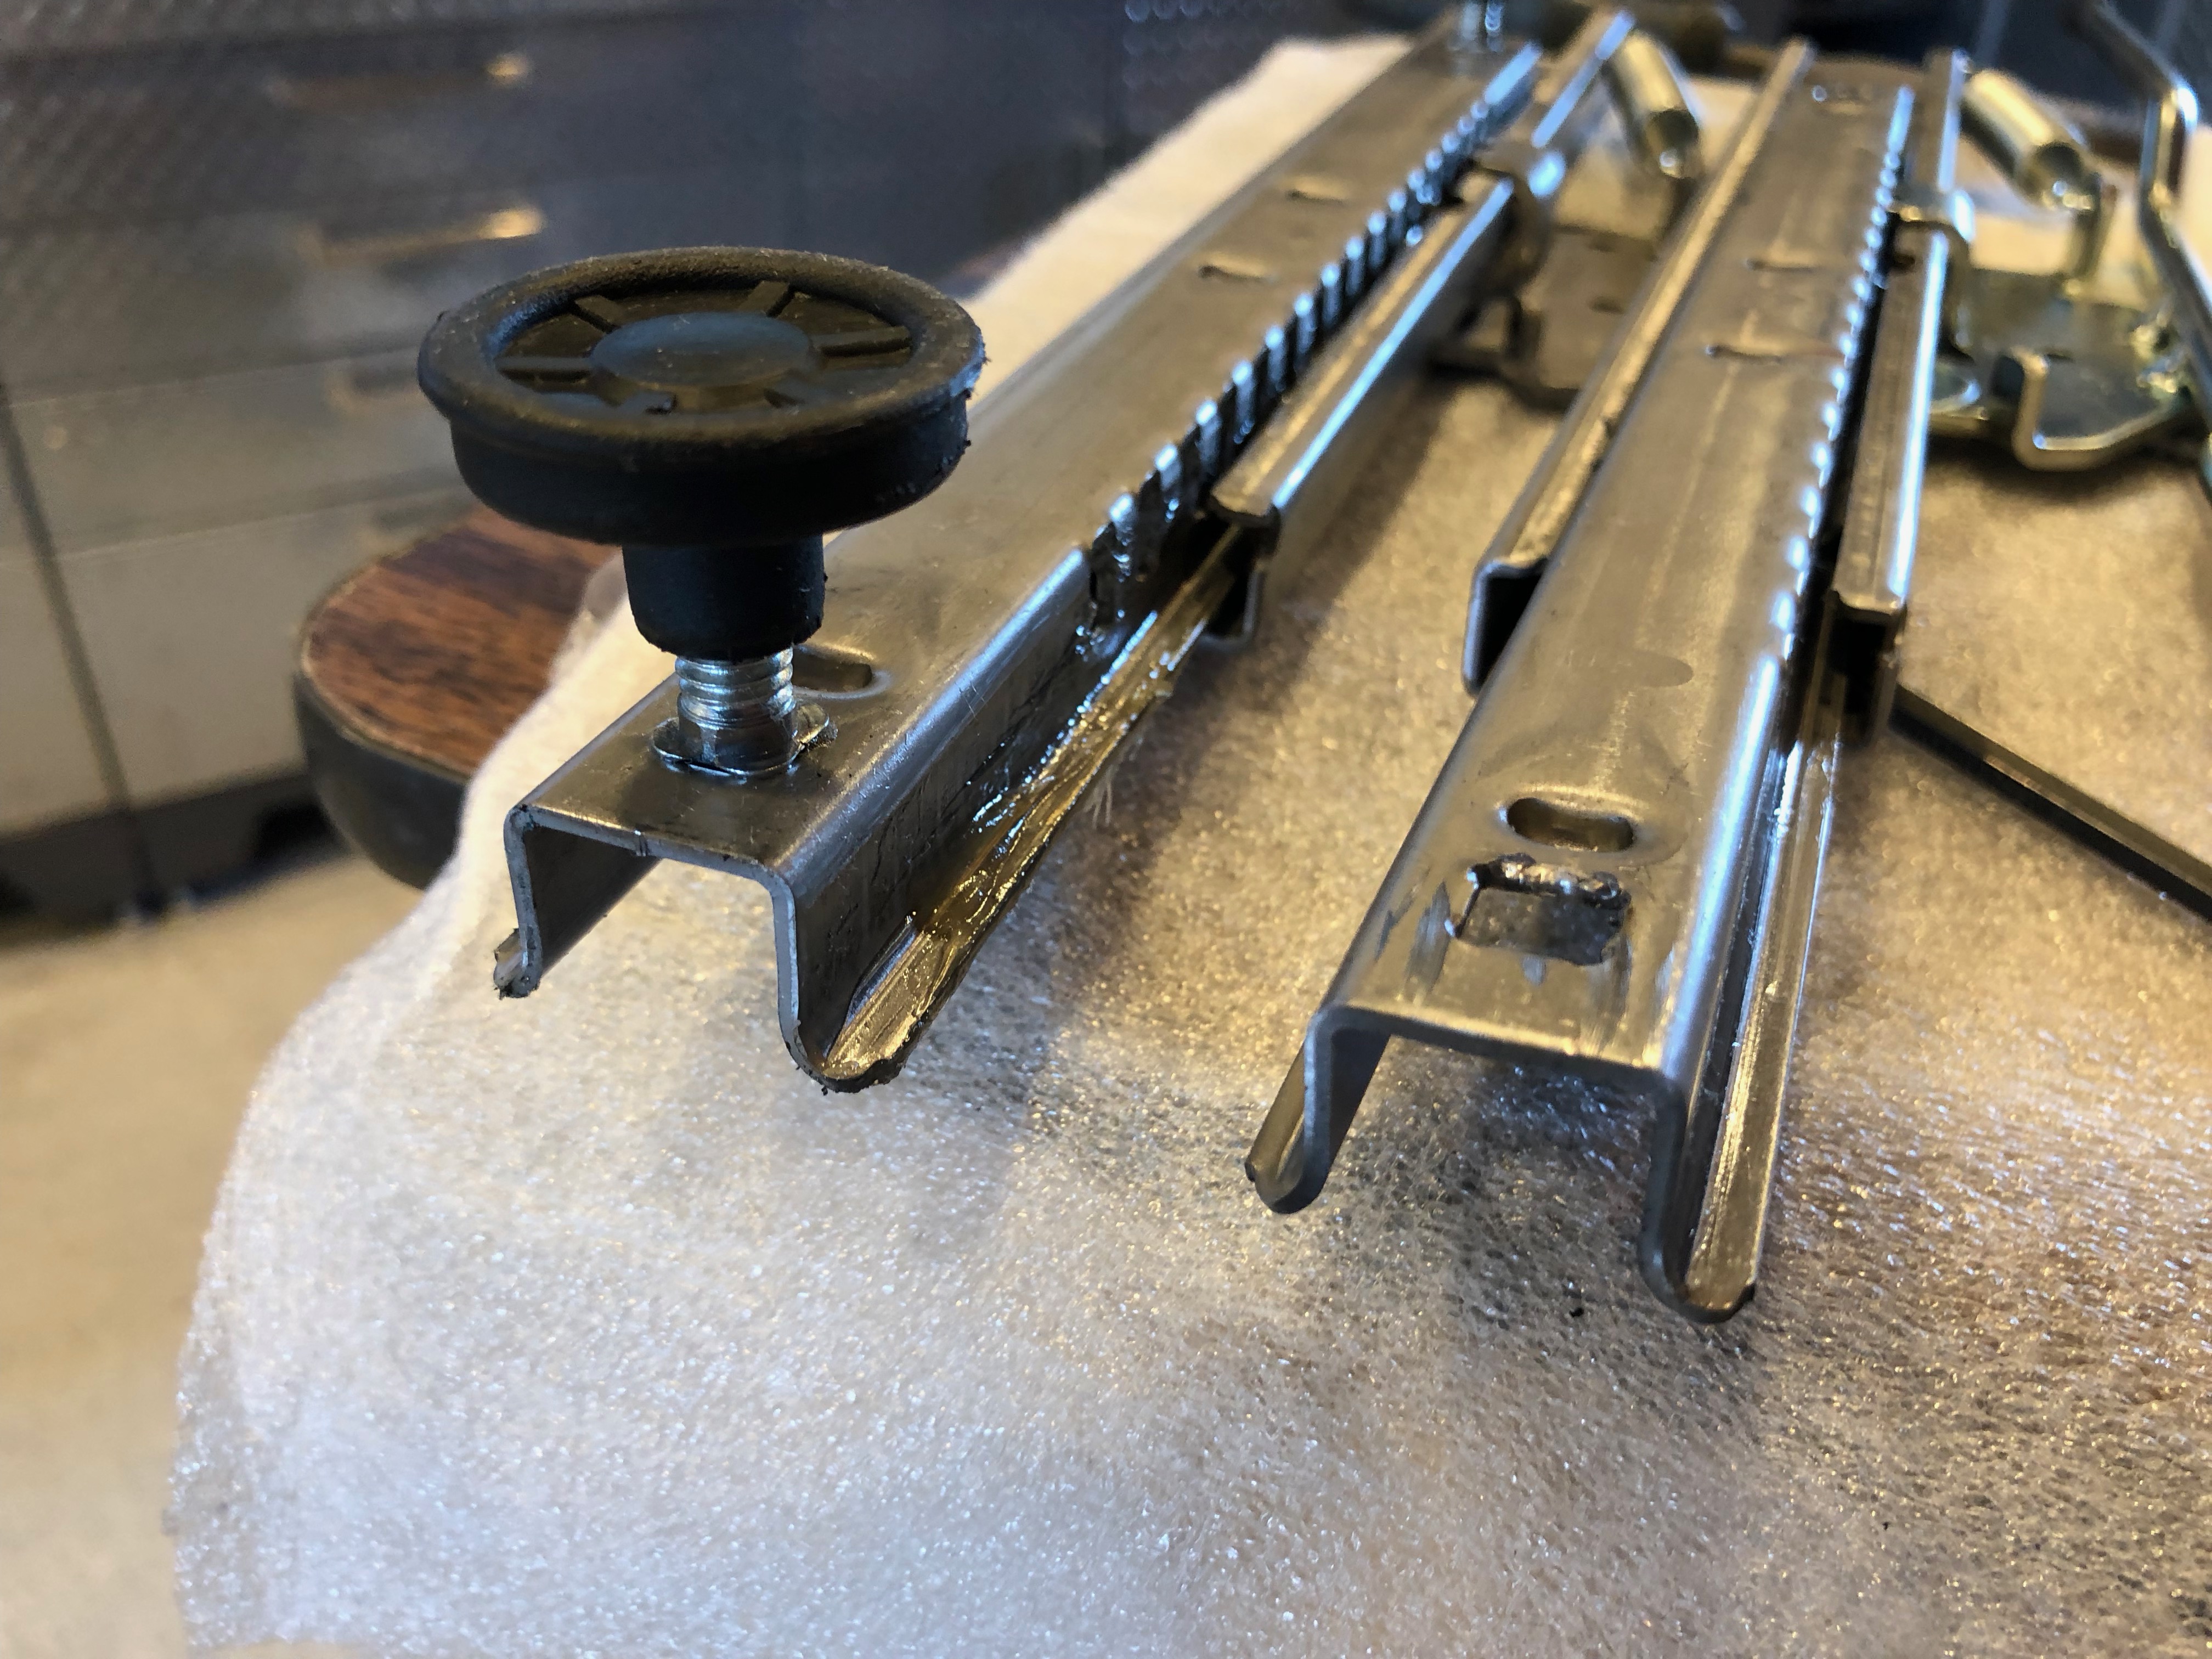
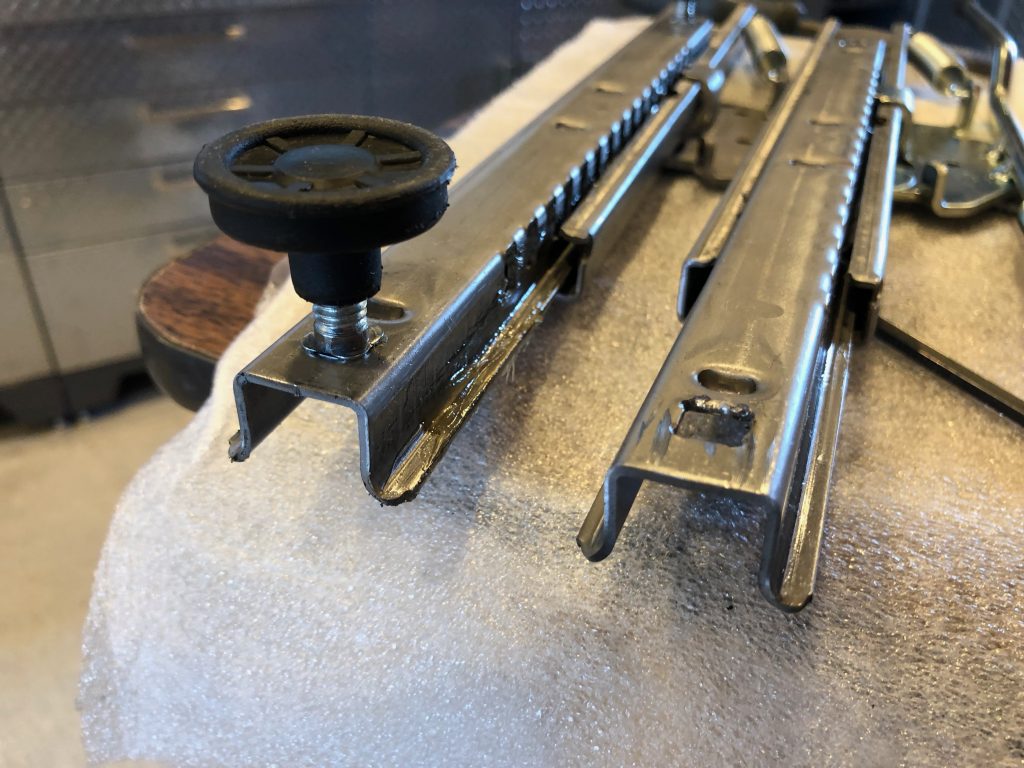
With the coolant reservoir installed, I turned back to the seat tracks. They come with four studs installed, but I need to remove them so that I can install screws through the floor. I ground off most of the stud with a grinder and cutoff wheel, then drilled through the remaining part until it popped out. Here’s the before and after picture.

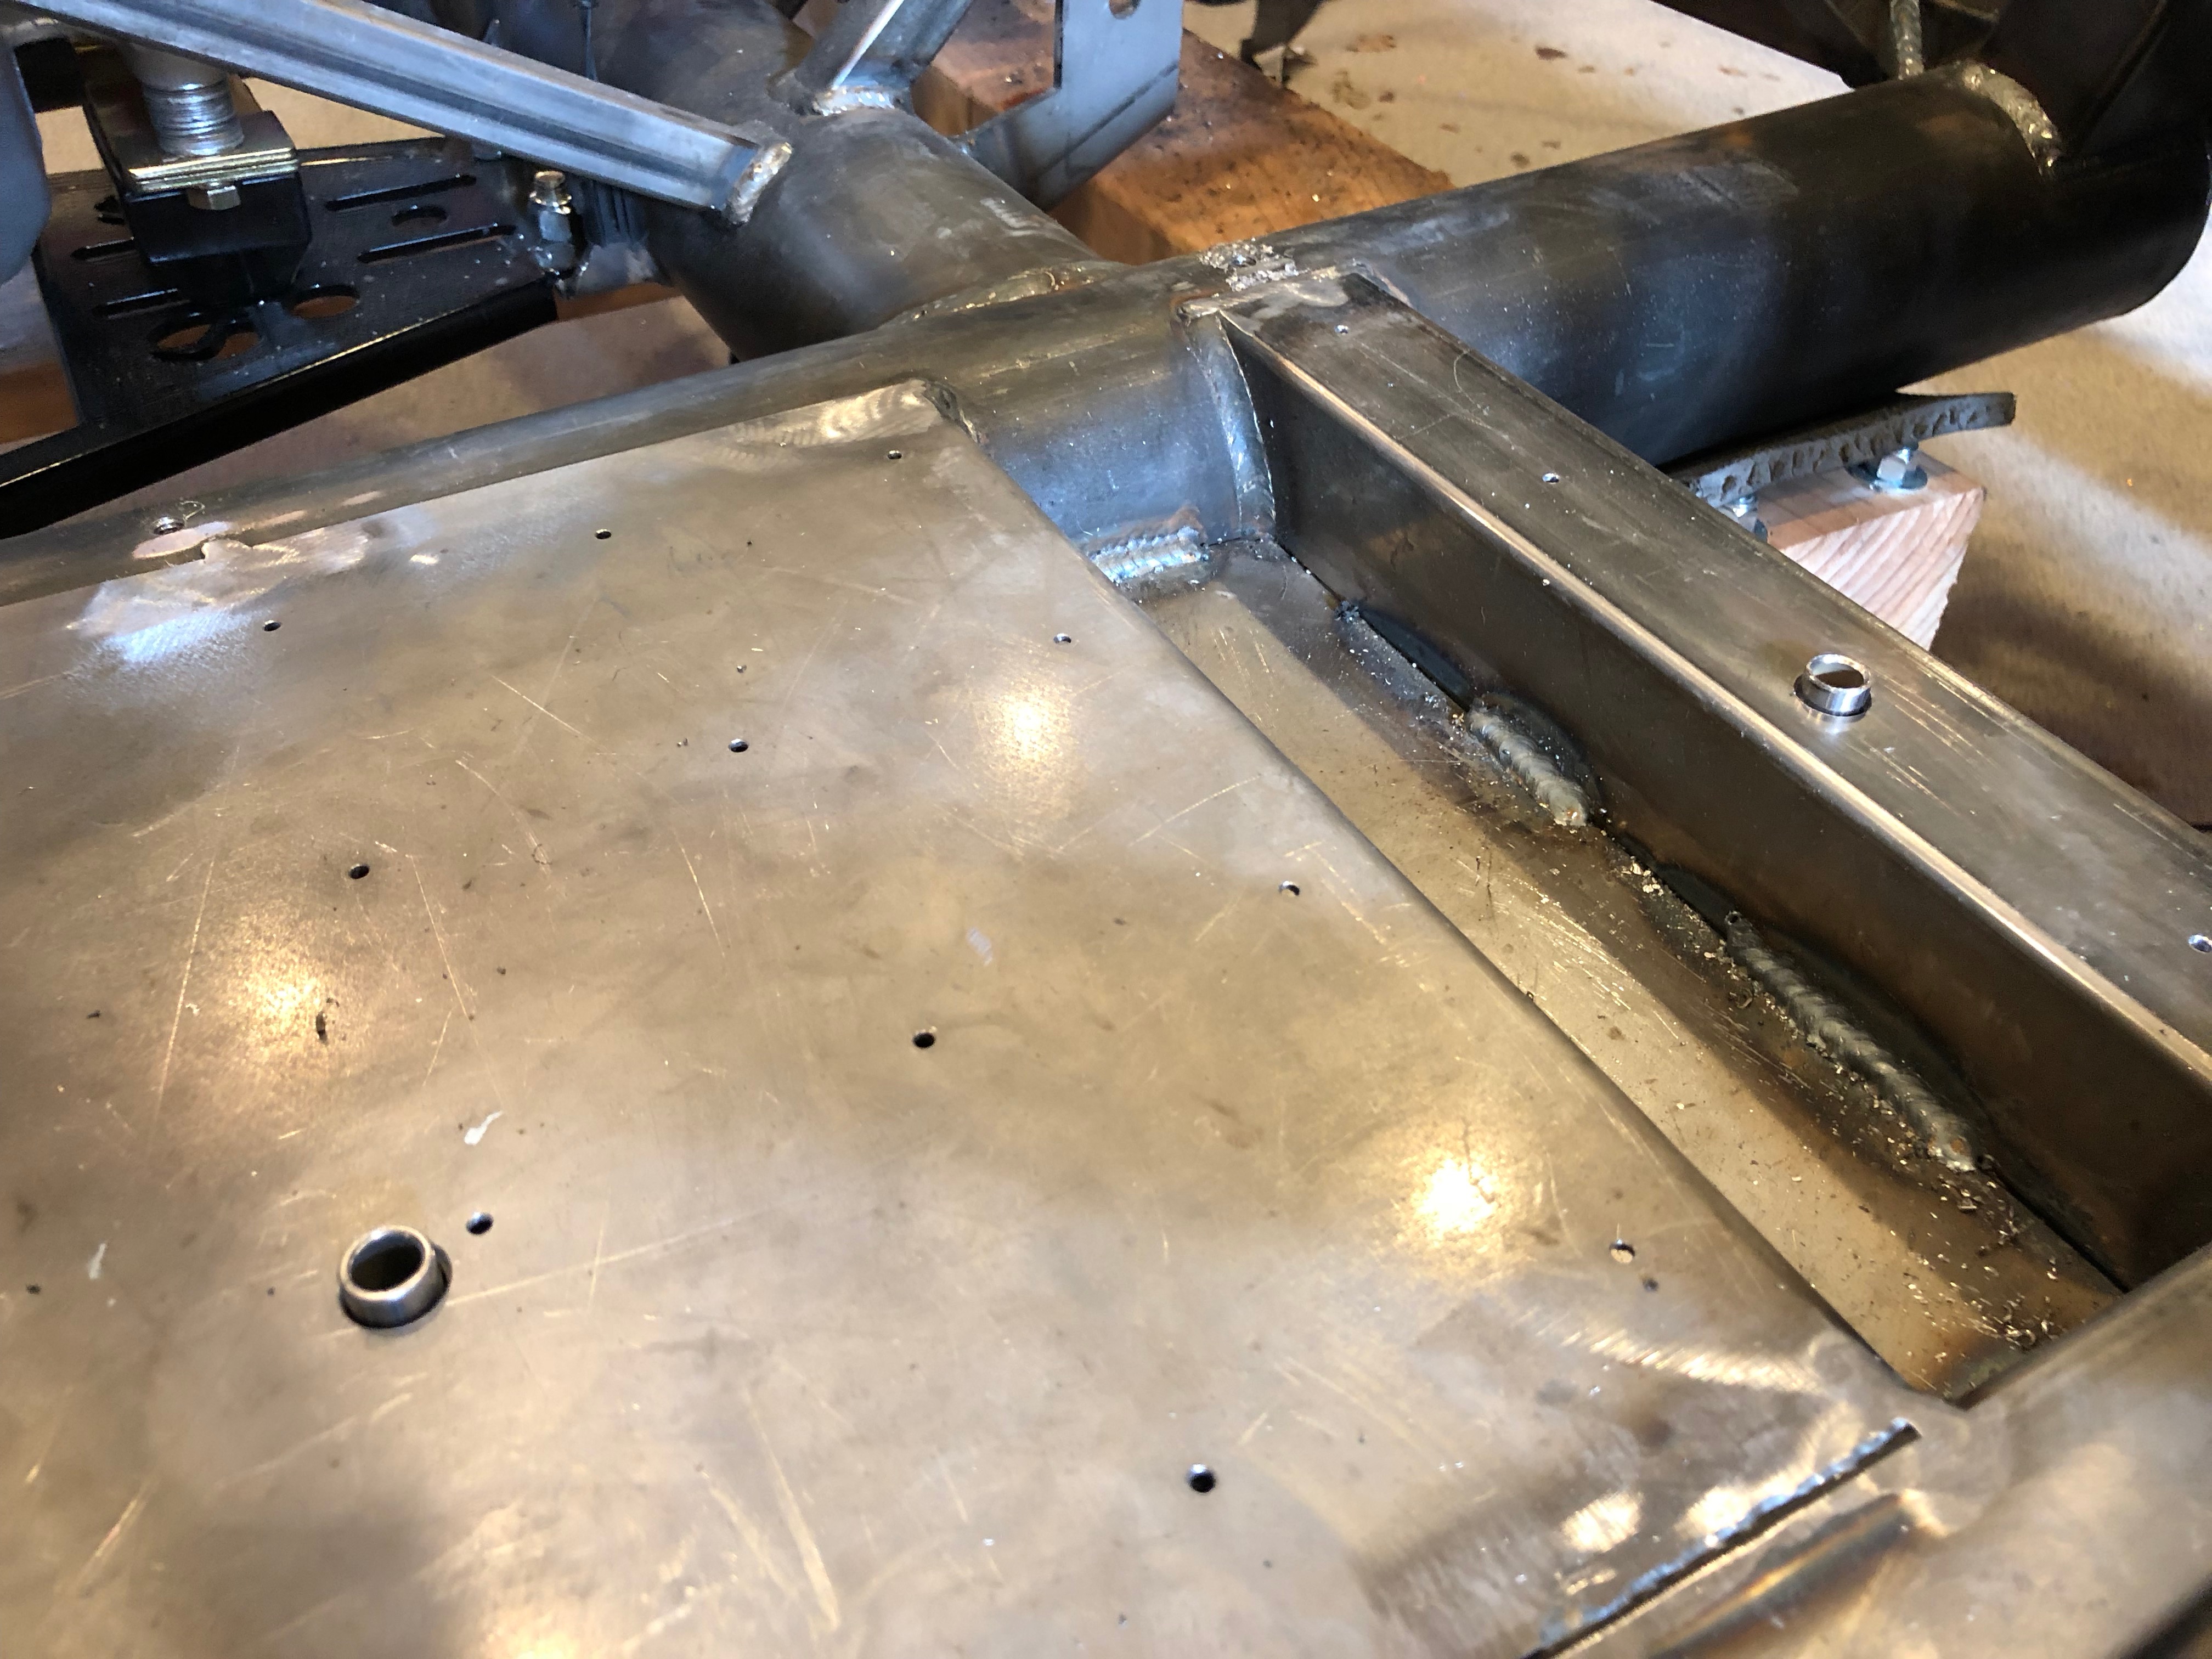
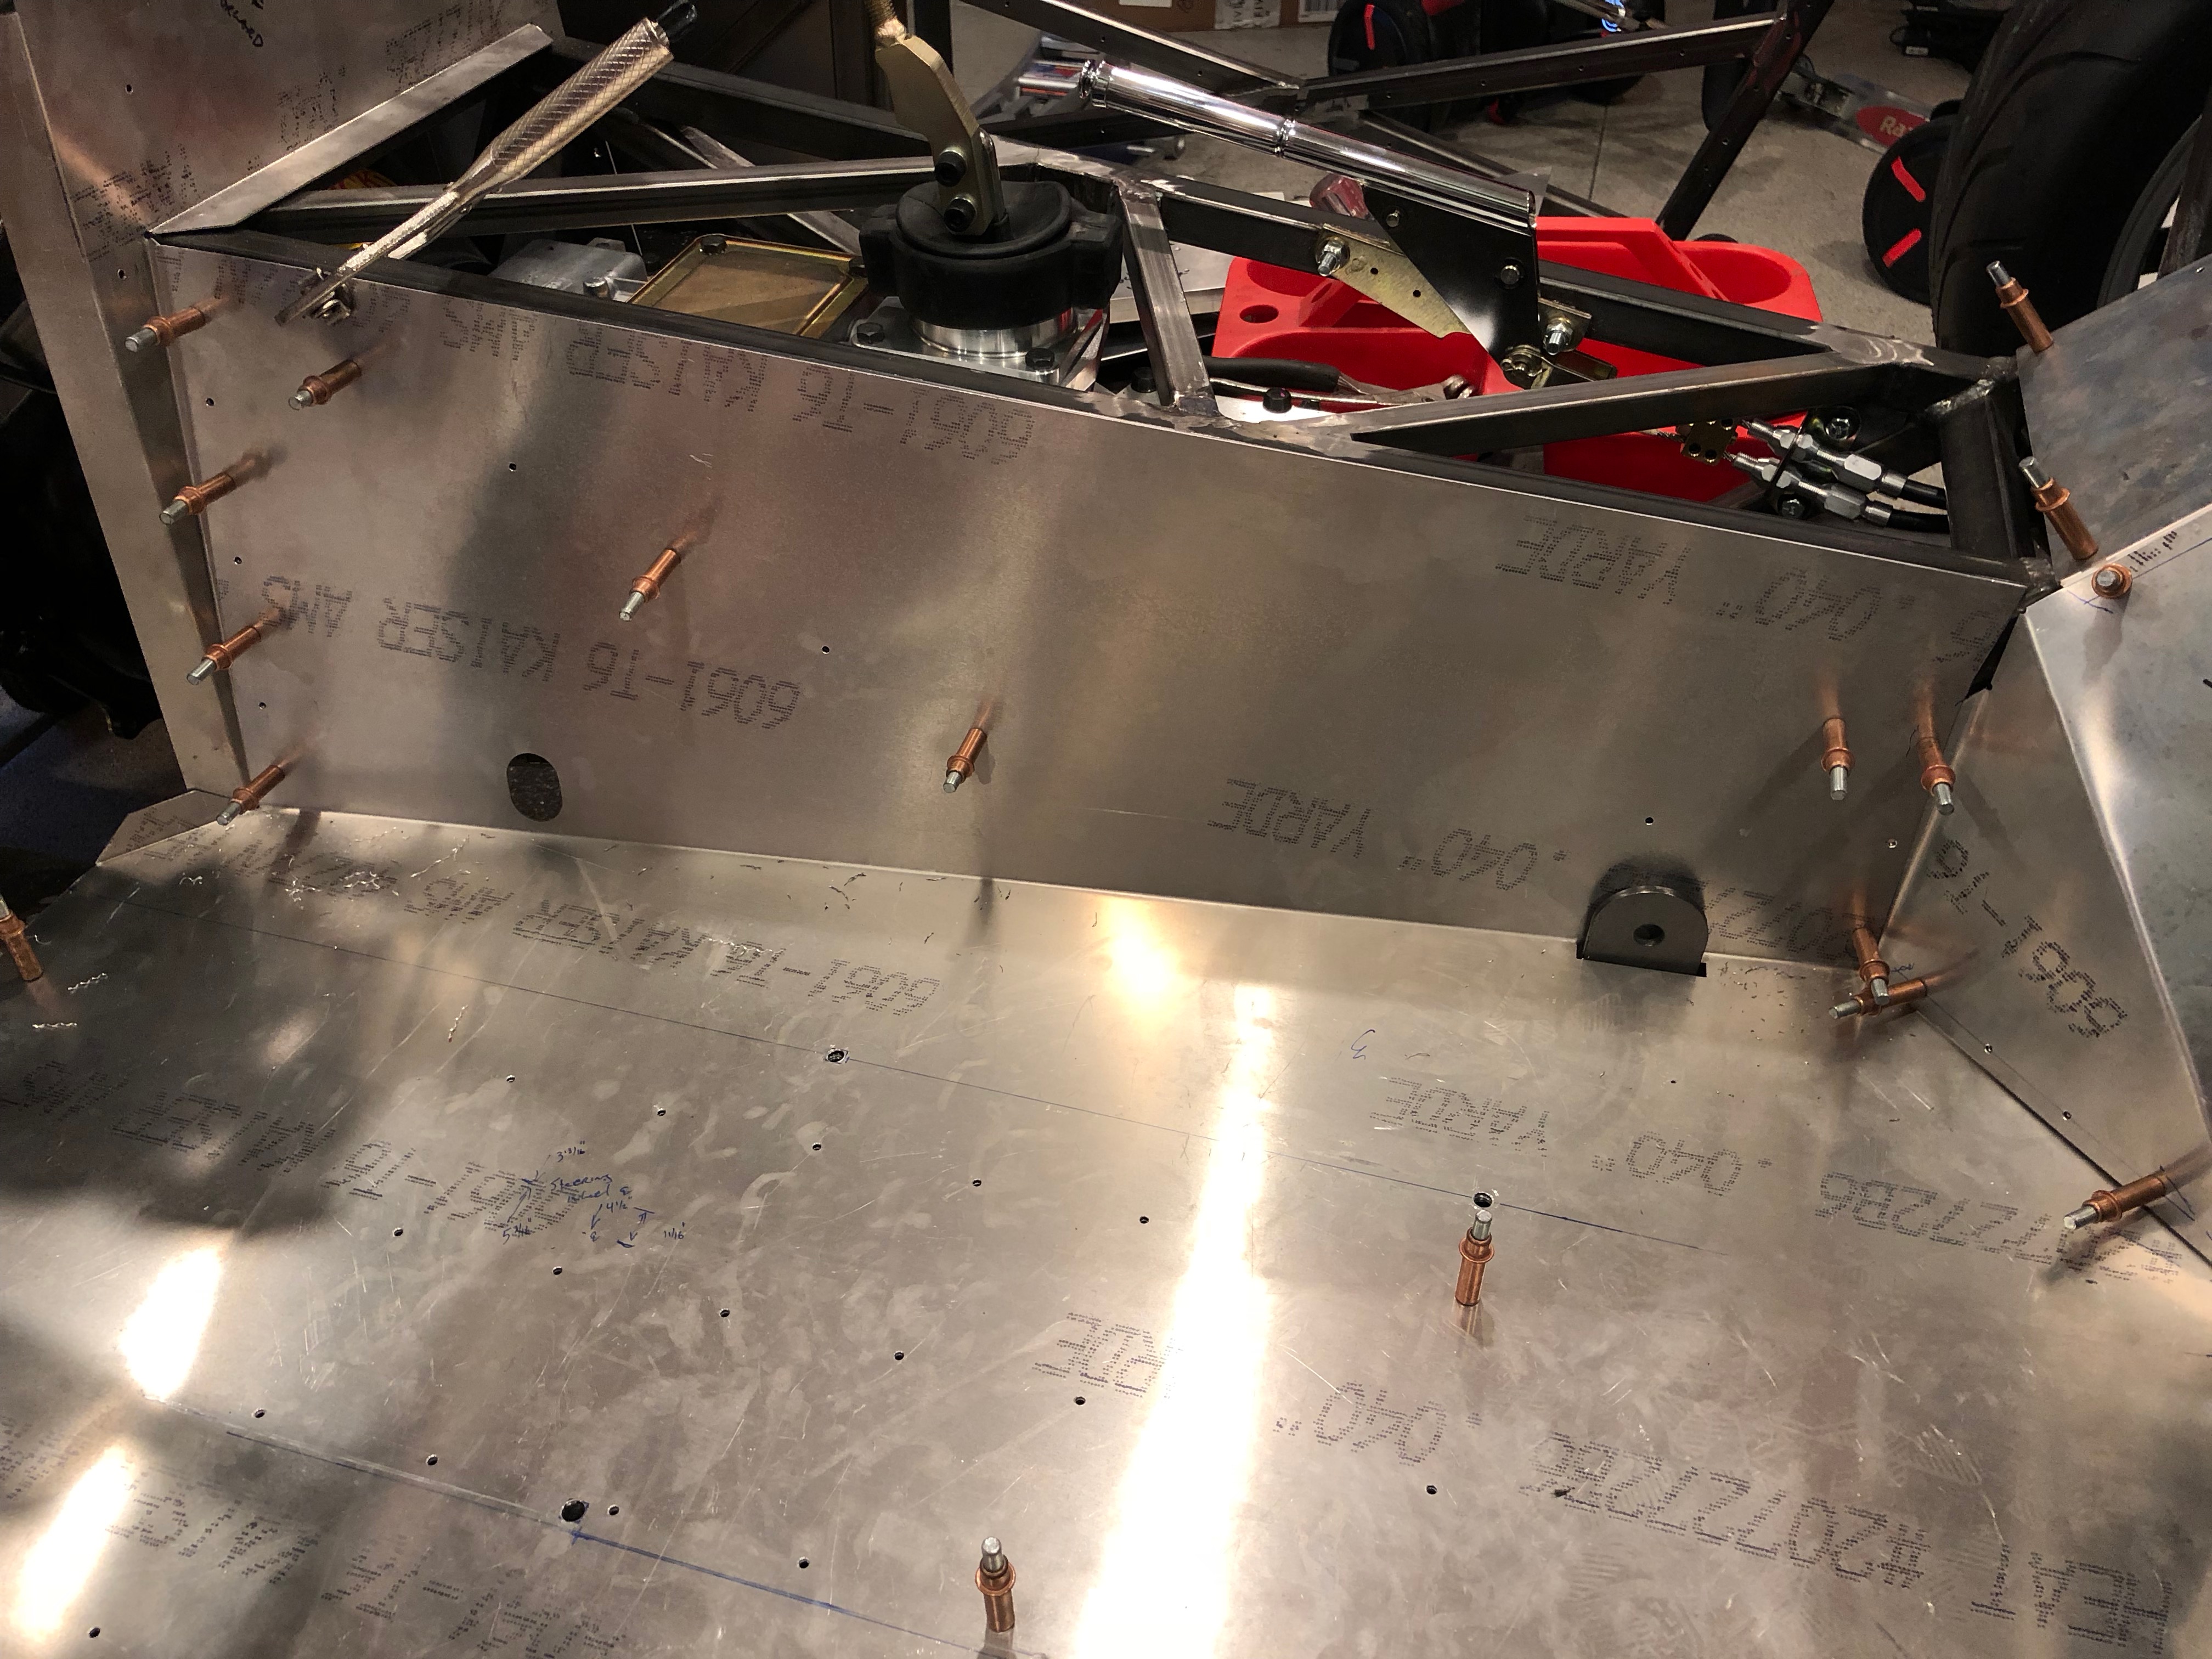
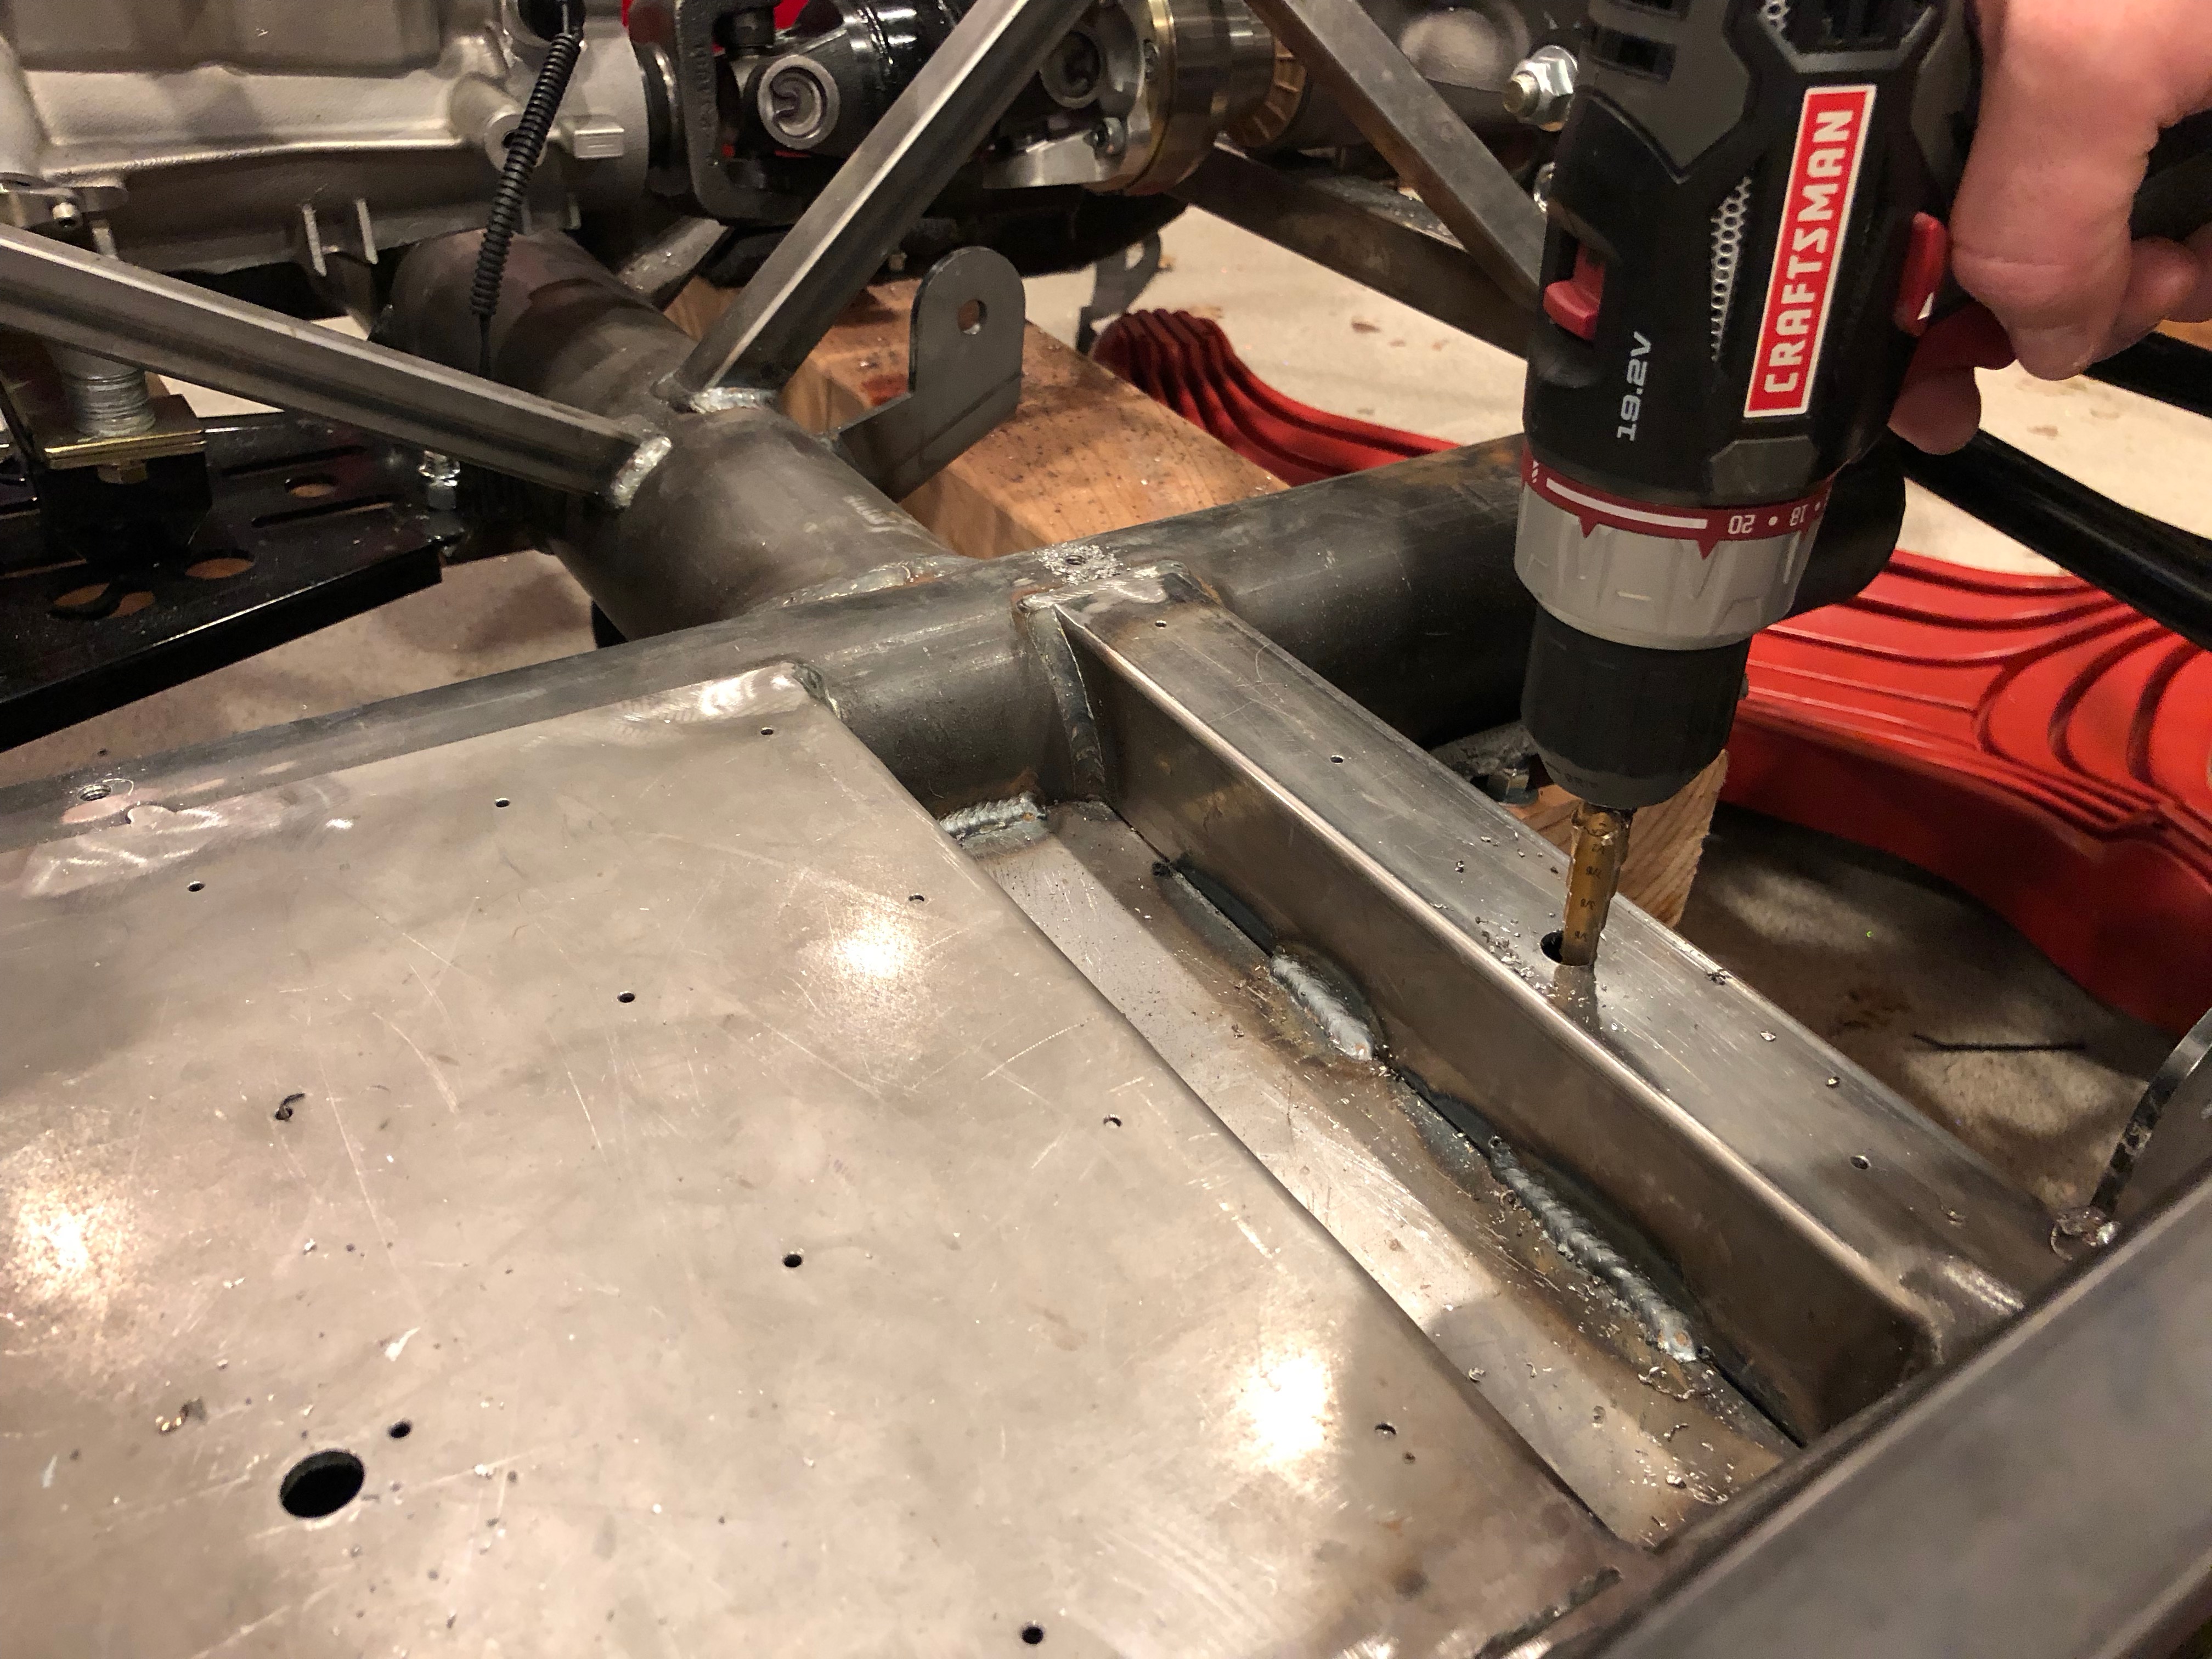
Using the measurements that Factory Five provides on their seat track instructions, I carefully laid out the position of the seat tracks. The right one is centered over the 4″ chassis tube on the left side of the car. I drilled and tapped the holes for 5/16-18 screws and screwed it down.

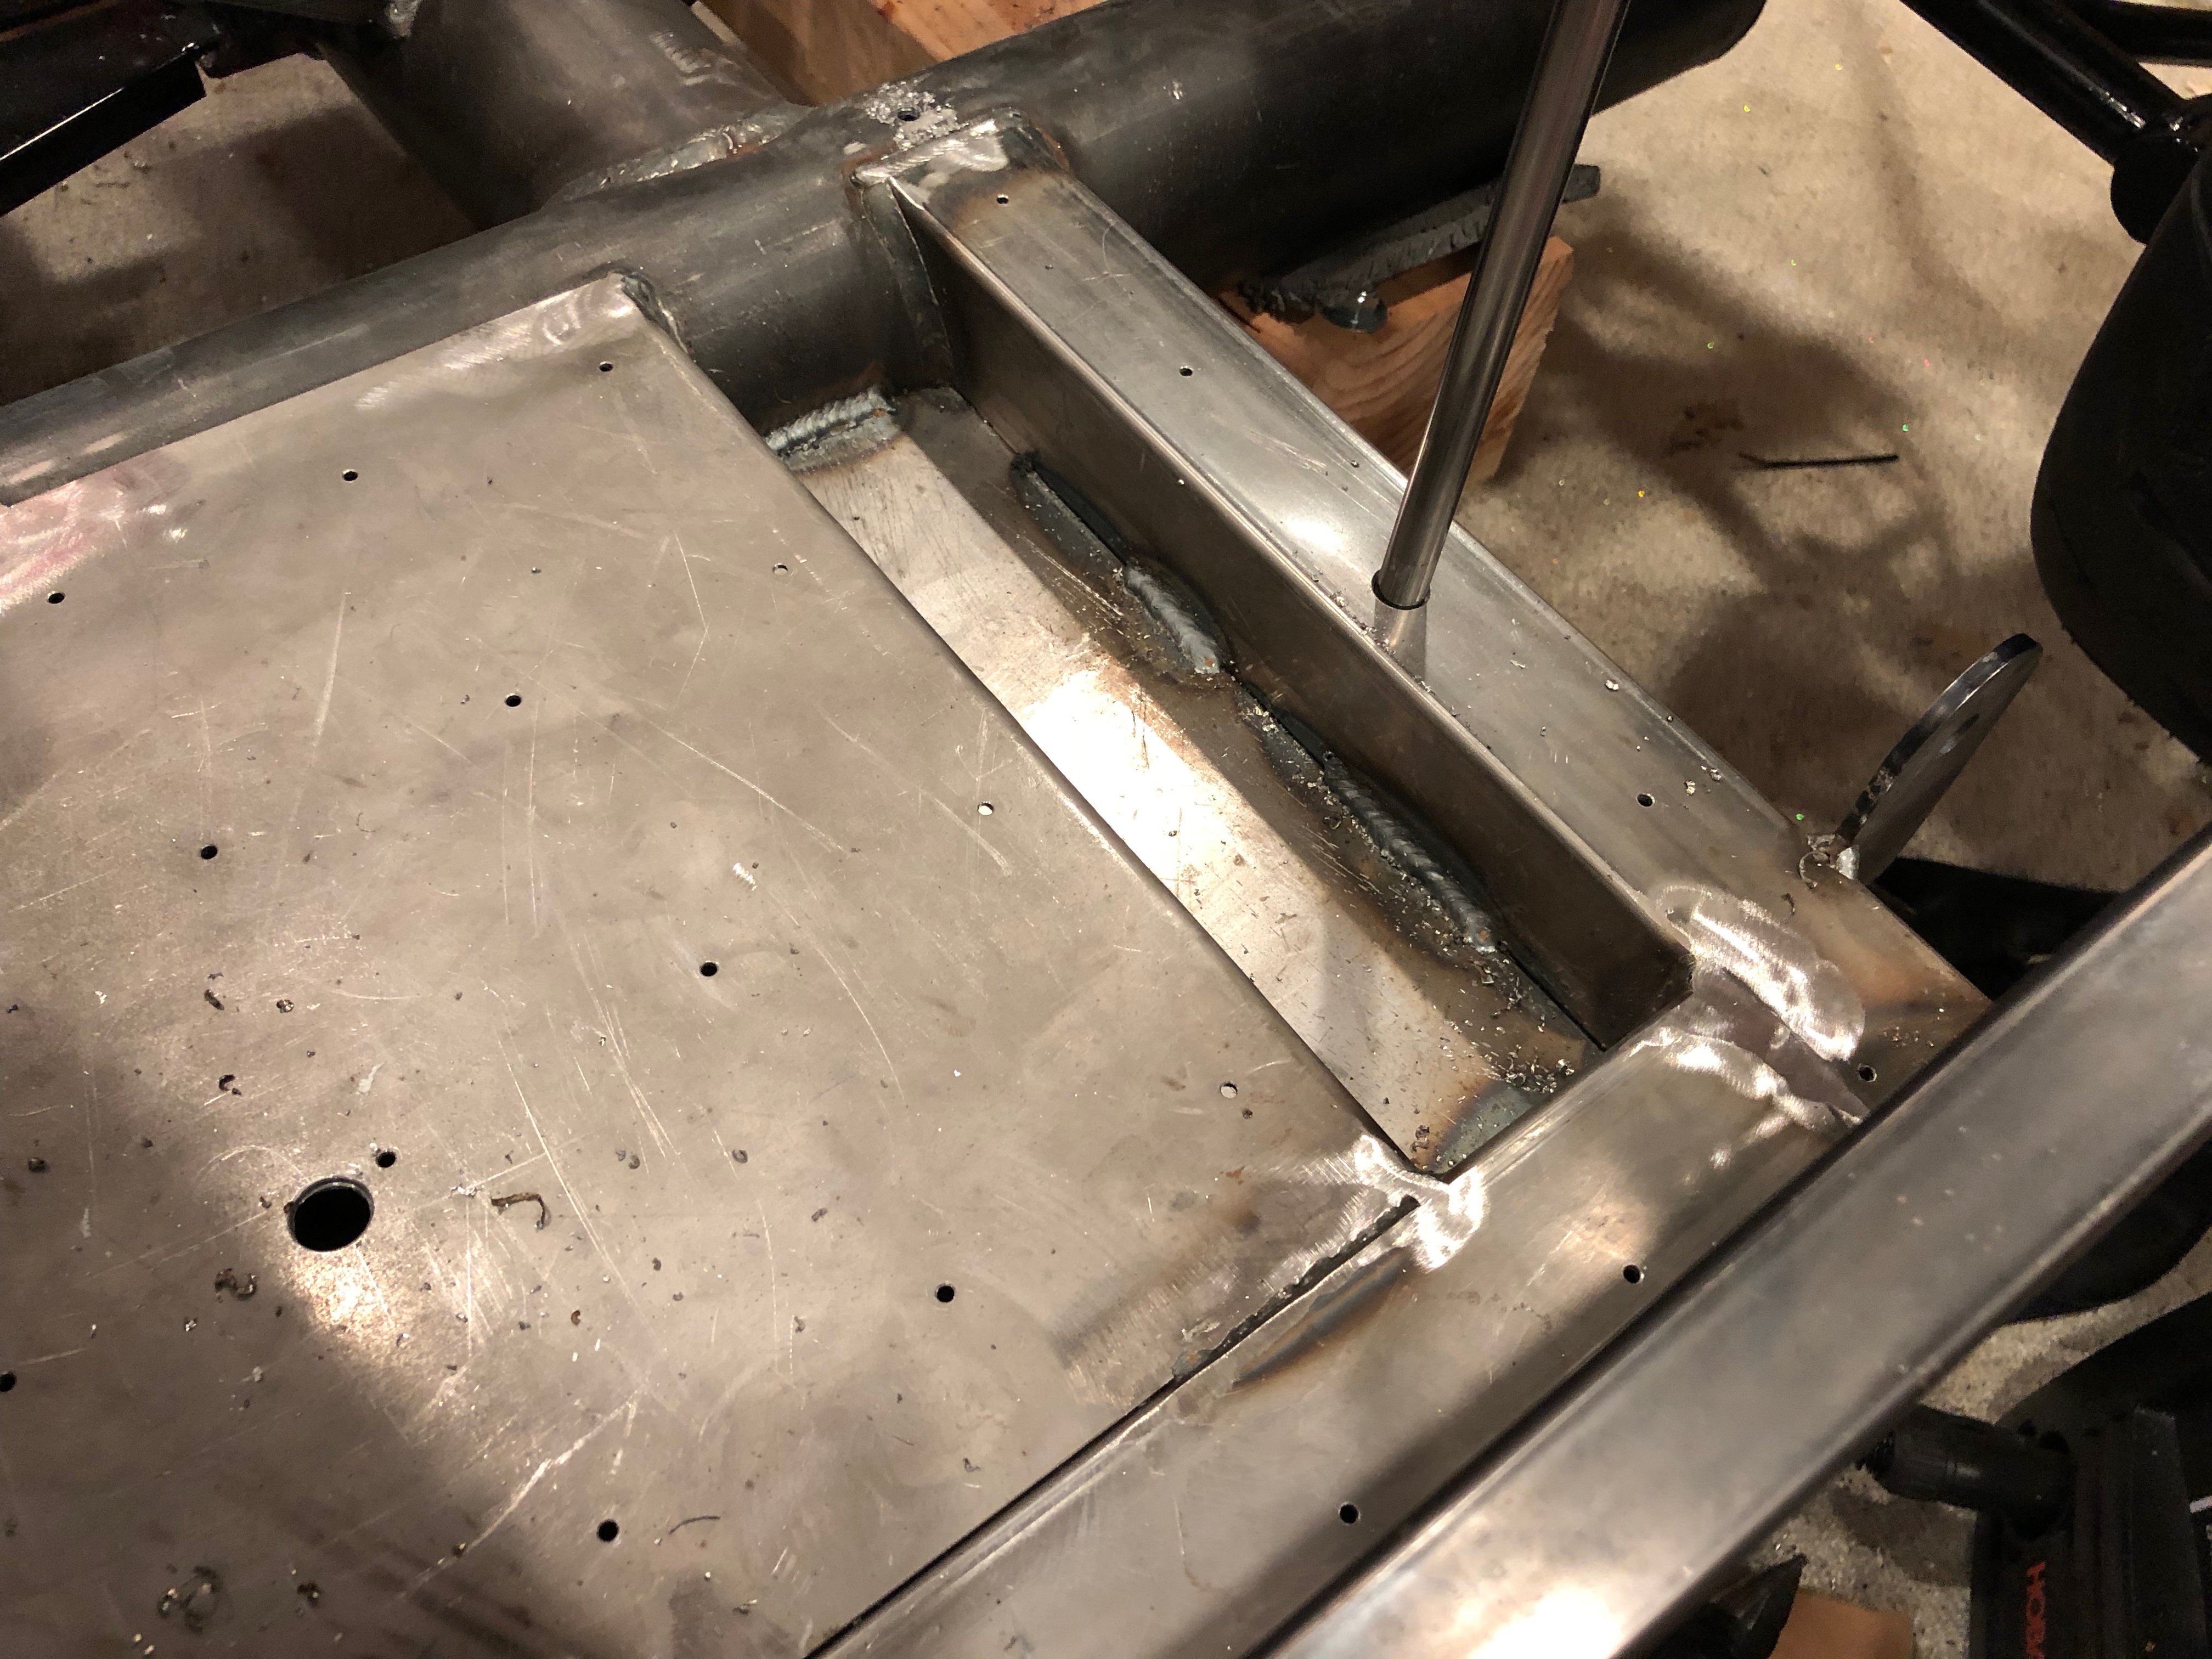
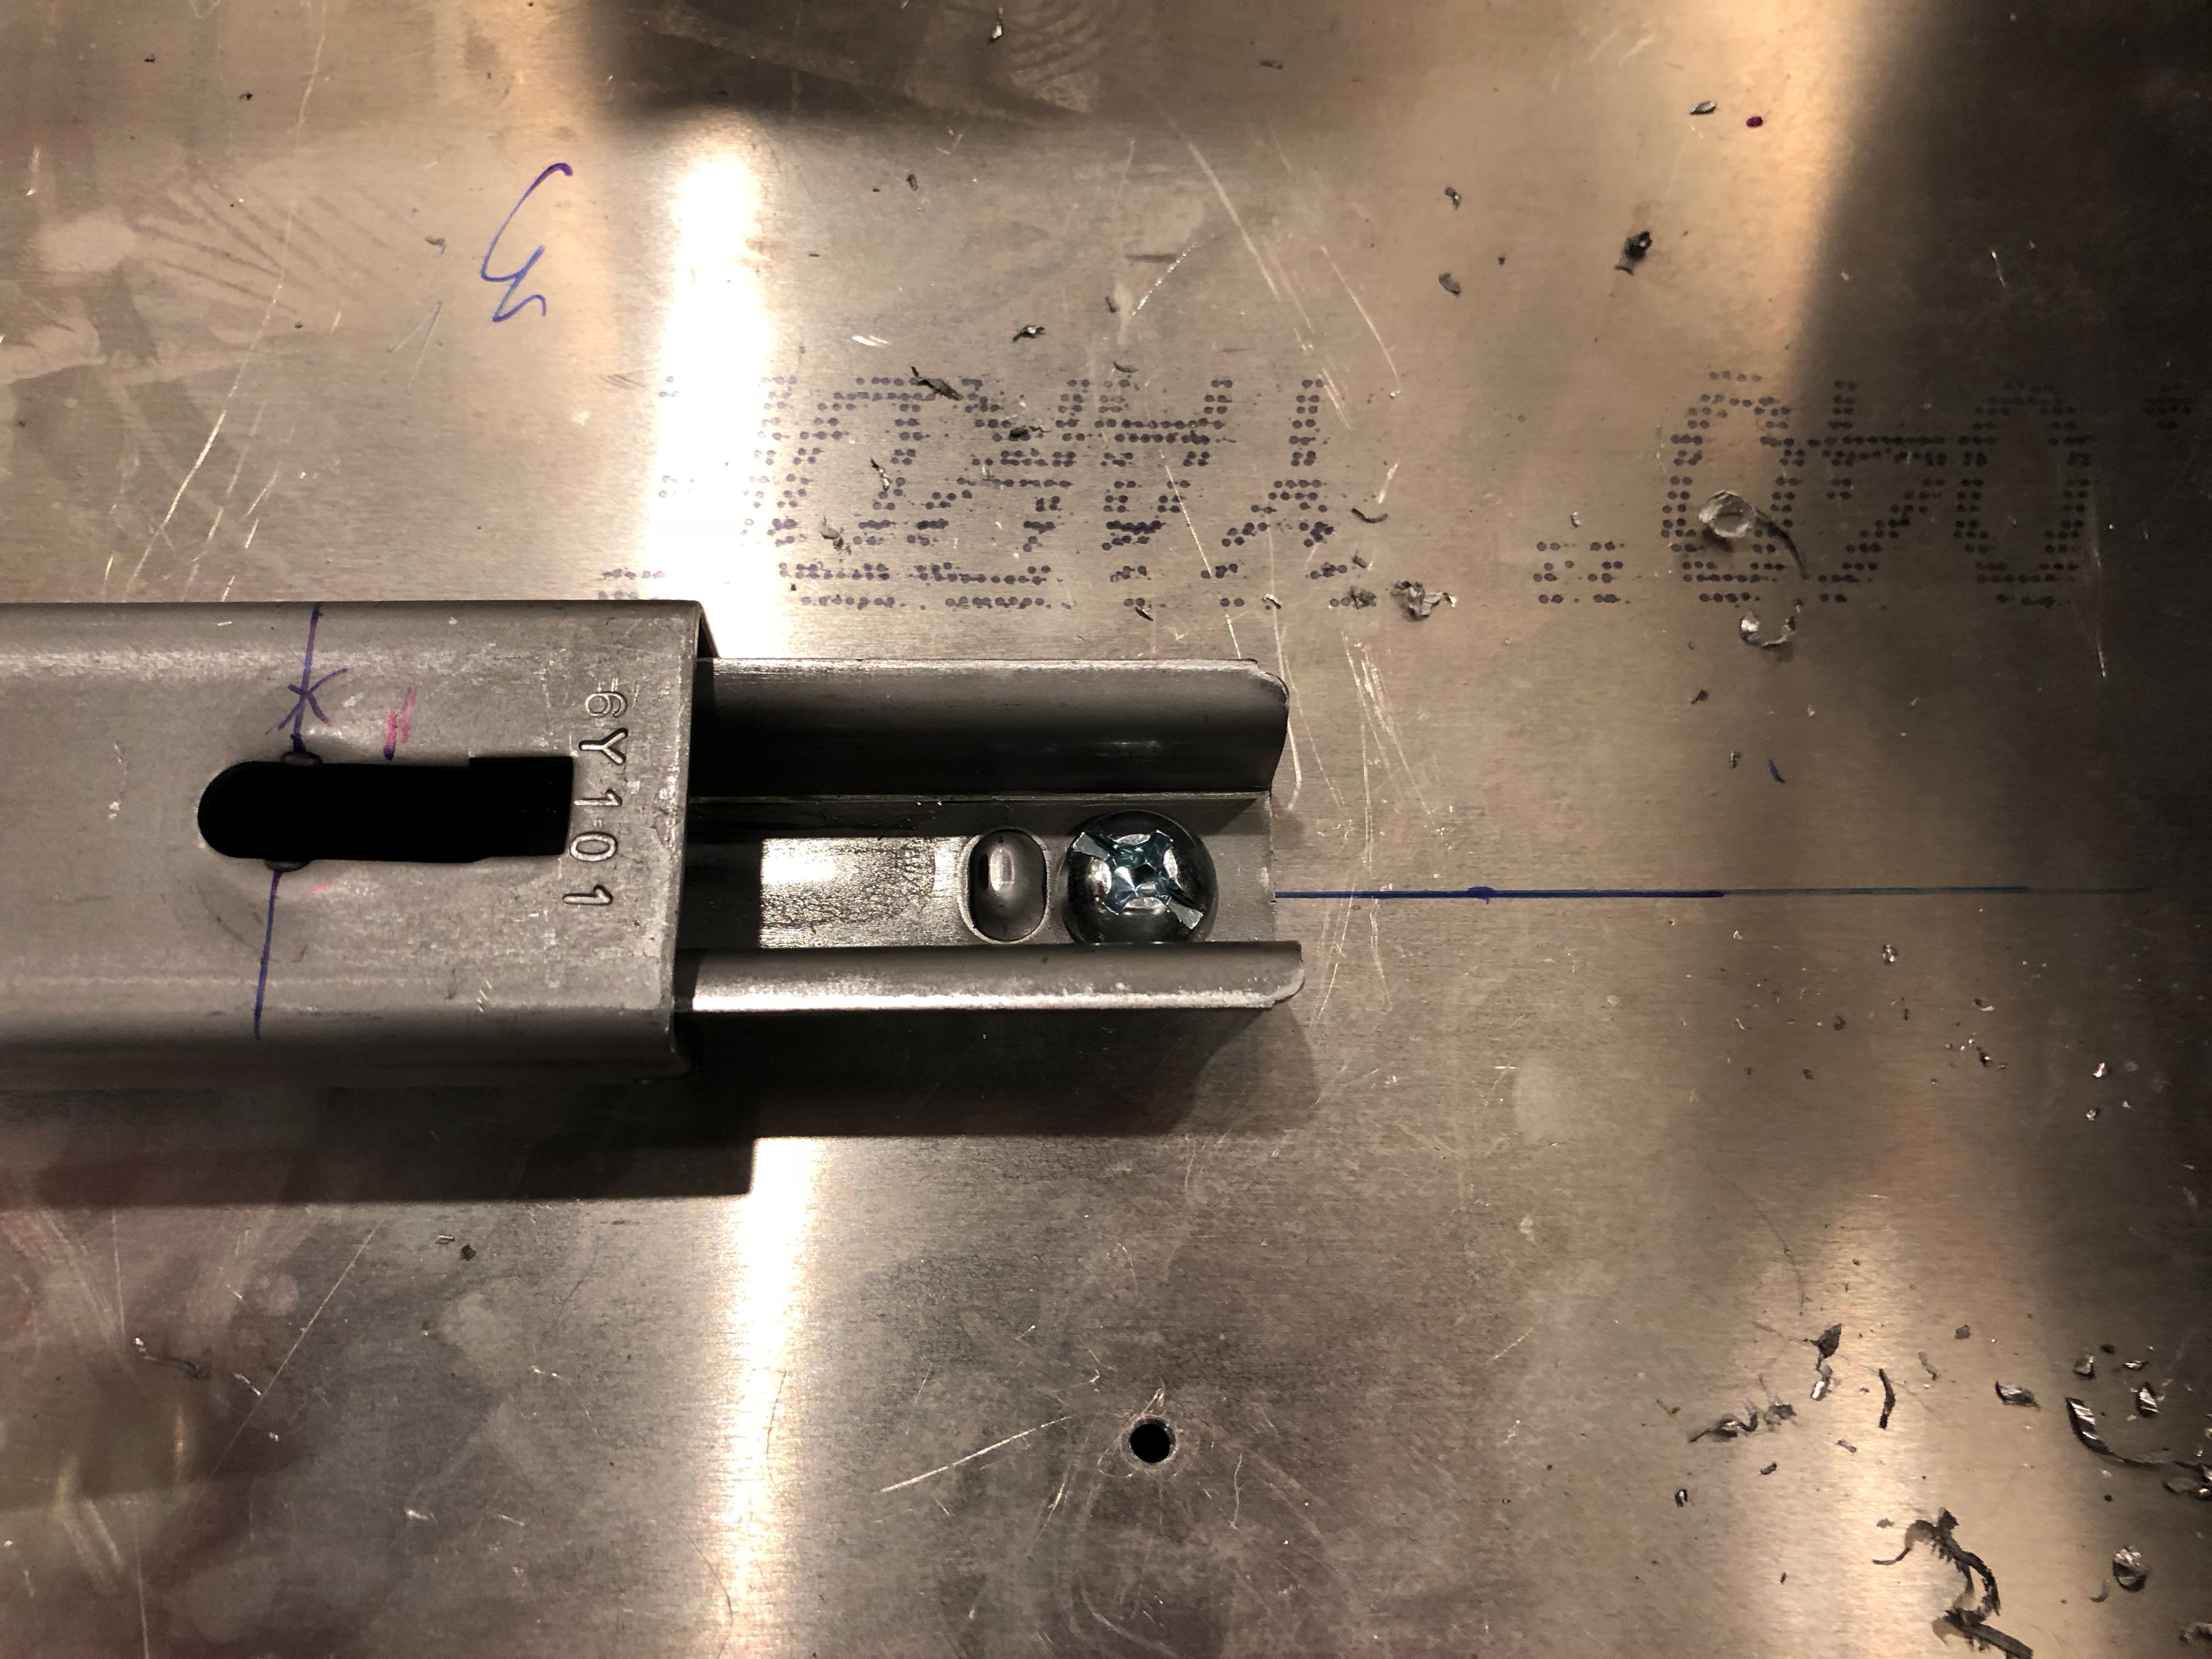
The screws are low profile enough that they won’t interfere with the operation of the track. This is the front end.

And this is the rear.

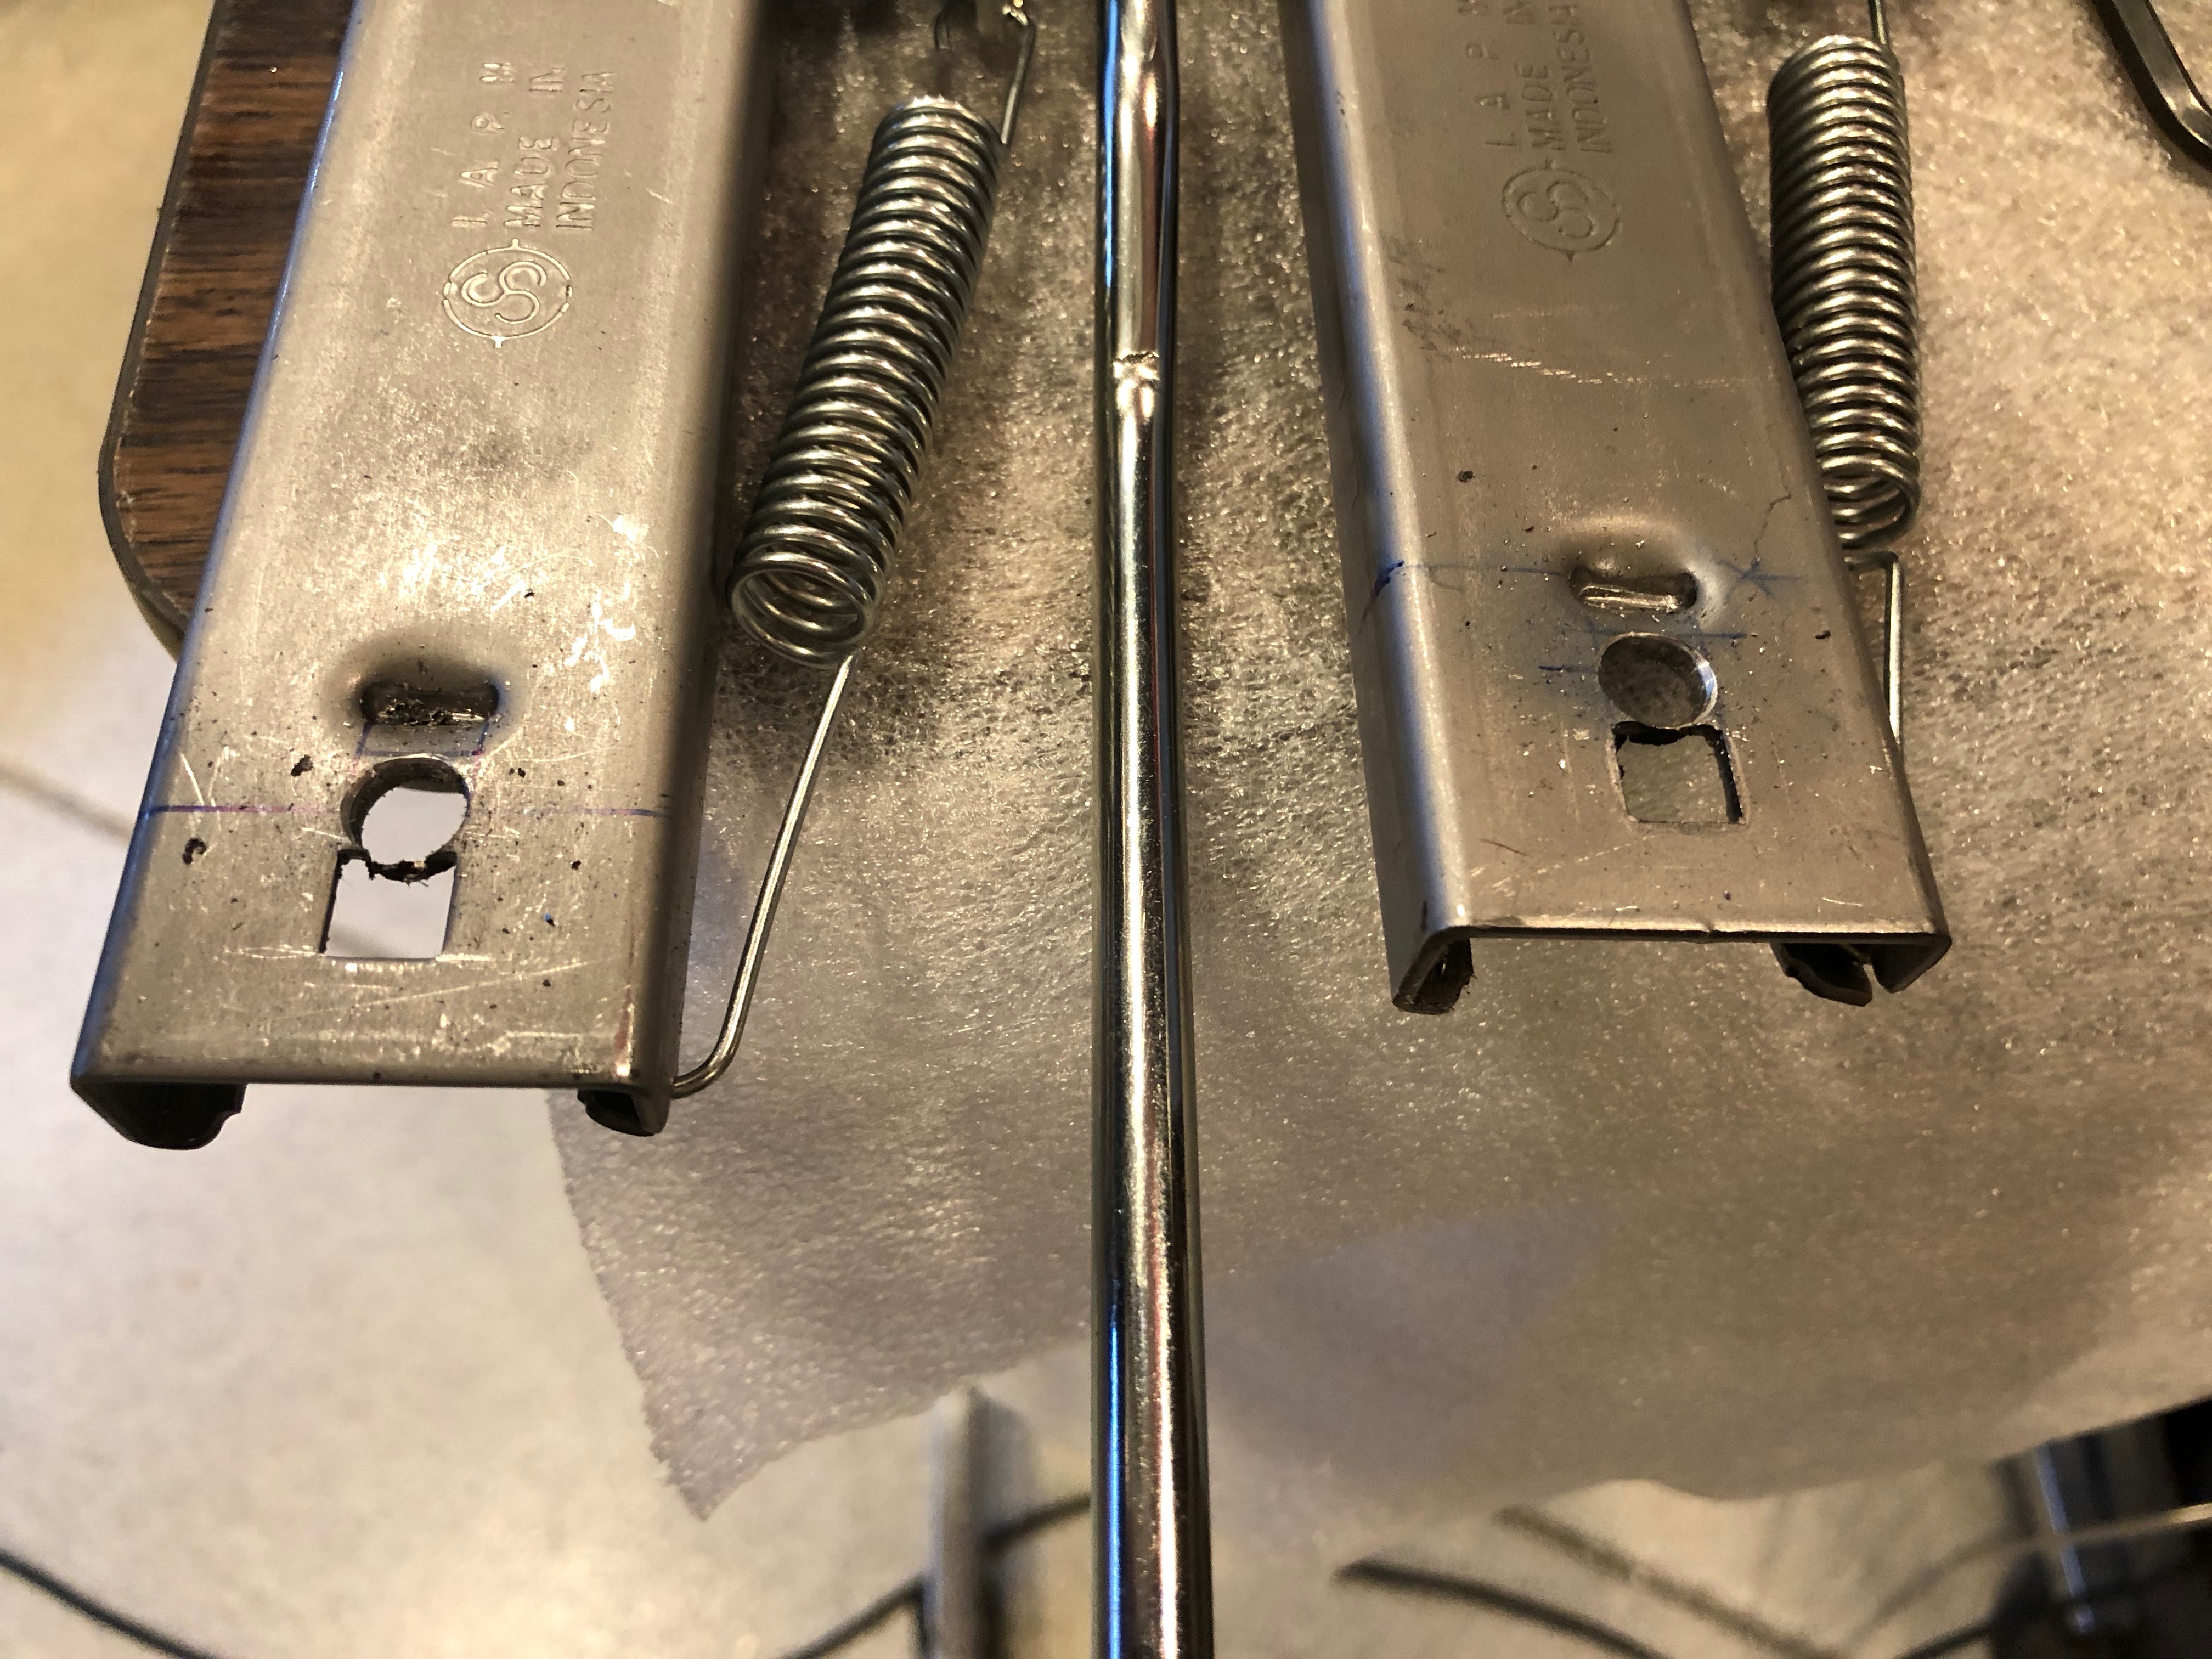
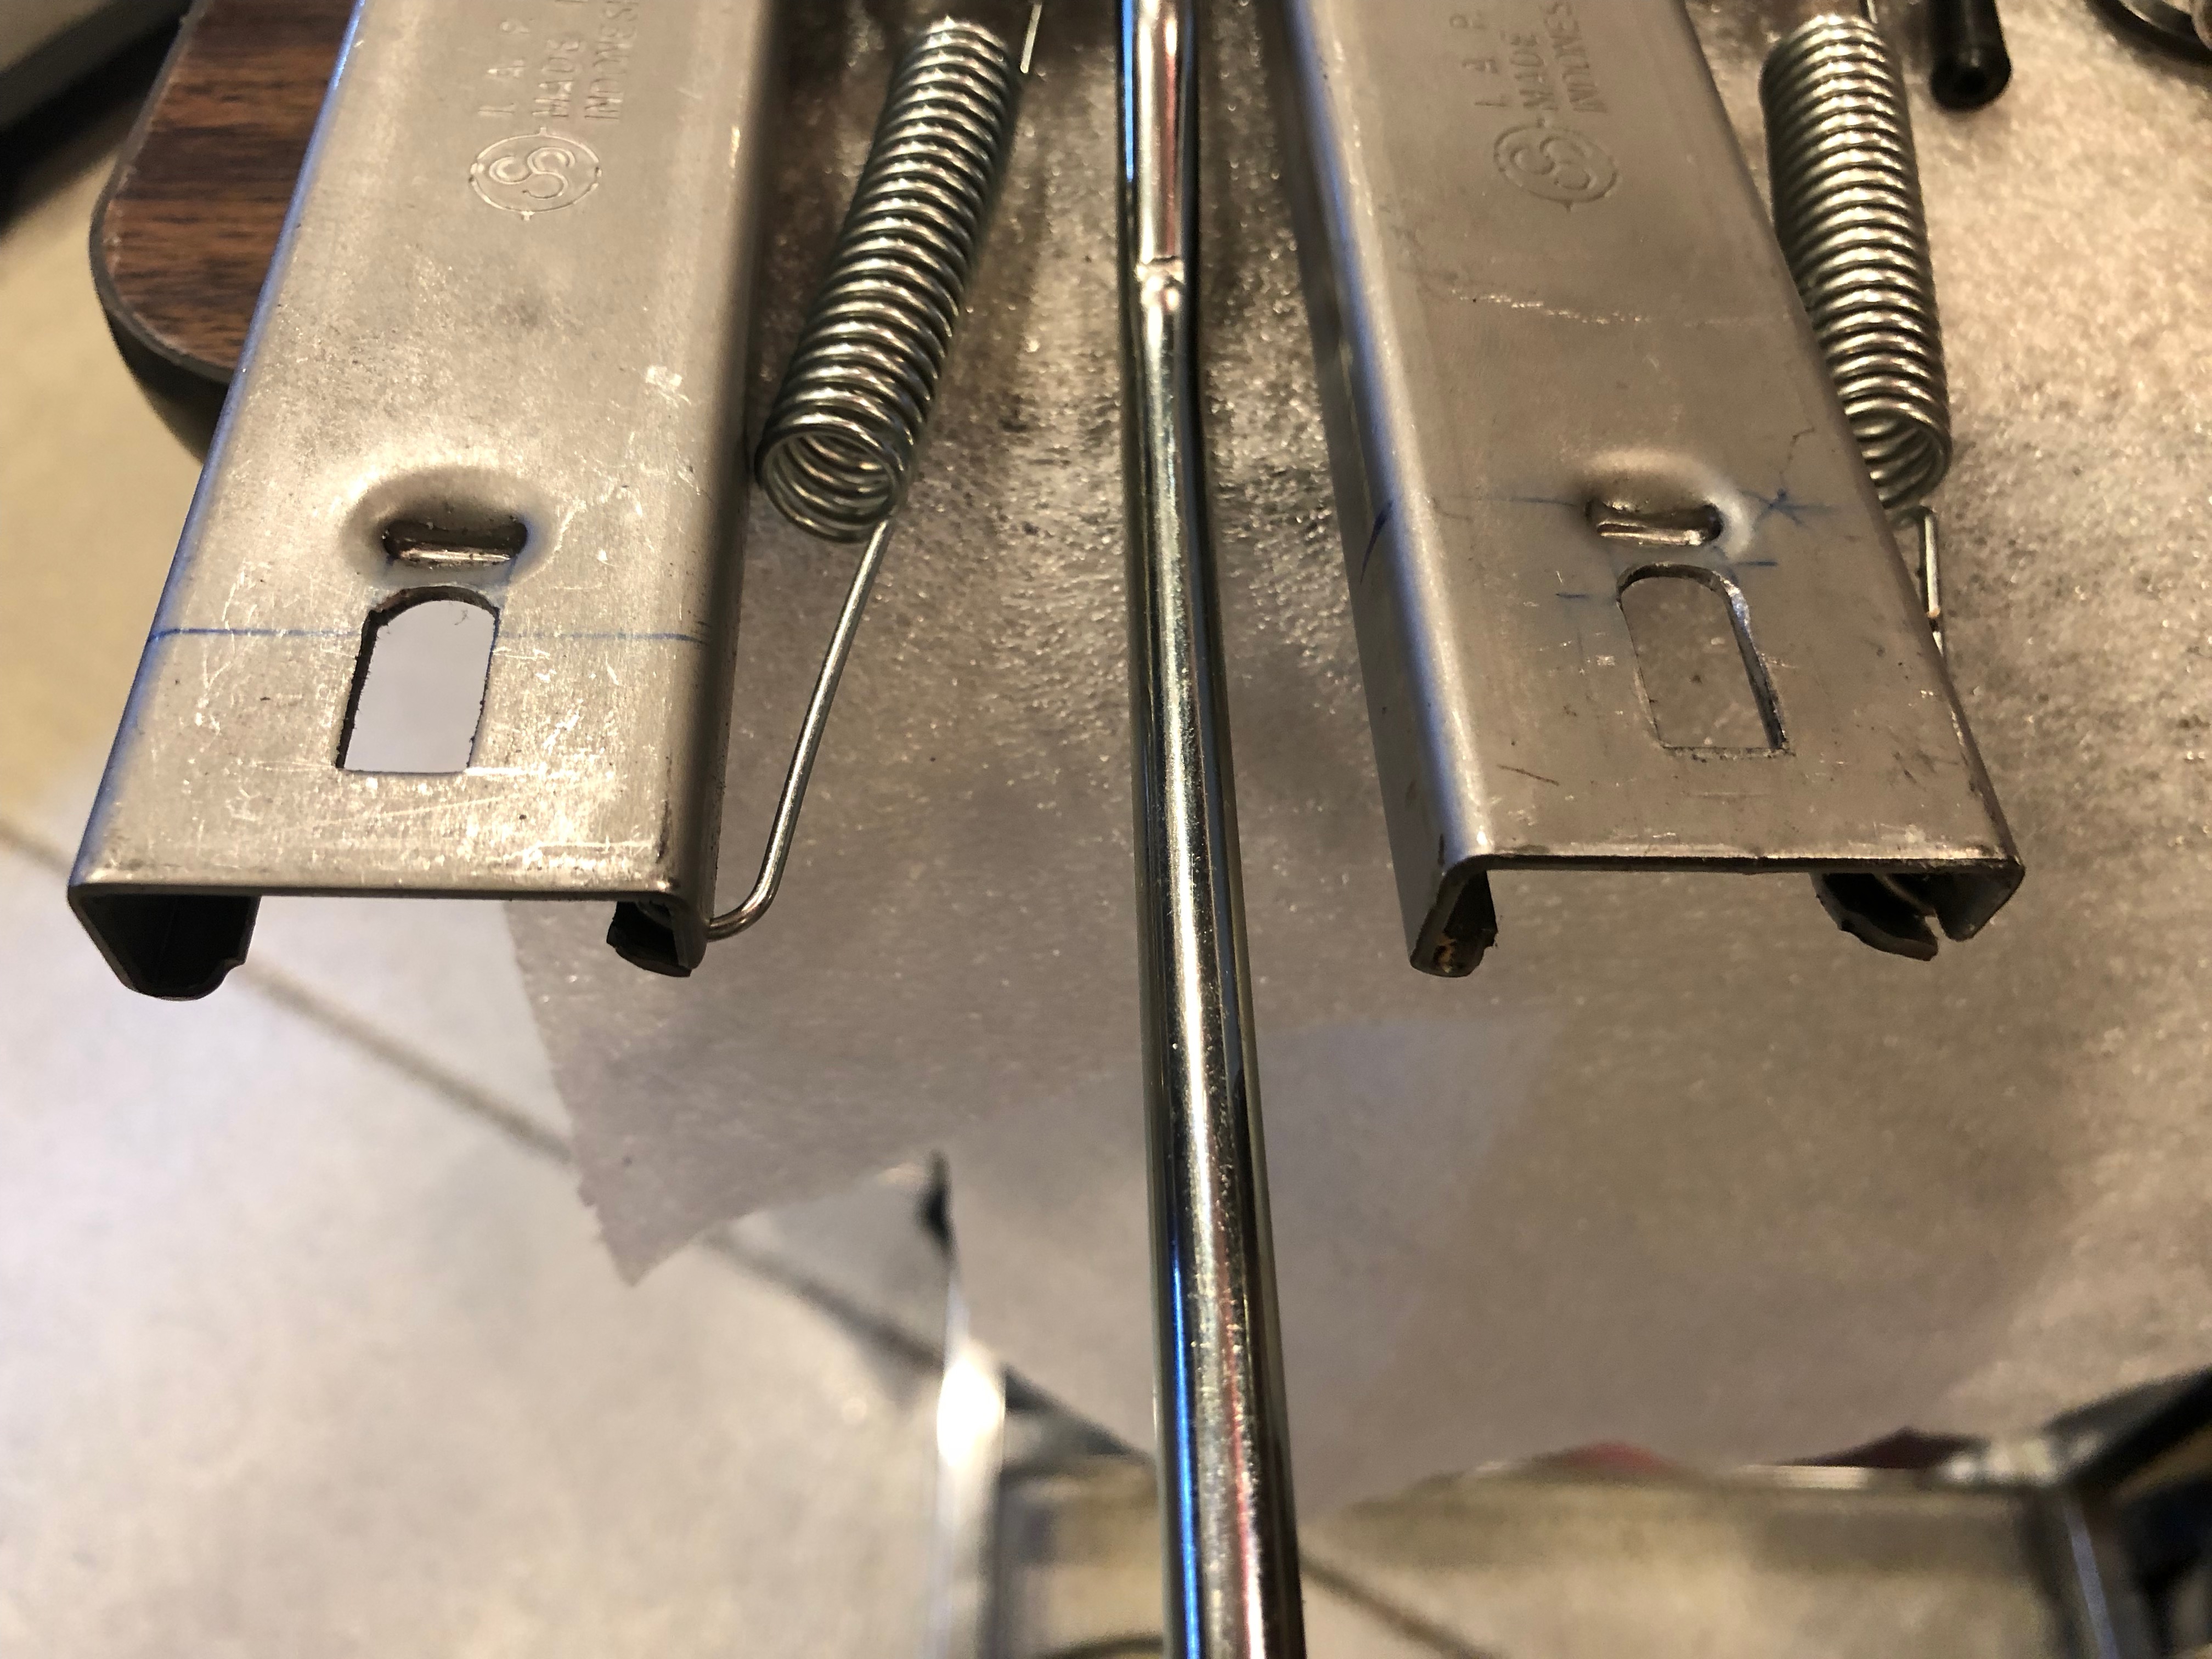
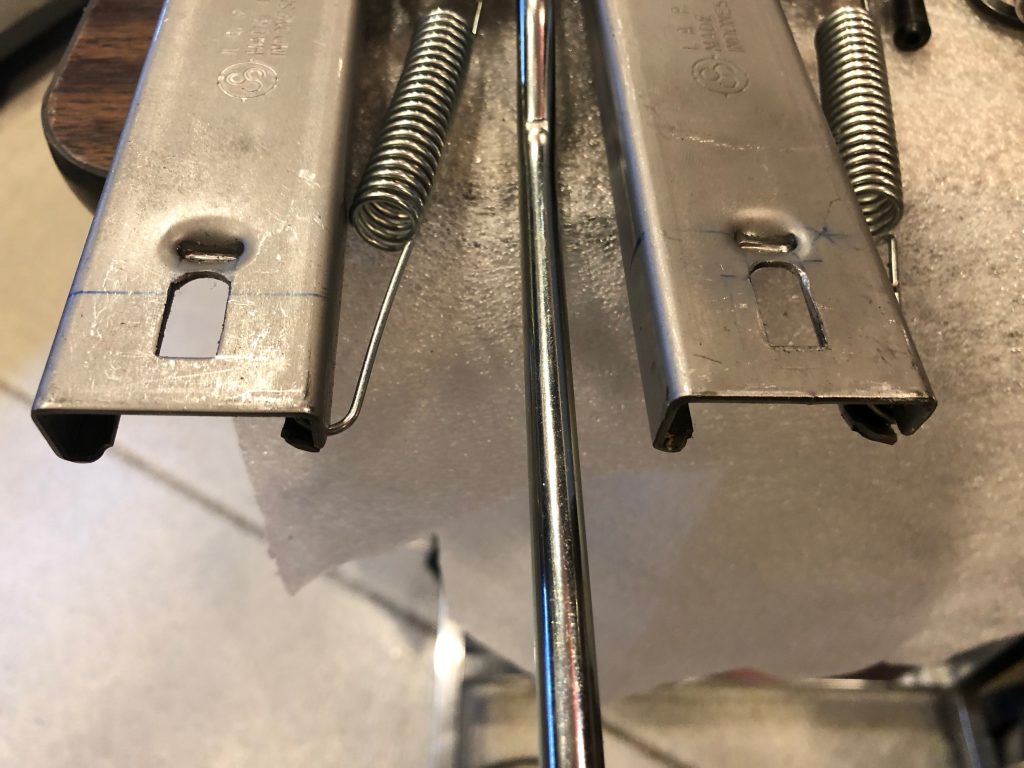
The upper part of the track is screwed to the seat, but the existing hoes aren’t spaced right to line up with the cross tubes in the seat frame. The FFR instructions have you elongate the hole at one end. I drilled a couple of 5/16″ hoes in the tracks just behind the existing square holes.

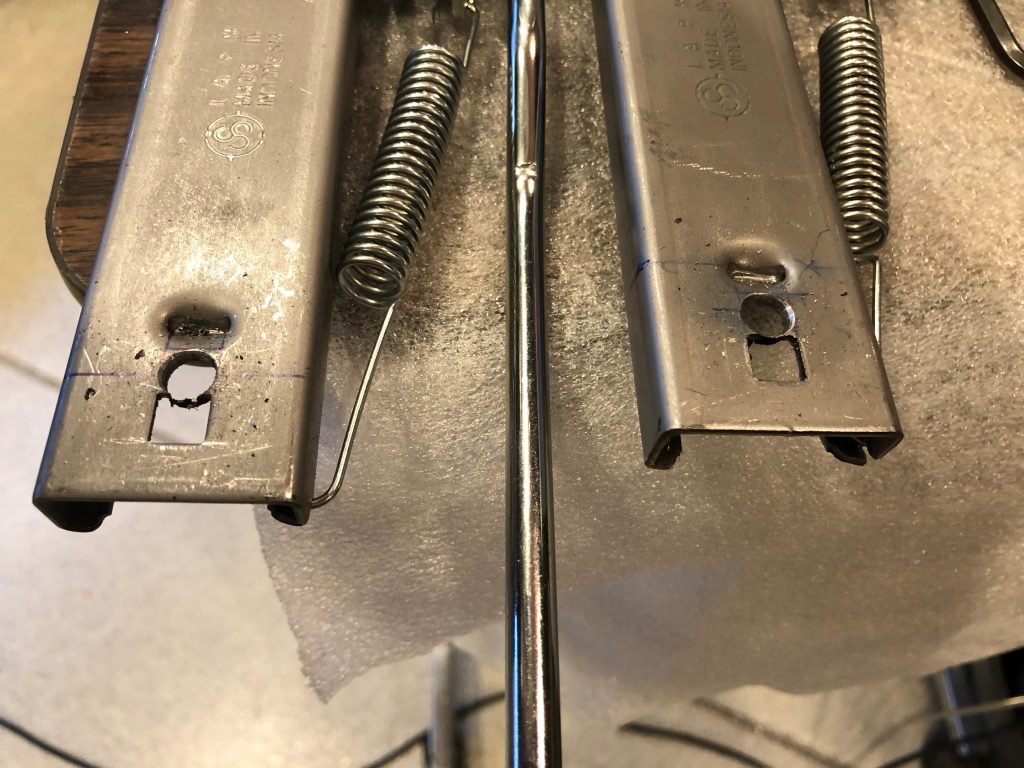
I used an air file to smooth out the sides. I didn’t need to square off the far end of the hole because it’s already radiused for the 5/16″ bolt that goes through it.

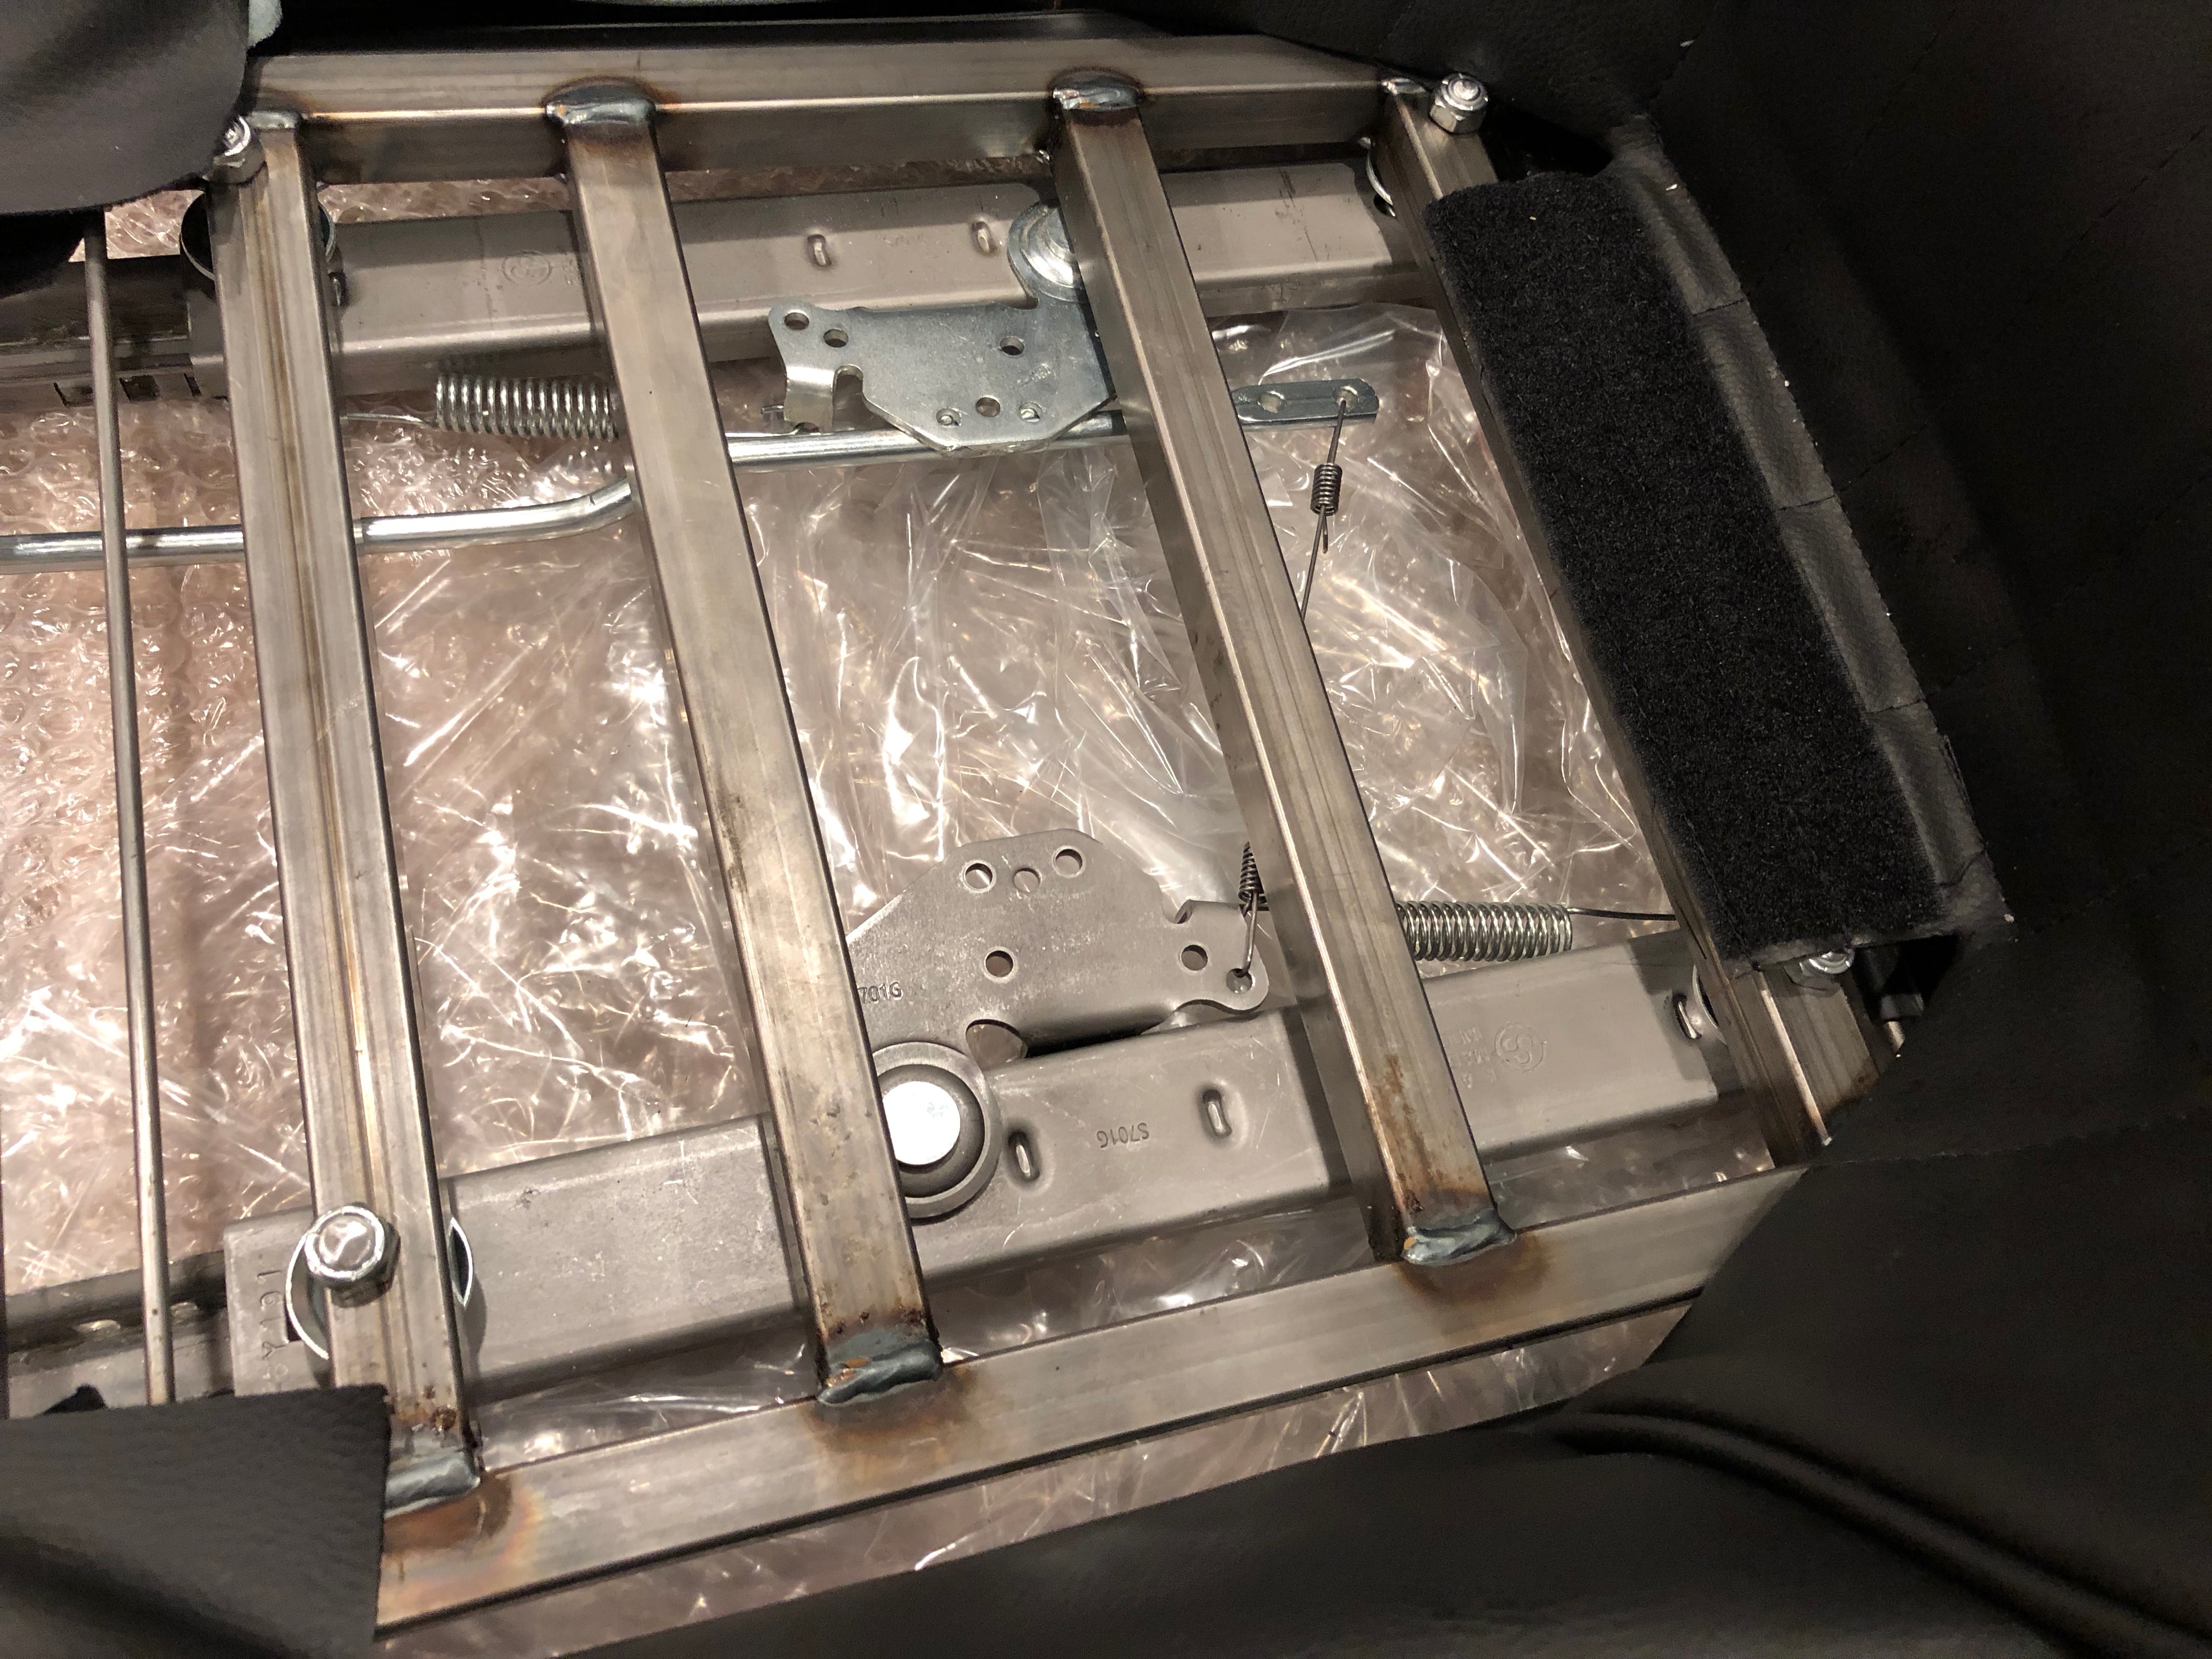
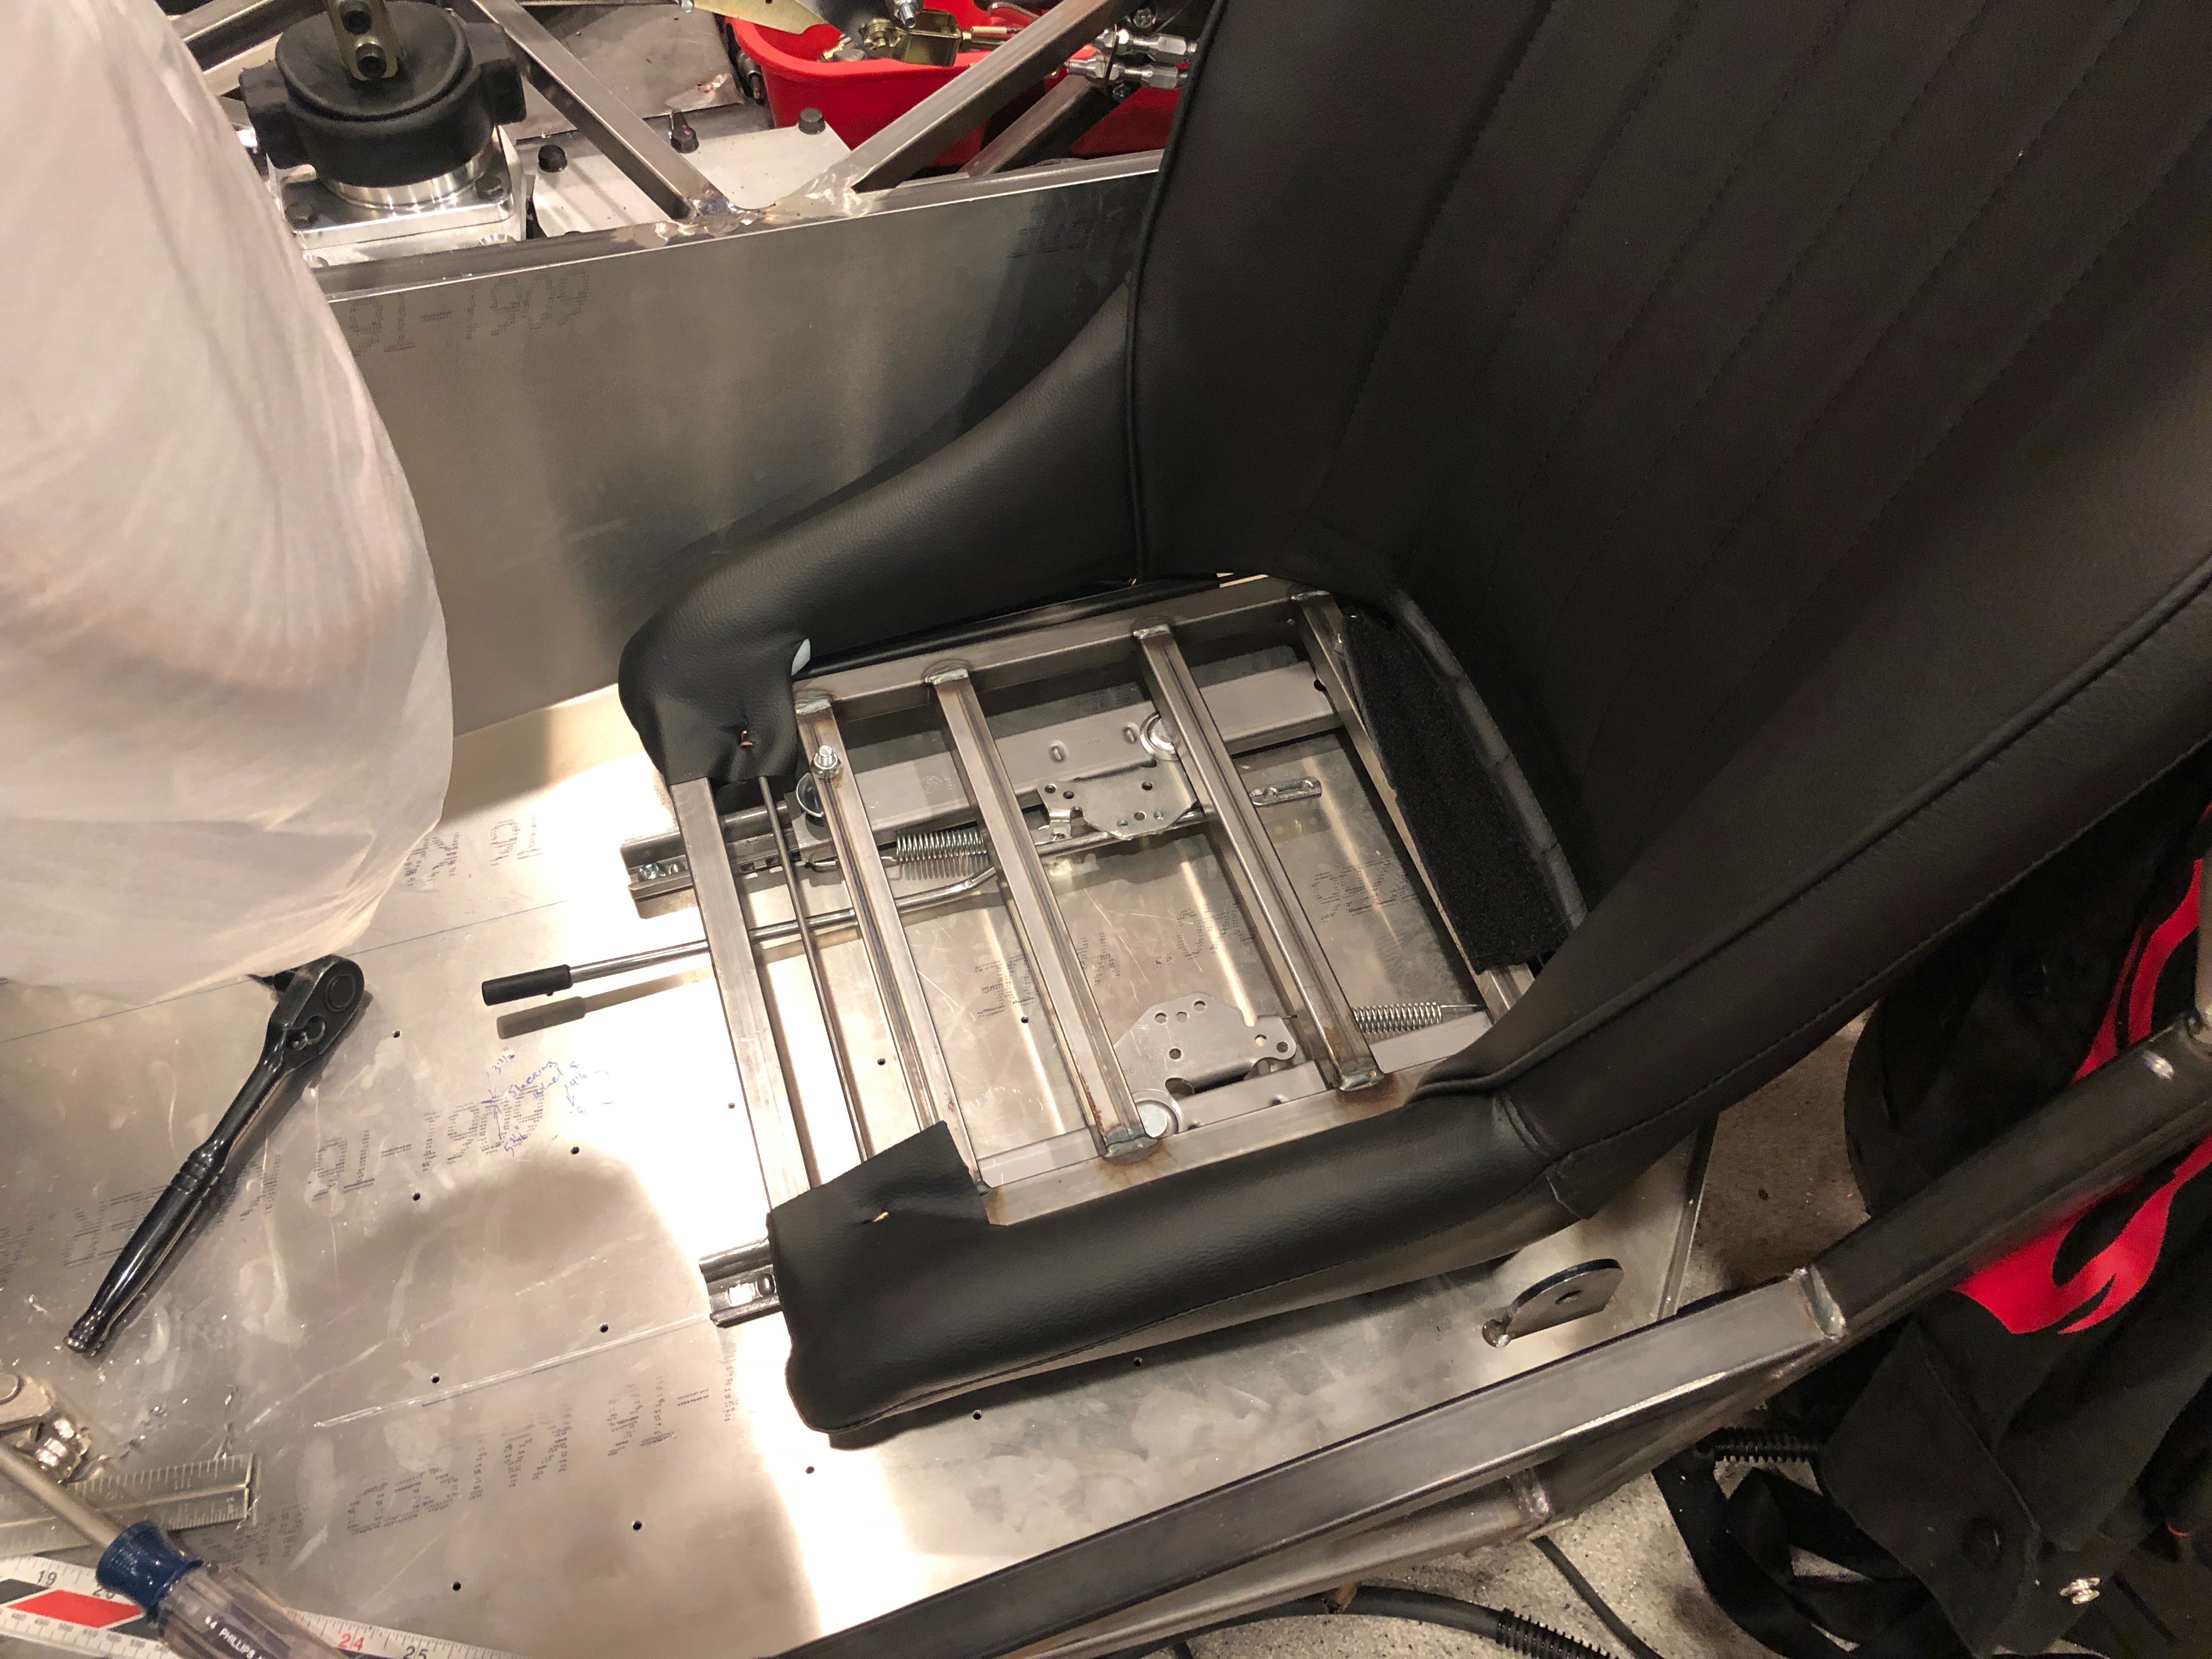
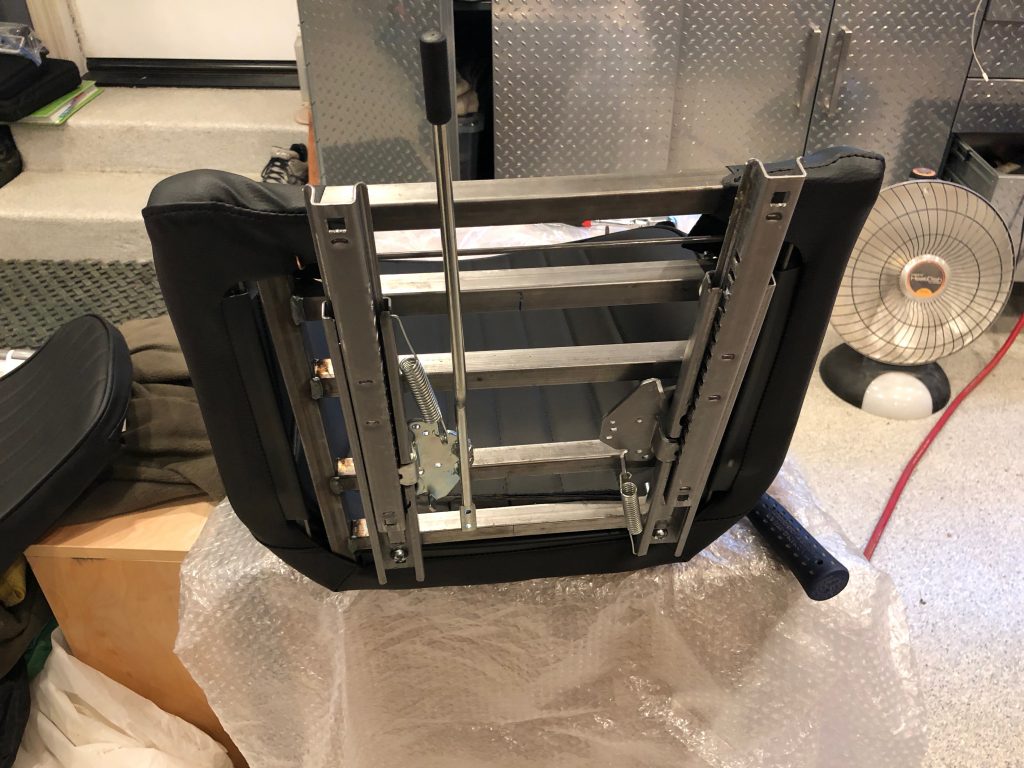
I then drilled holes in the bottom of the seat frame and installed the tracks. They’re slightly off center (by 13/16″) to align the center of the seat to the center of the steering wheel.

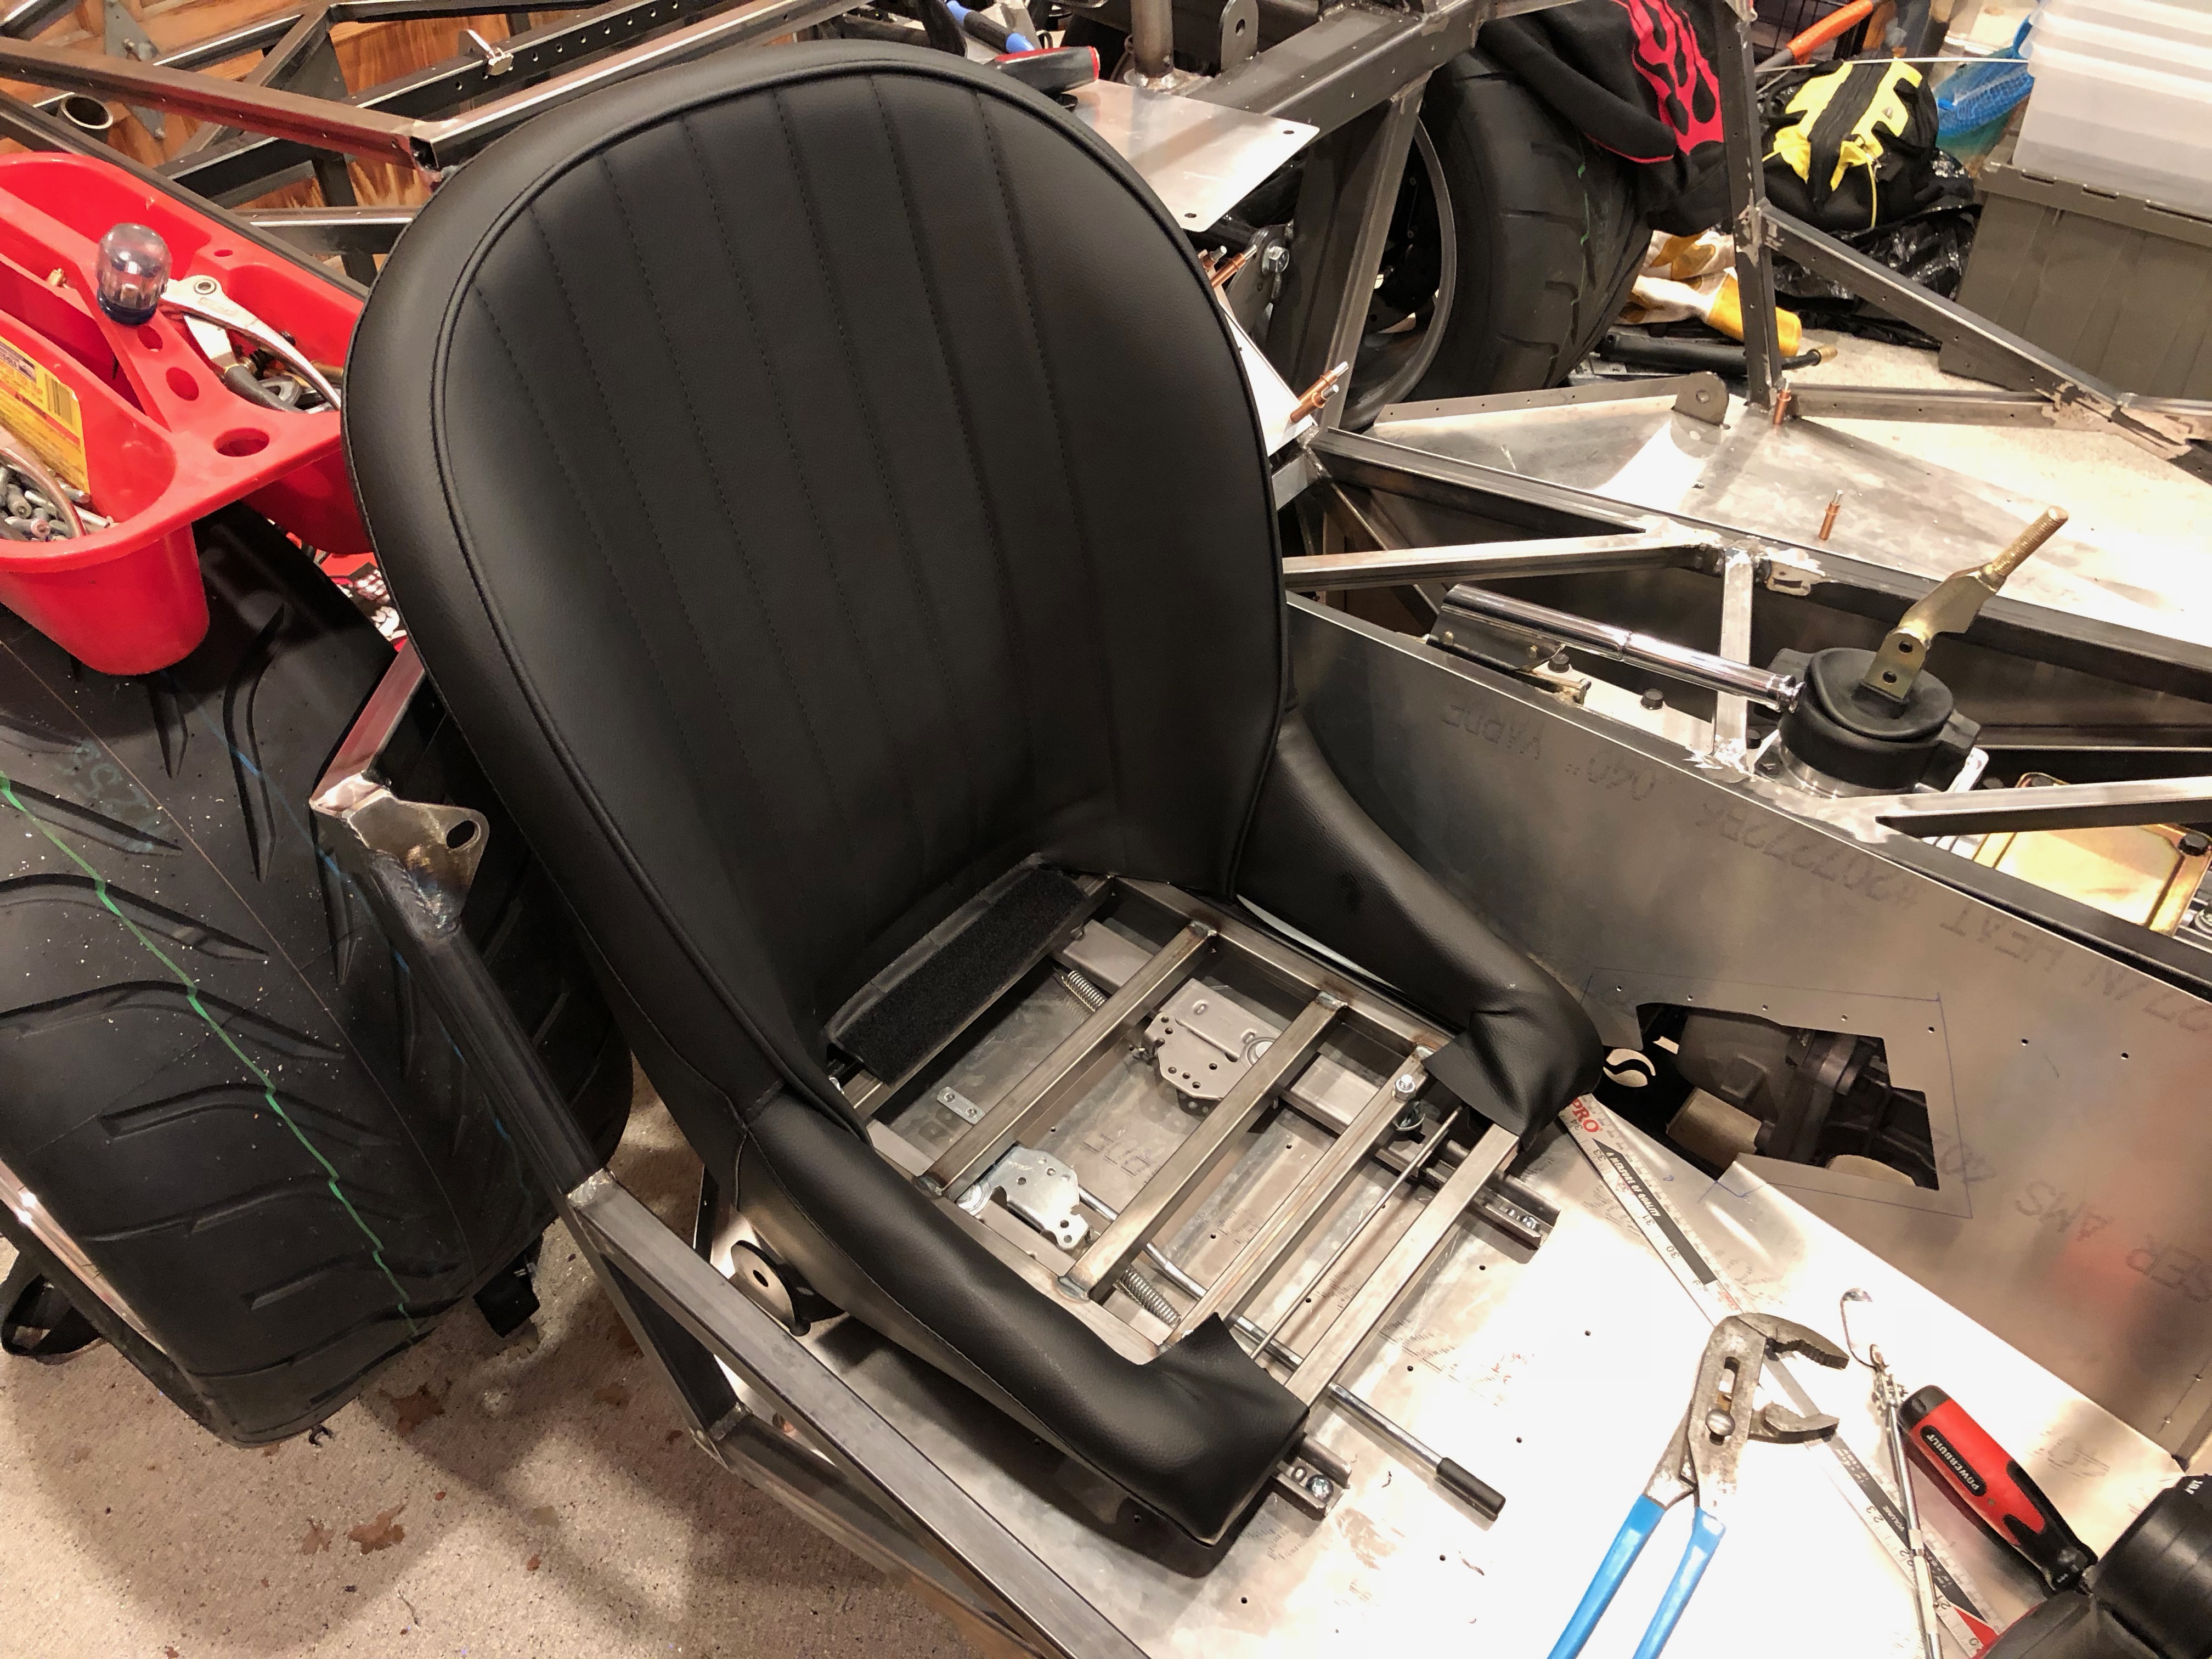
I reinstalled the seat and re-bolted the inside track to the 4″ round tube.

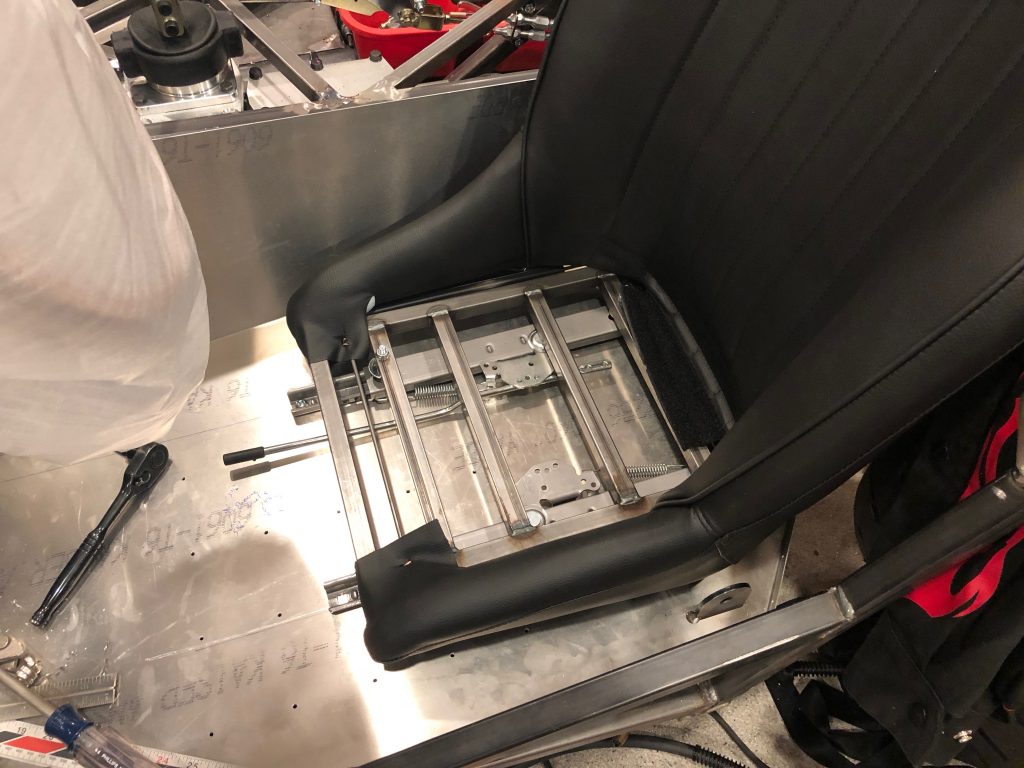
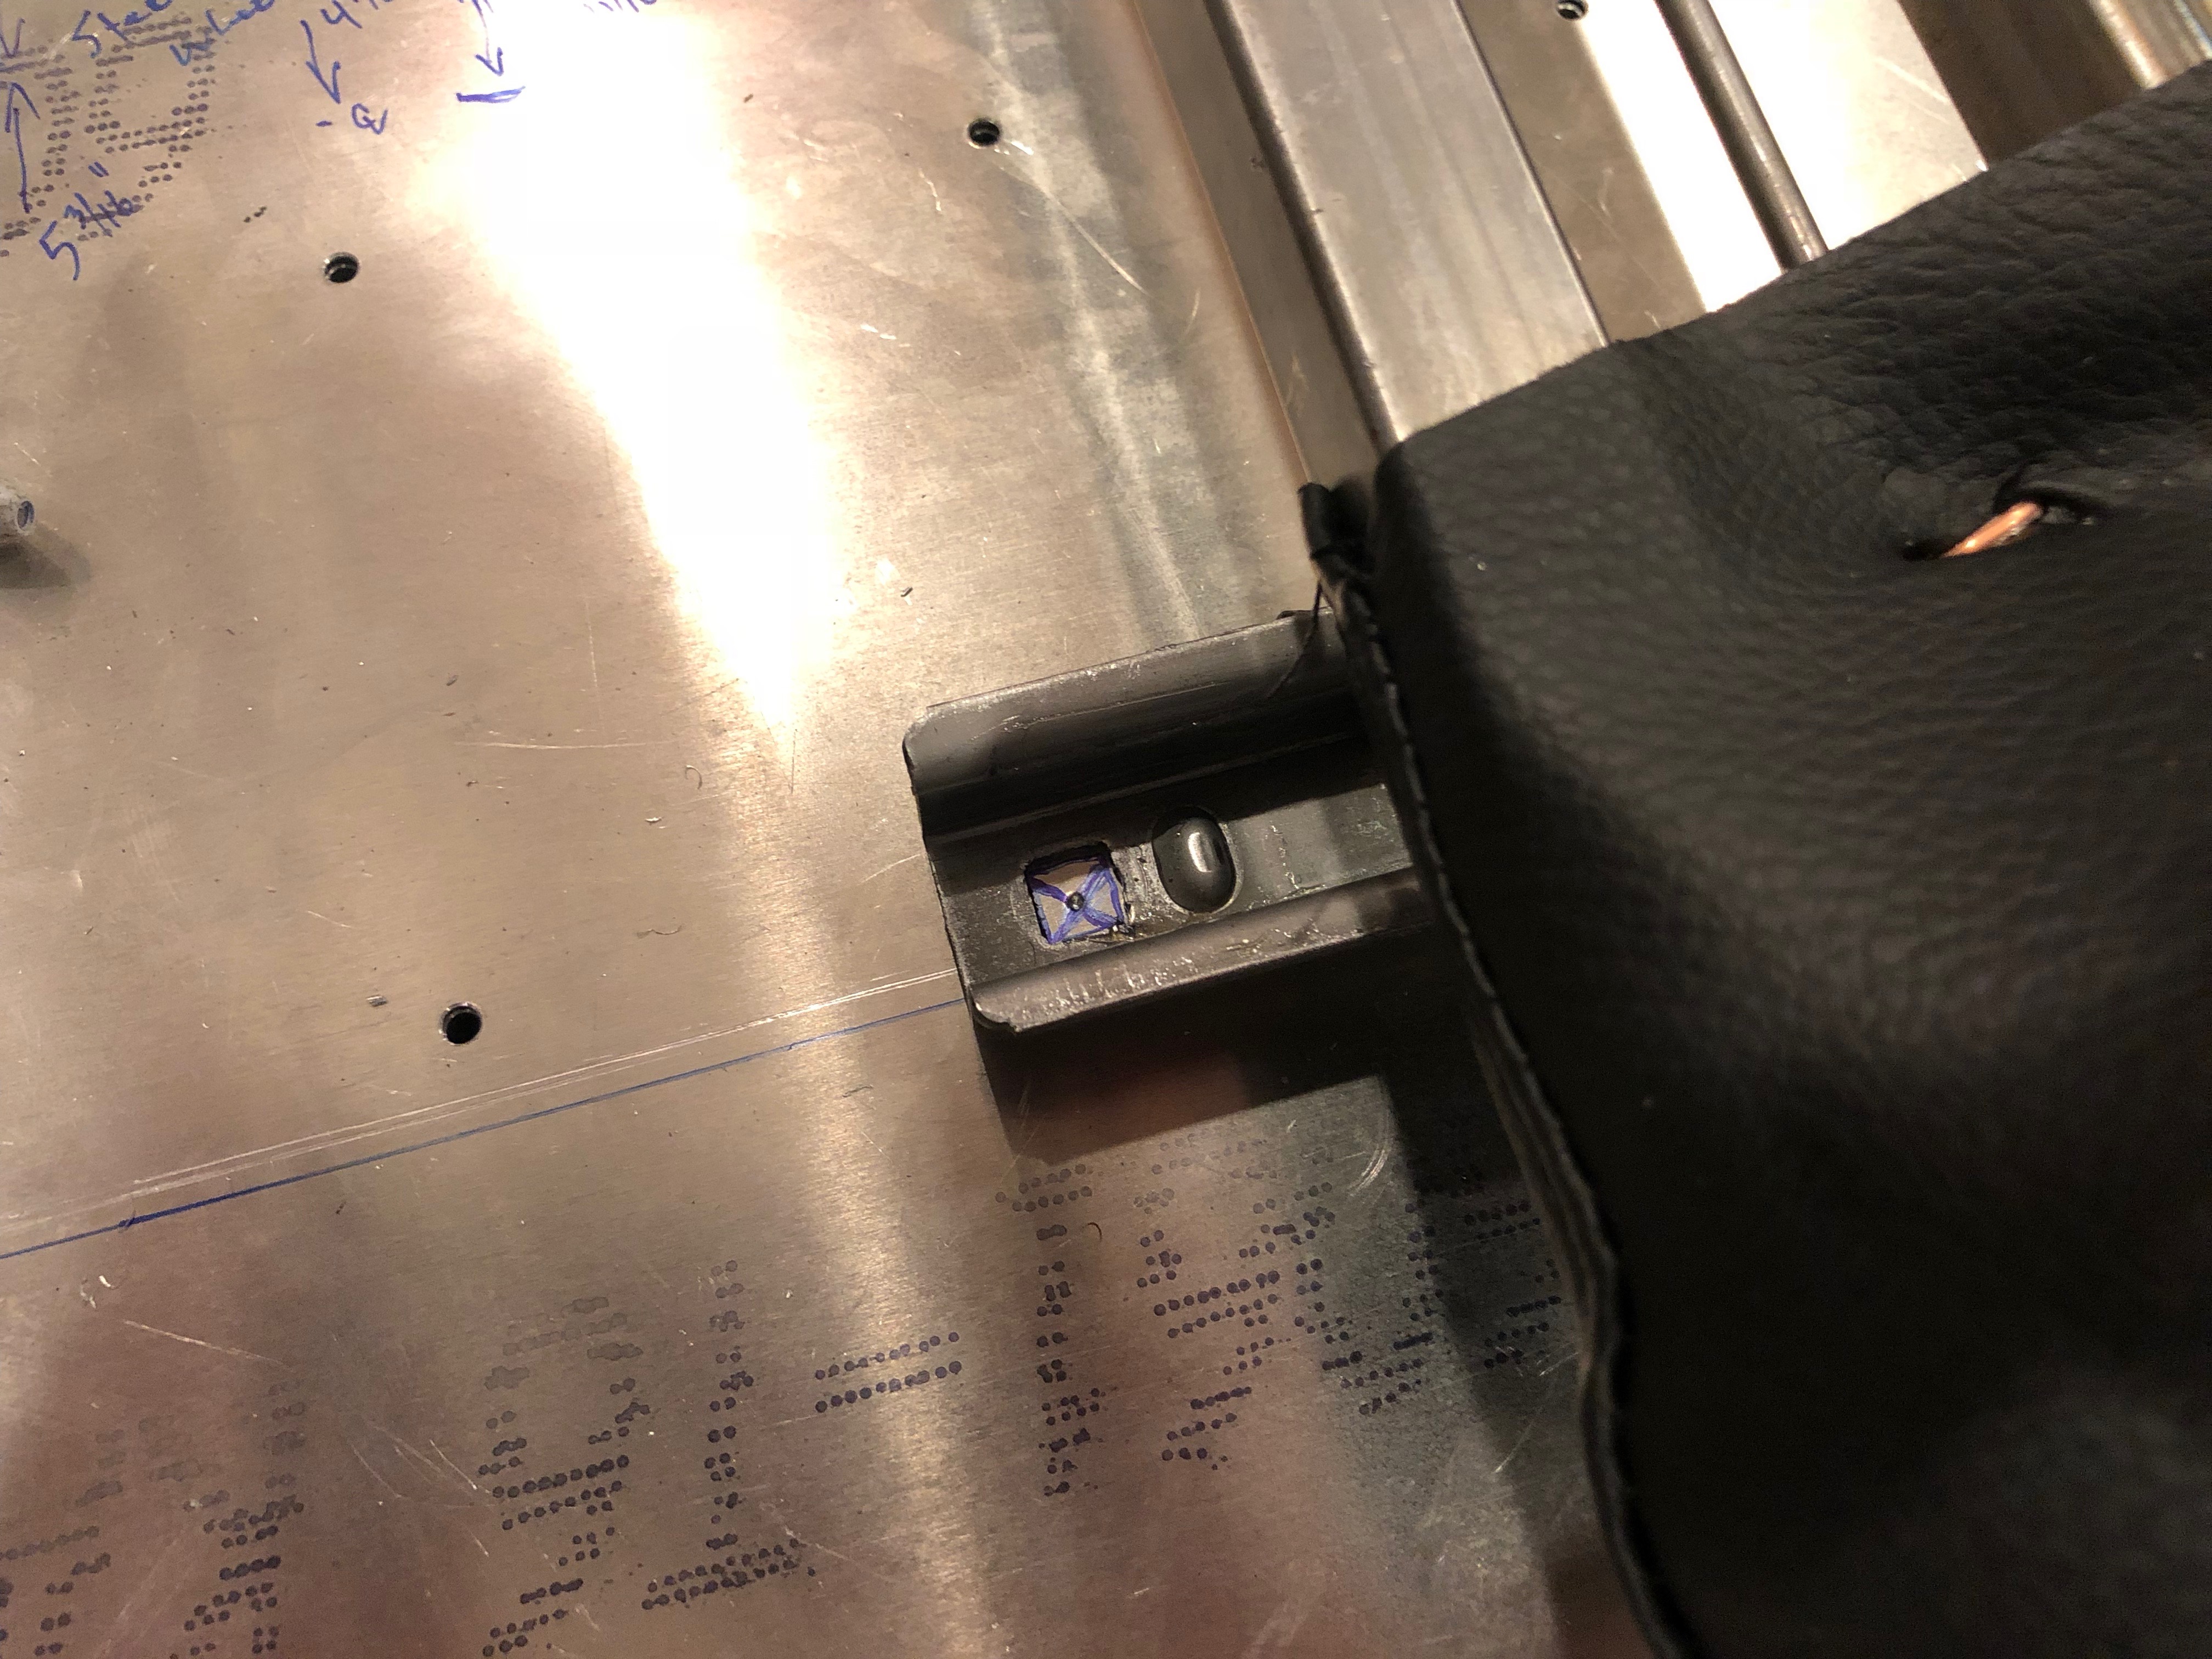
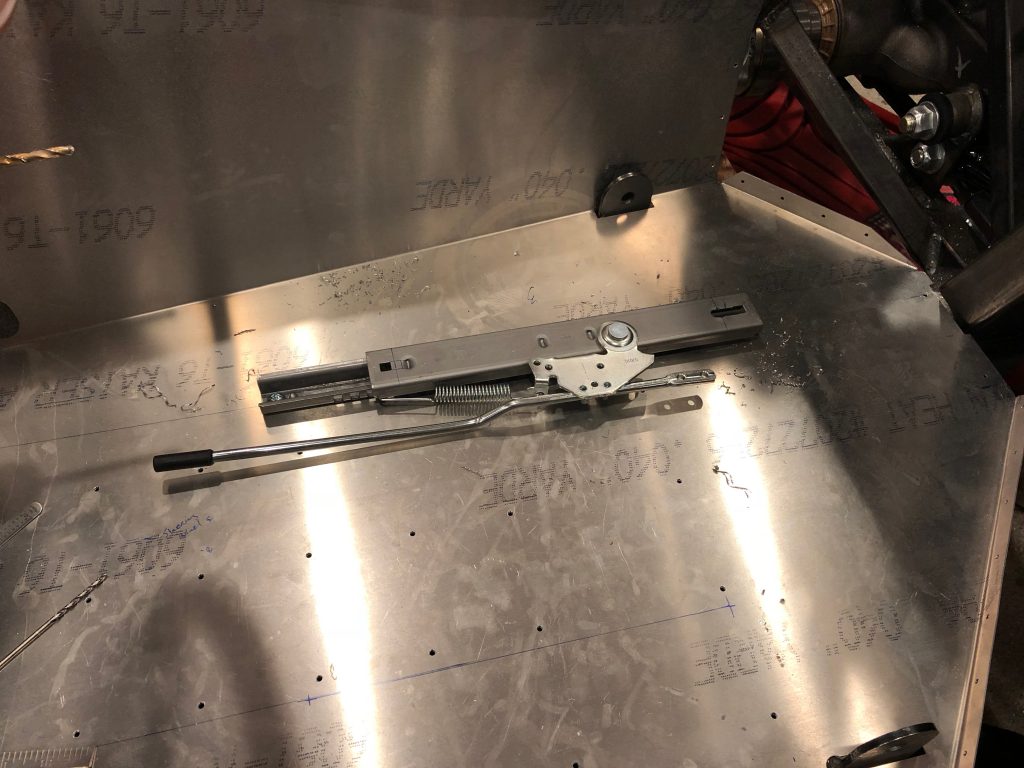
With the inside track locked into position and both tracks adjusted to the rearmost position, I marked where the forward hole should be drilled. The long blue line just below where I marked is where the plans specify that the outboard track should be installed. I shifted this track inboard slightly because it would have put the holes in the seat frame right through a weld.

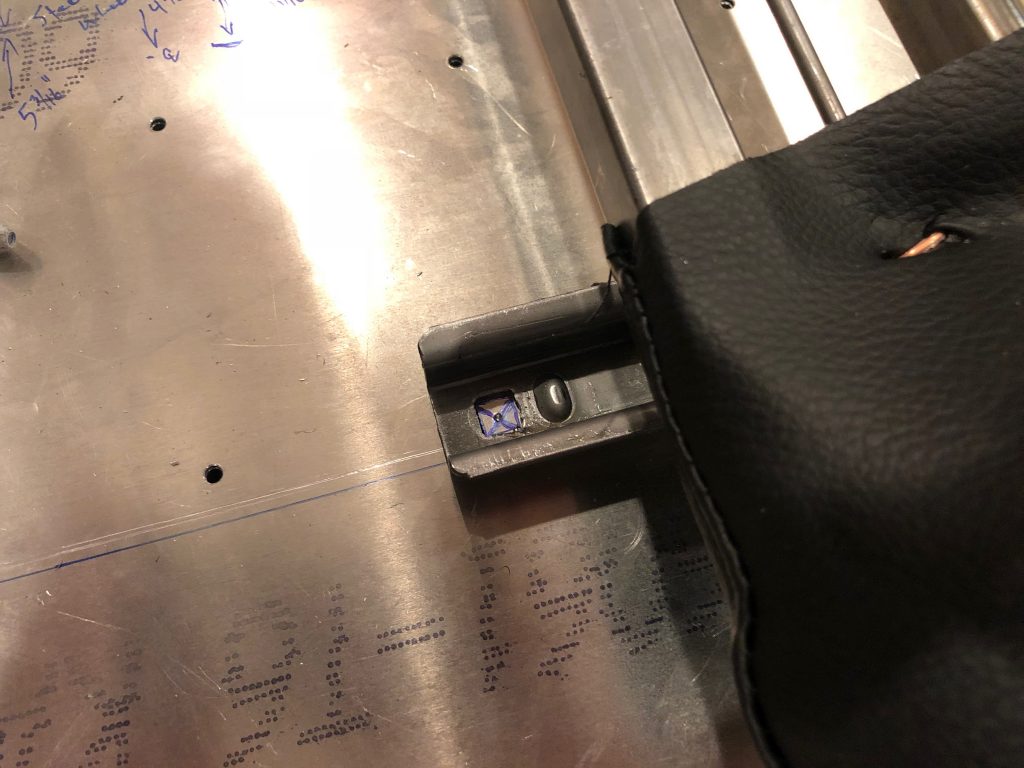
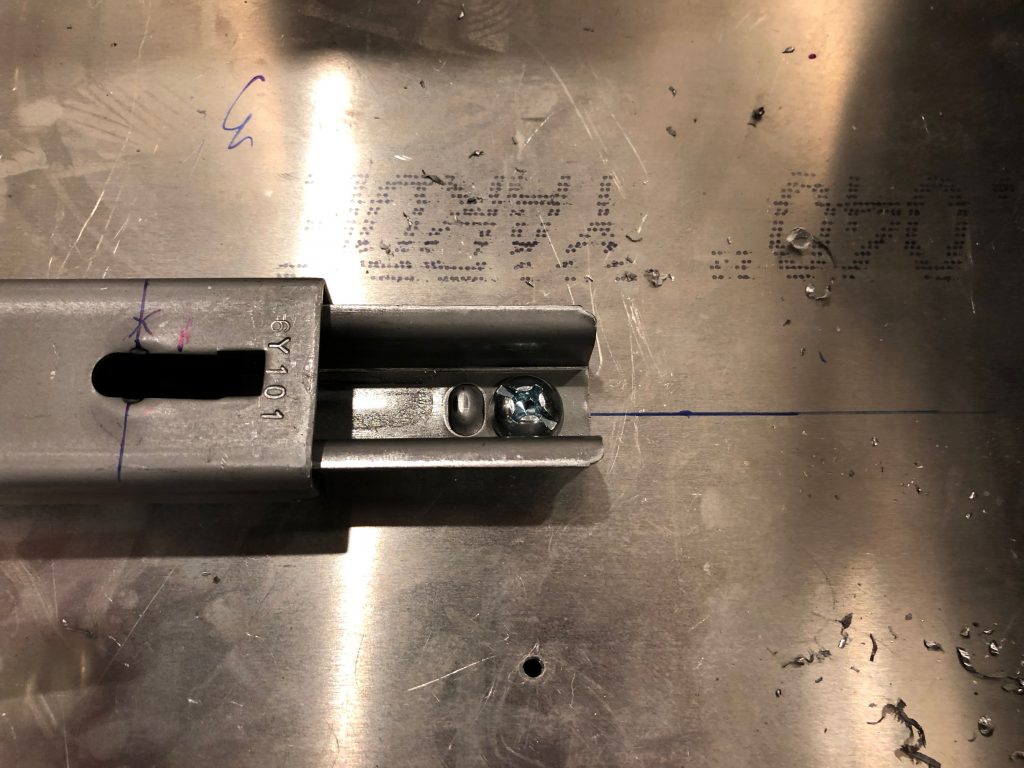
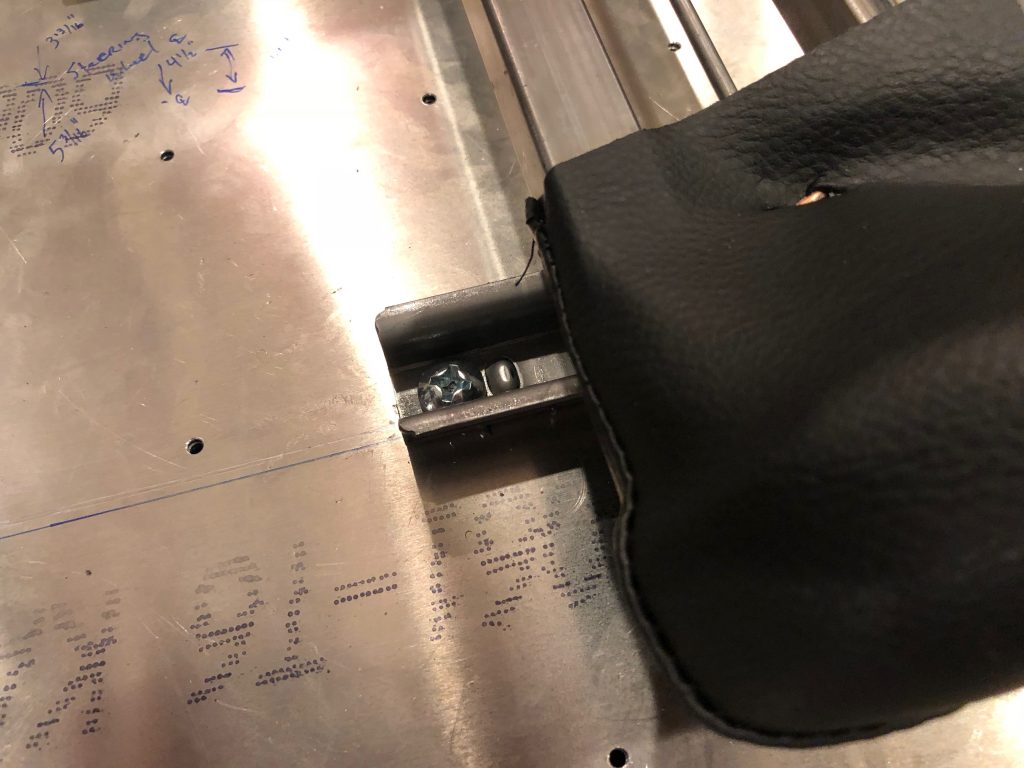
I drilled the hole and dropped in a screw to hold the track in place. This is drilled out to 5/16″ since it’s not tapped. I’ll ultimately drill it out further and install a spacer between the upper and lower steel plates.

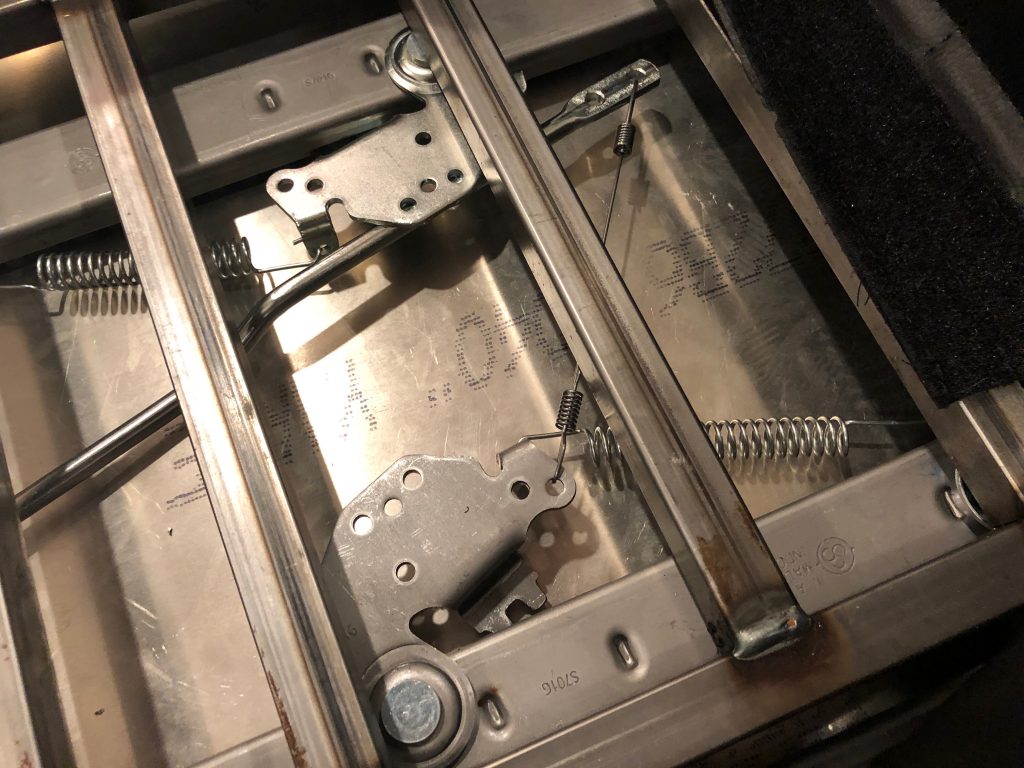
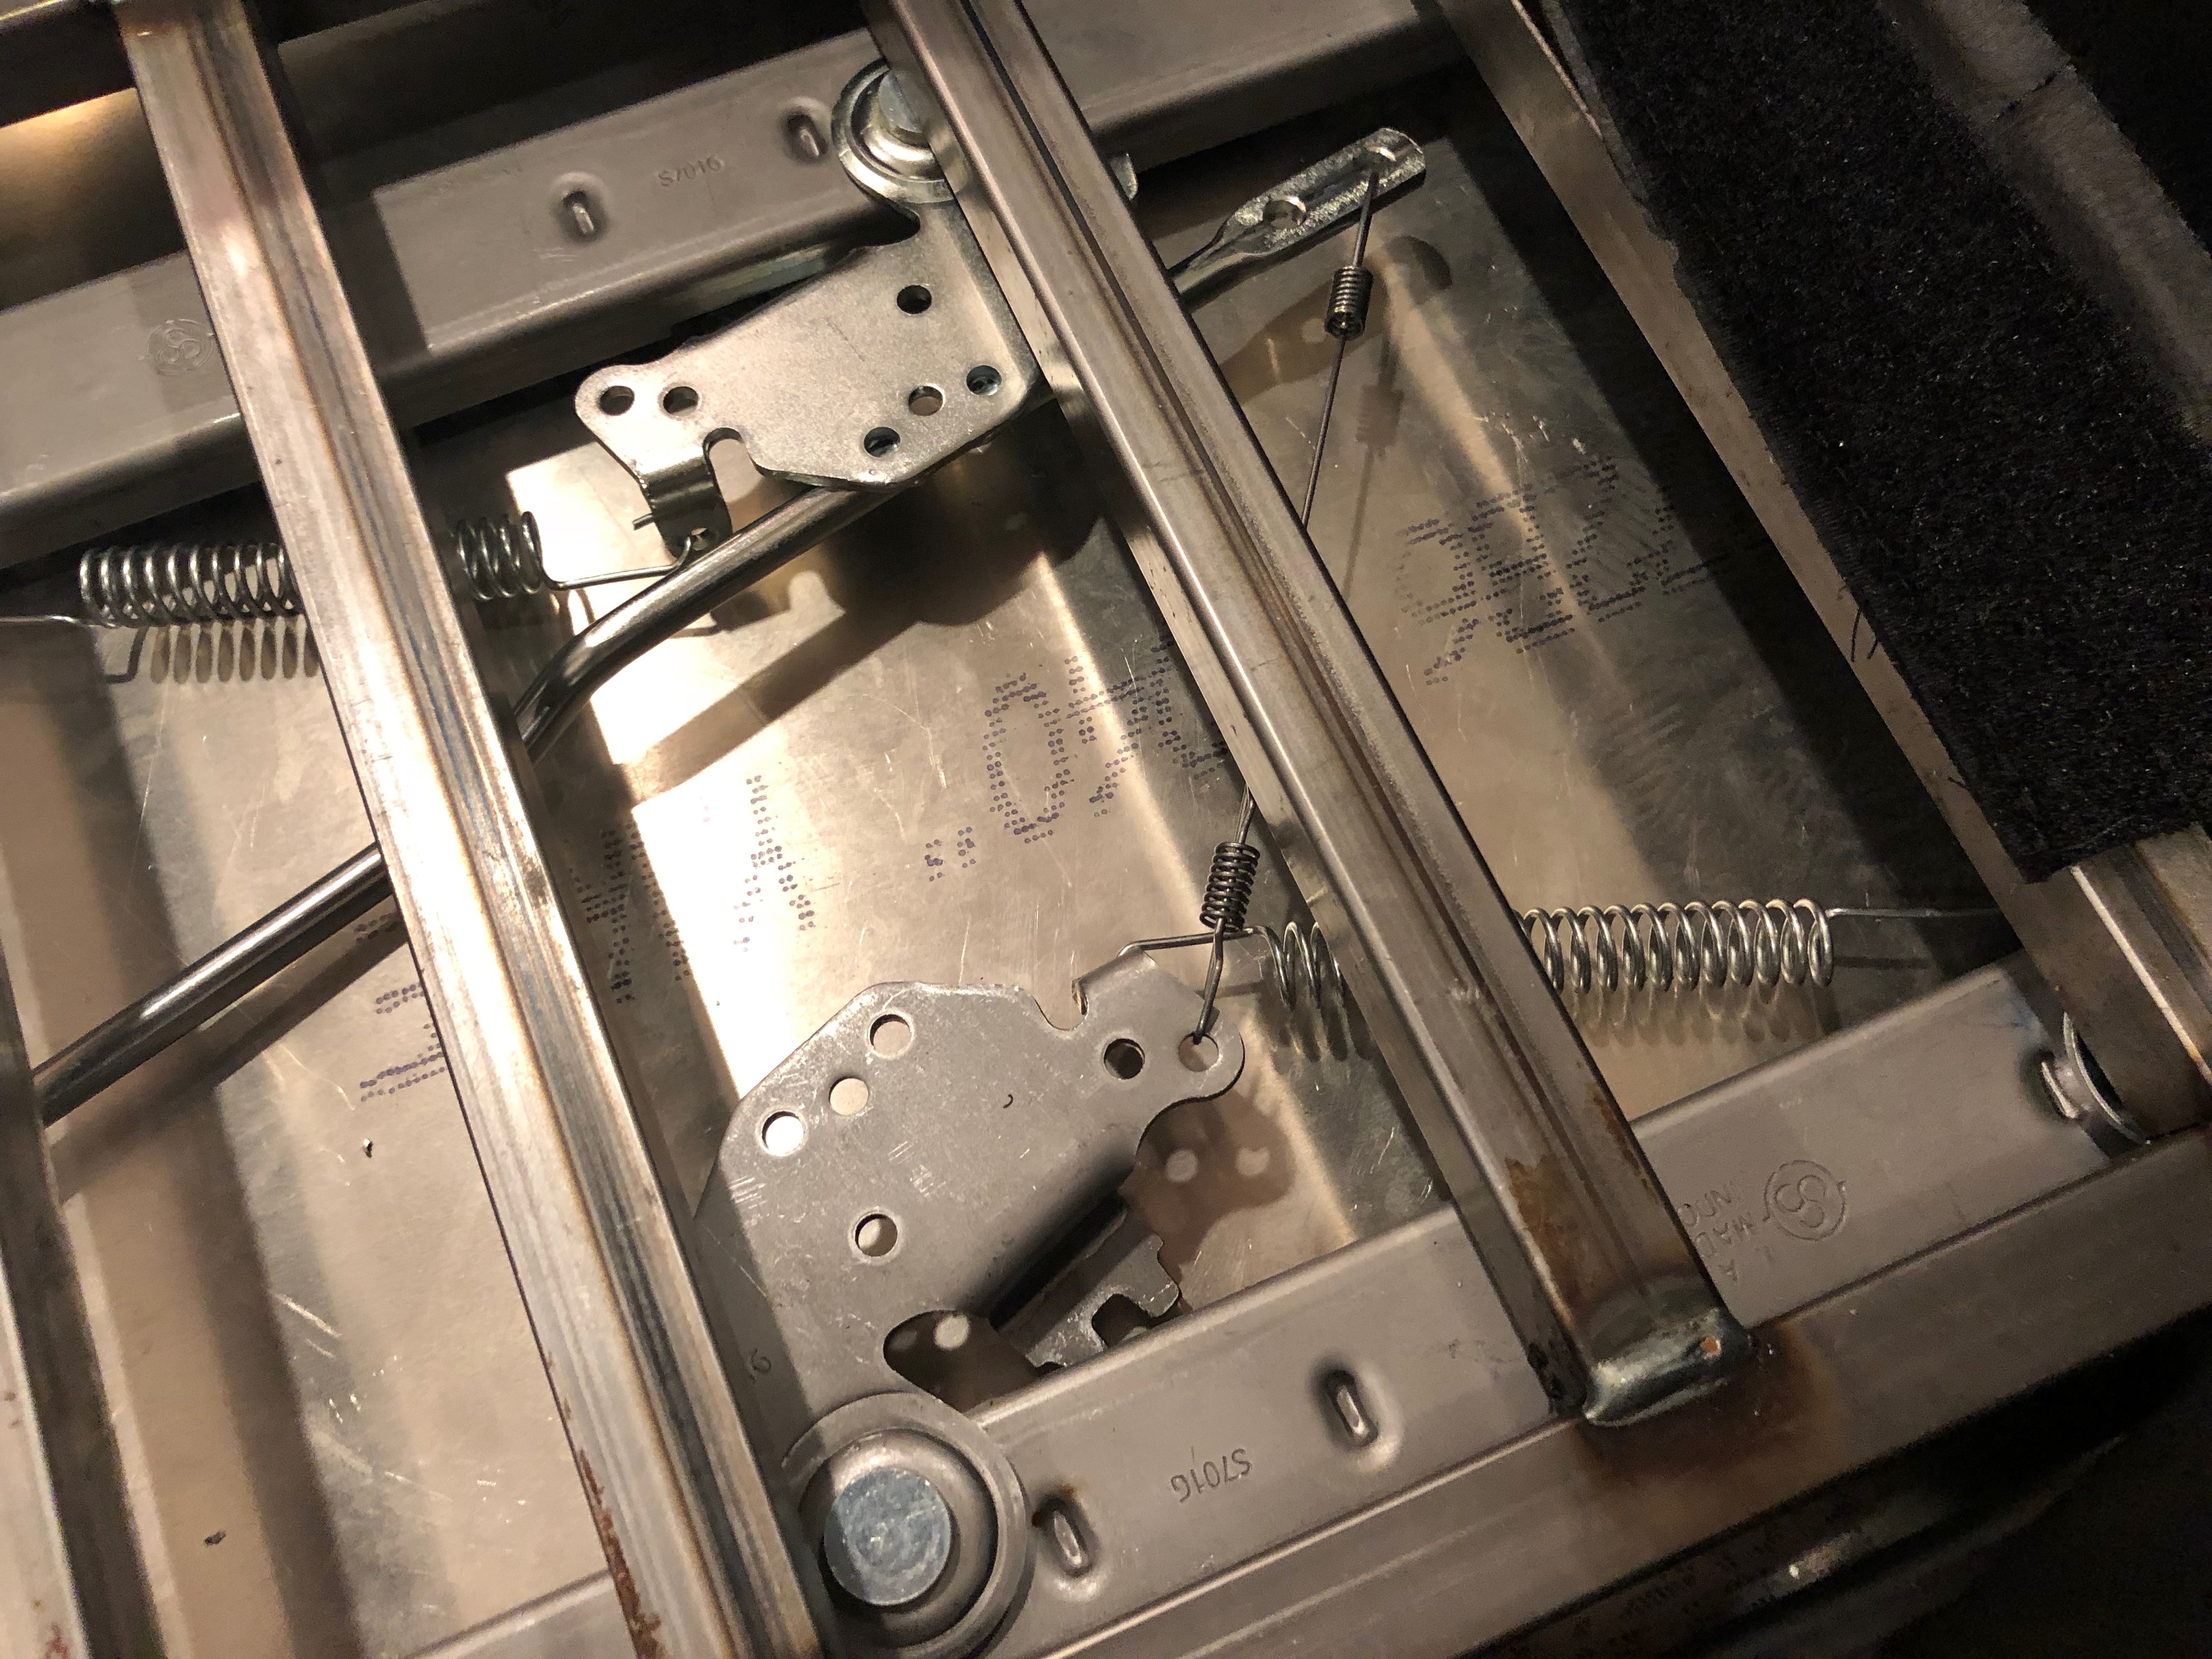
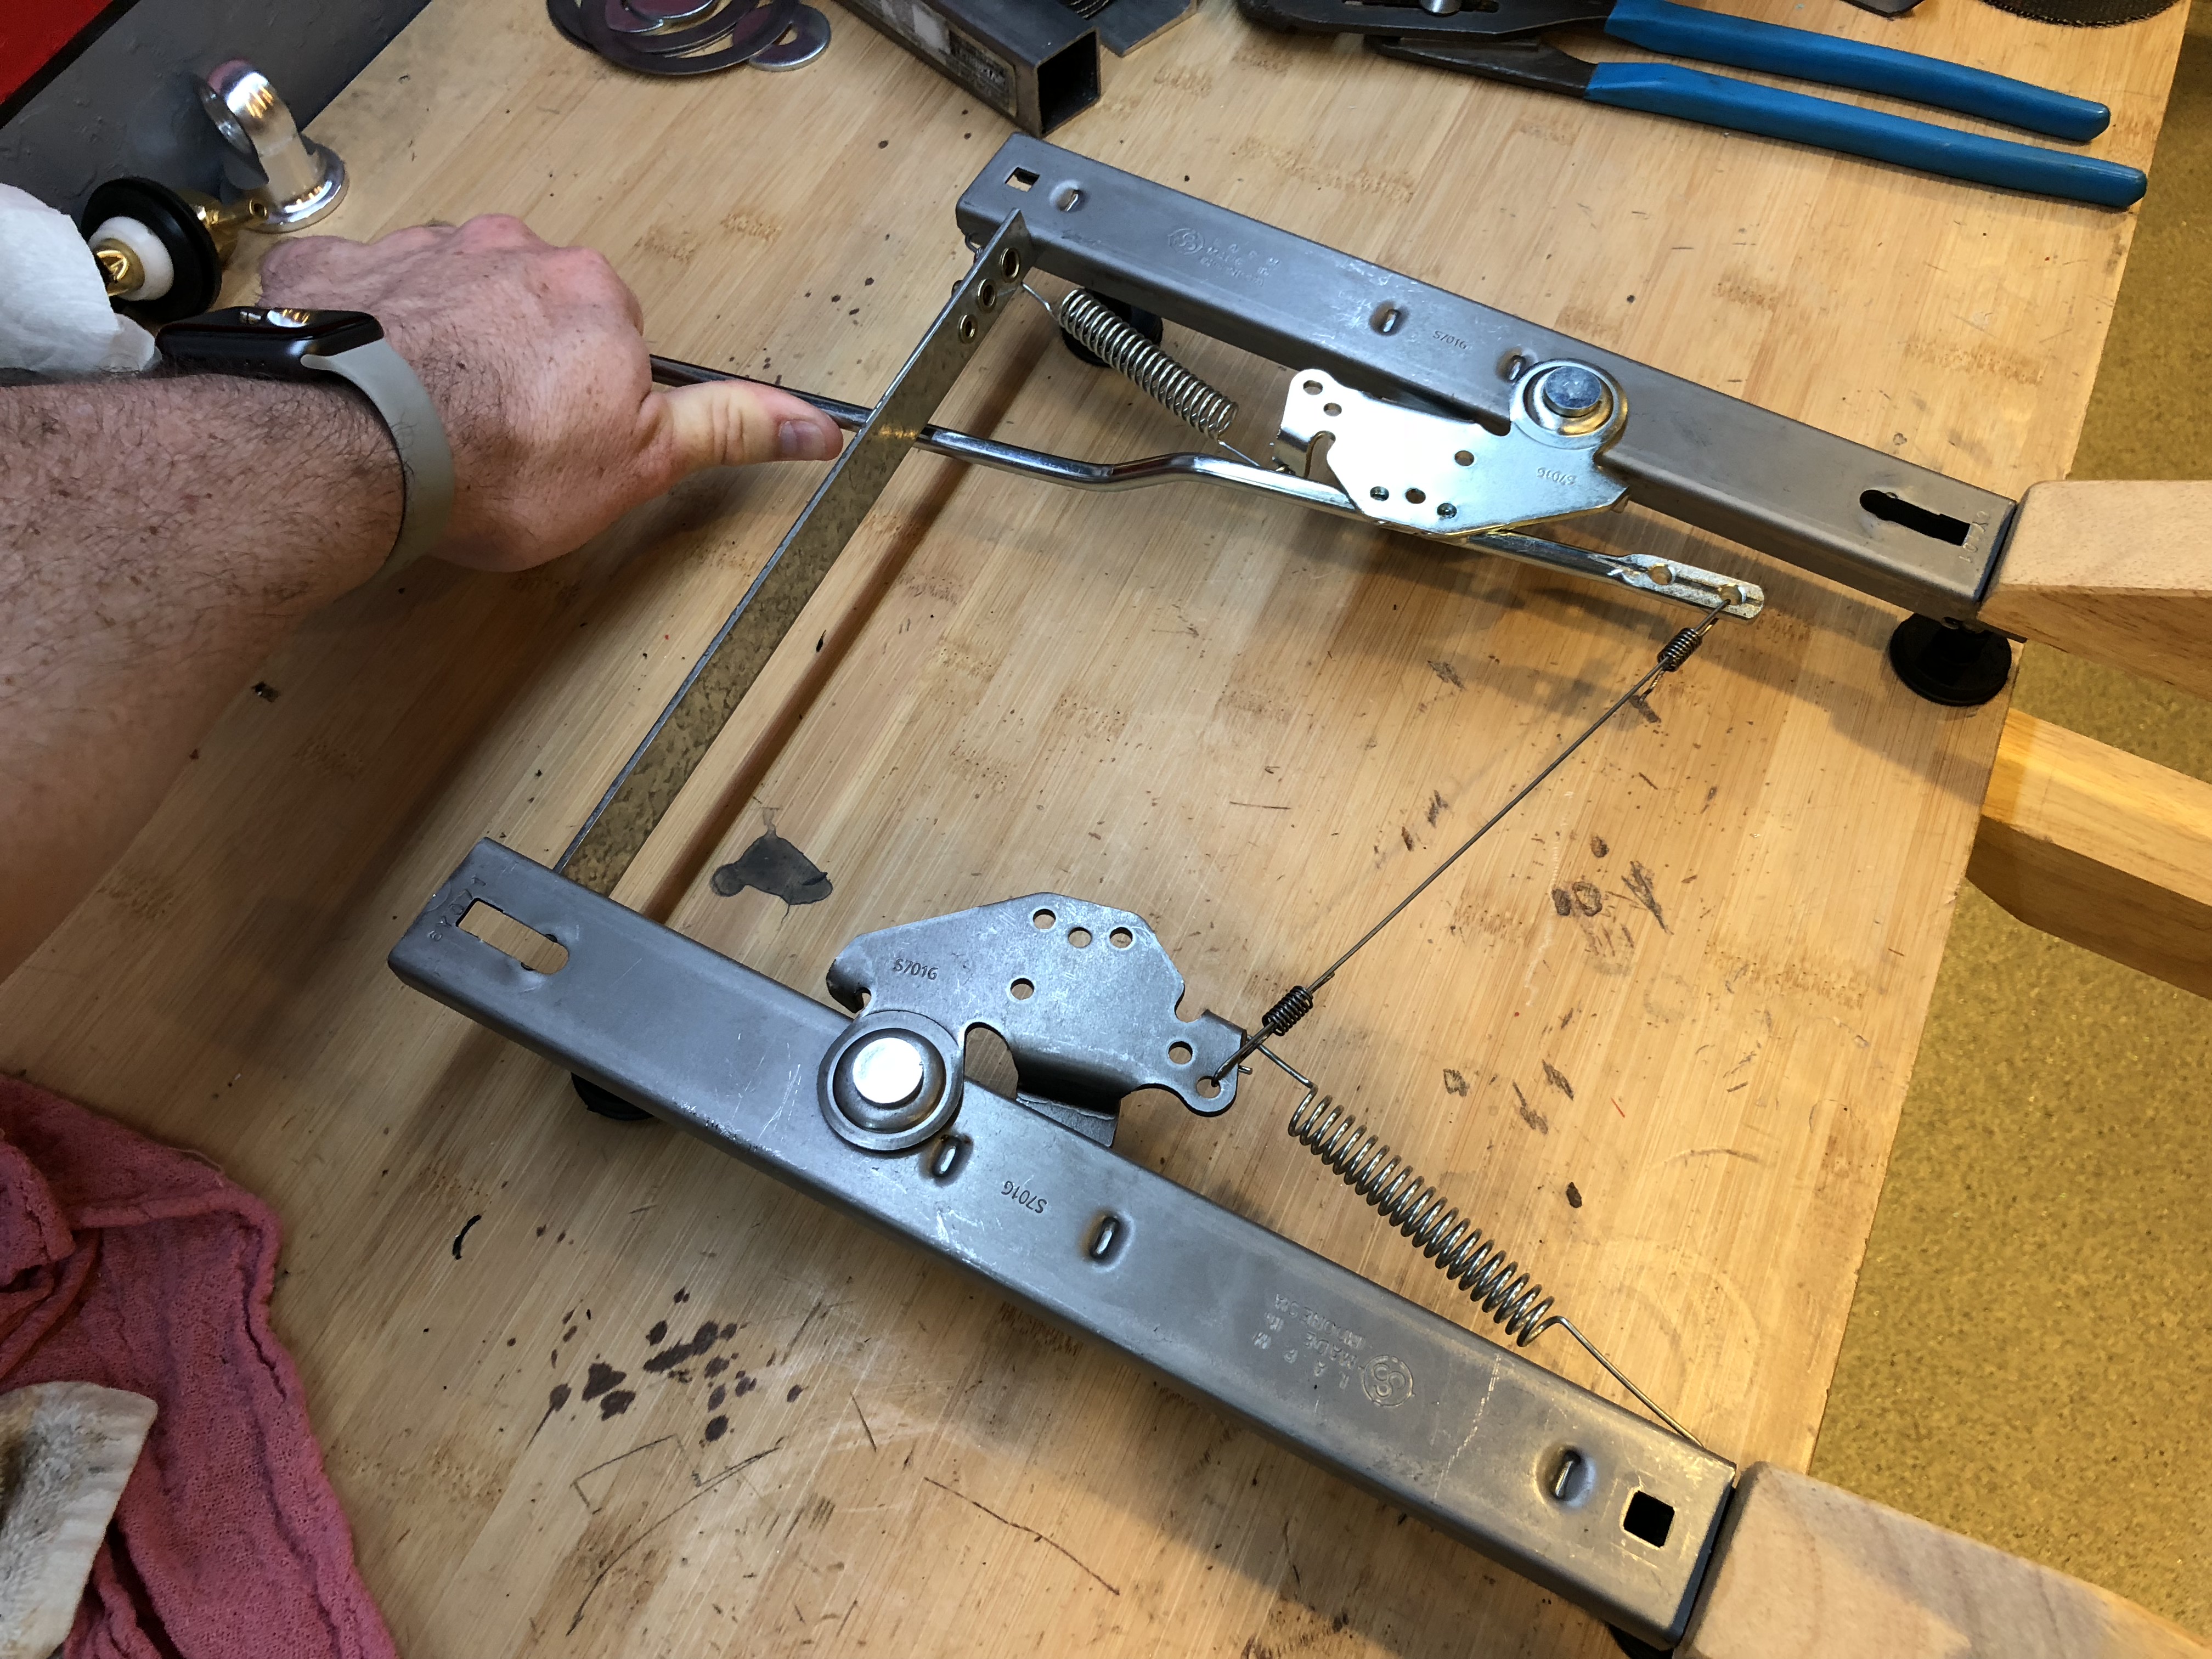
Before I can adjust the seats, I need to tie the two locking mechanisms together. I used the connecting wire that came with the kit, but I had to shorten it over 1″ since these are not remotely installed according to plans.

With the handle moved to the side, both locking mechanisms release at the same time. By installing these to the seat first and then attaching the inside seat track to the chassis, it guarantees that both locking mechanisms lock and release at exactly the same point. Without doing it this way, it would be easy to get one track slightly in front of the other and both sides might not lock at exactly the same time.

Figured Out Seat Track Mechanism

Most builders just bolt the seats to the floor, but that won’t work for us. Jenn and I are nearly one foot different in height (5′ 4 3/4″ vs 6′ 4″), so we have to have an adjustable seat. Factory Five sells a seat track that works for the Roadster, but it only locks on one side. This won’t pass the technical inspection at some tracks, so I decided to see if I could find a seat track that has dual locks that could be made to work with the Roadster seats.

This is a set of Summit Racing seat brackets (part #G1153). It appears to be the same exact manufacturer and part as the one FFR sells, but it has dual locks. The instructions specify that the upper bracket in this picture is installed pointing the other way (rotated 180º from what is shown in this picture). This puts the handle on the outside of the seat track. Adjusting the seat would require swinging the handle even further outside the seat track which is not something there’s room for in the Roadster. Instead, I reversed that track and tied the linkage together using the extension on the adjustment arm.

I clamped the tracks to the table and spaced the front ends apart with a piece of scrap metal. This works beautifully and both sides lock and unlock together. I can’t use the included linkage (shown) since this puts the tracks too far apart, but I can easily use a piece of safety wire and fabricate a linkage of the exact right length.