Poured Final Slab and Stairs

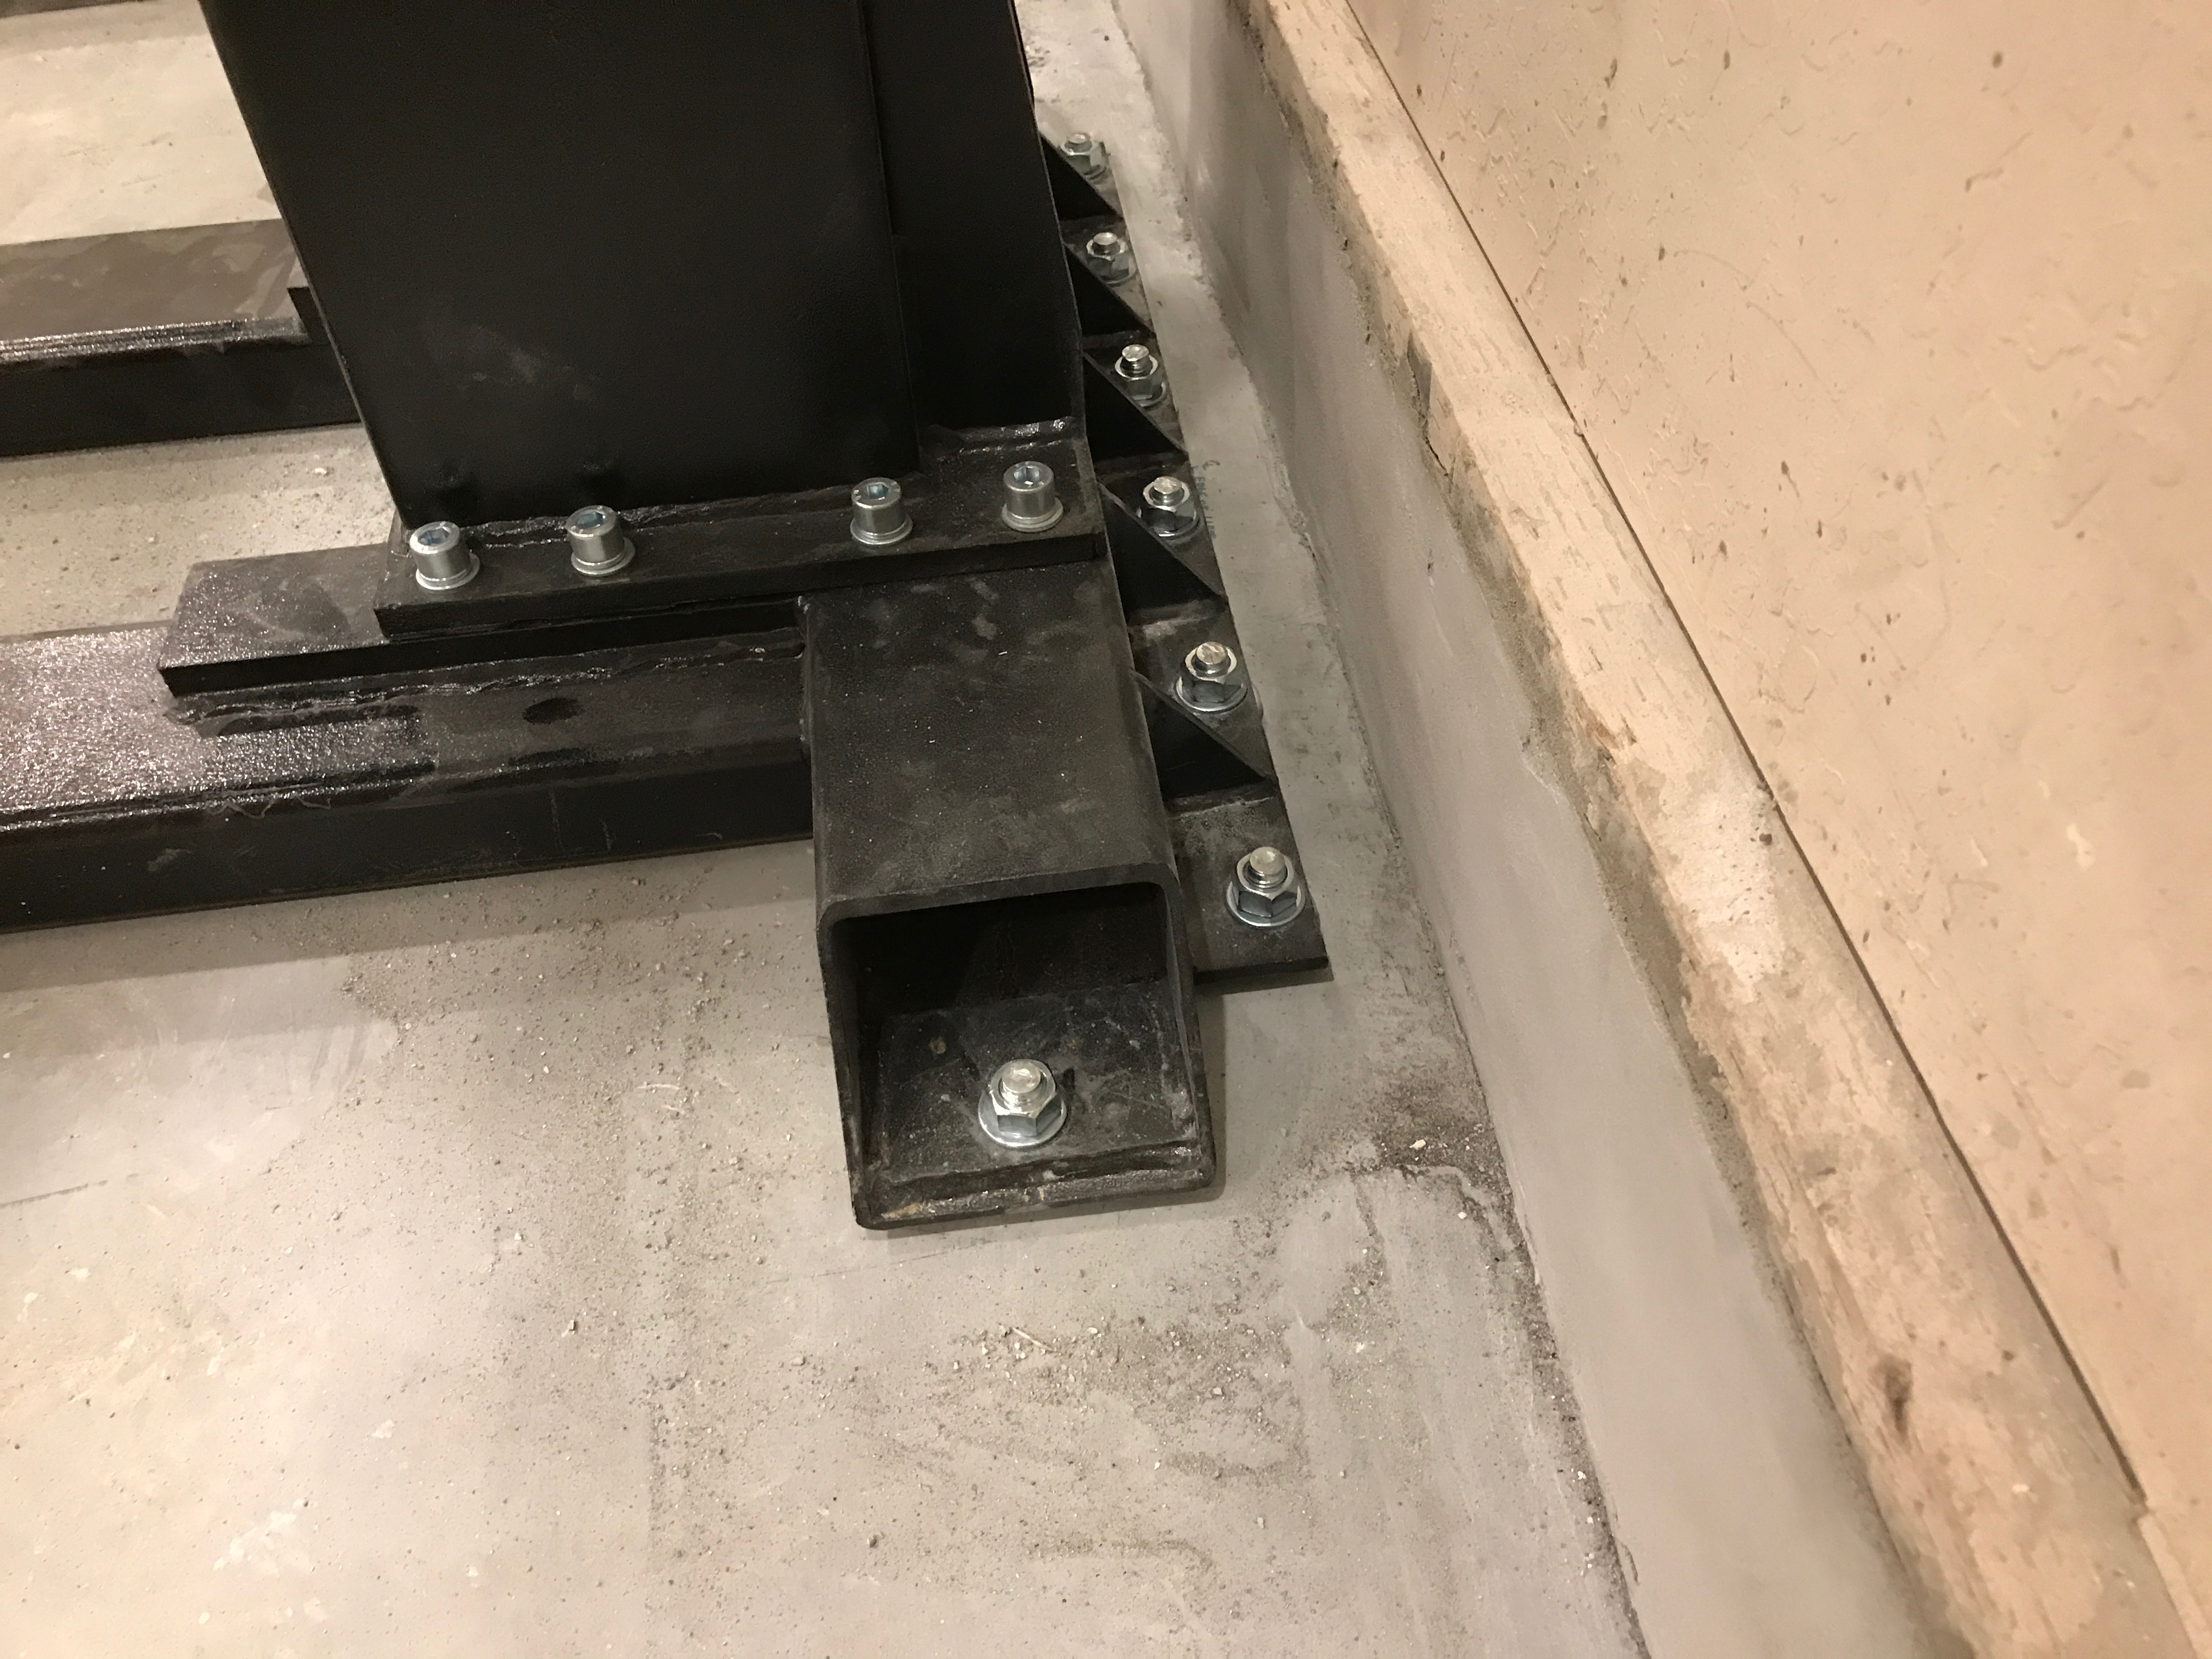
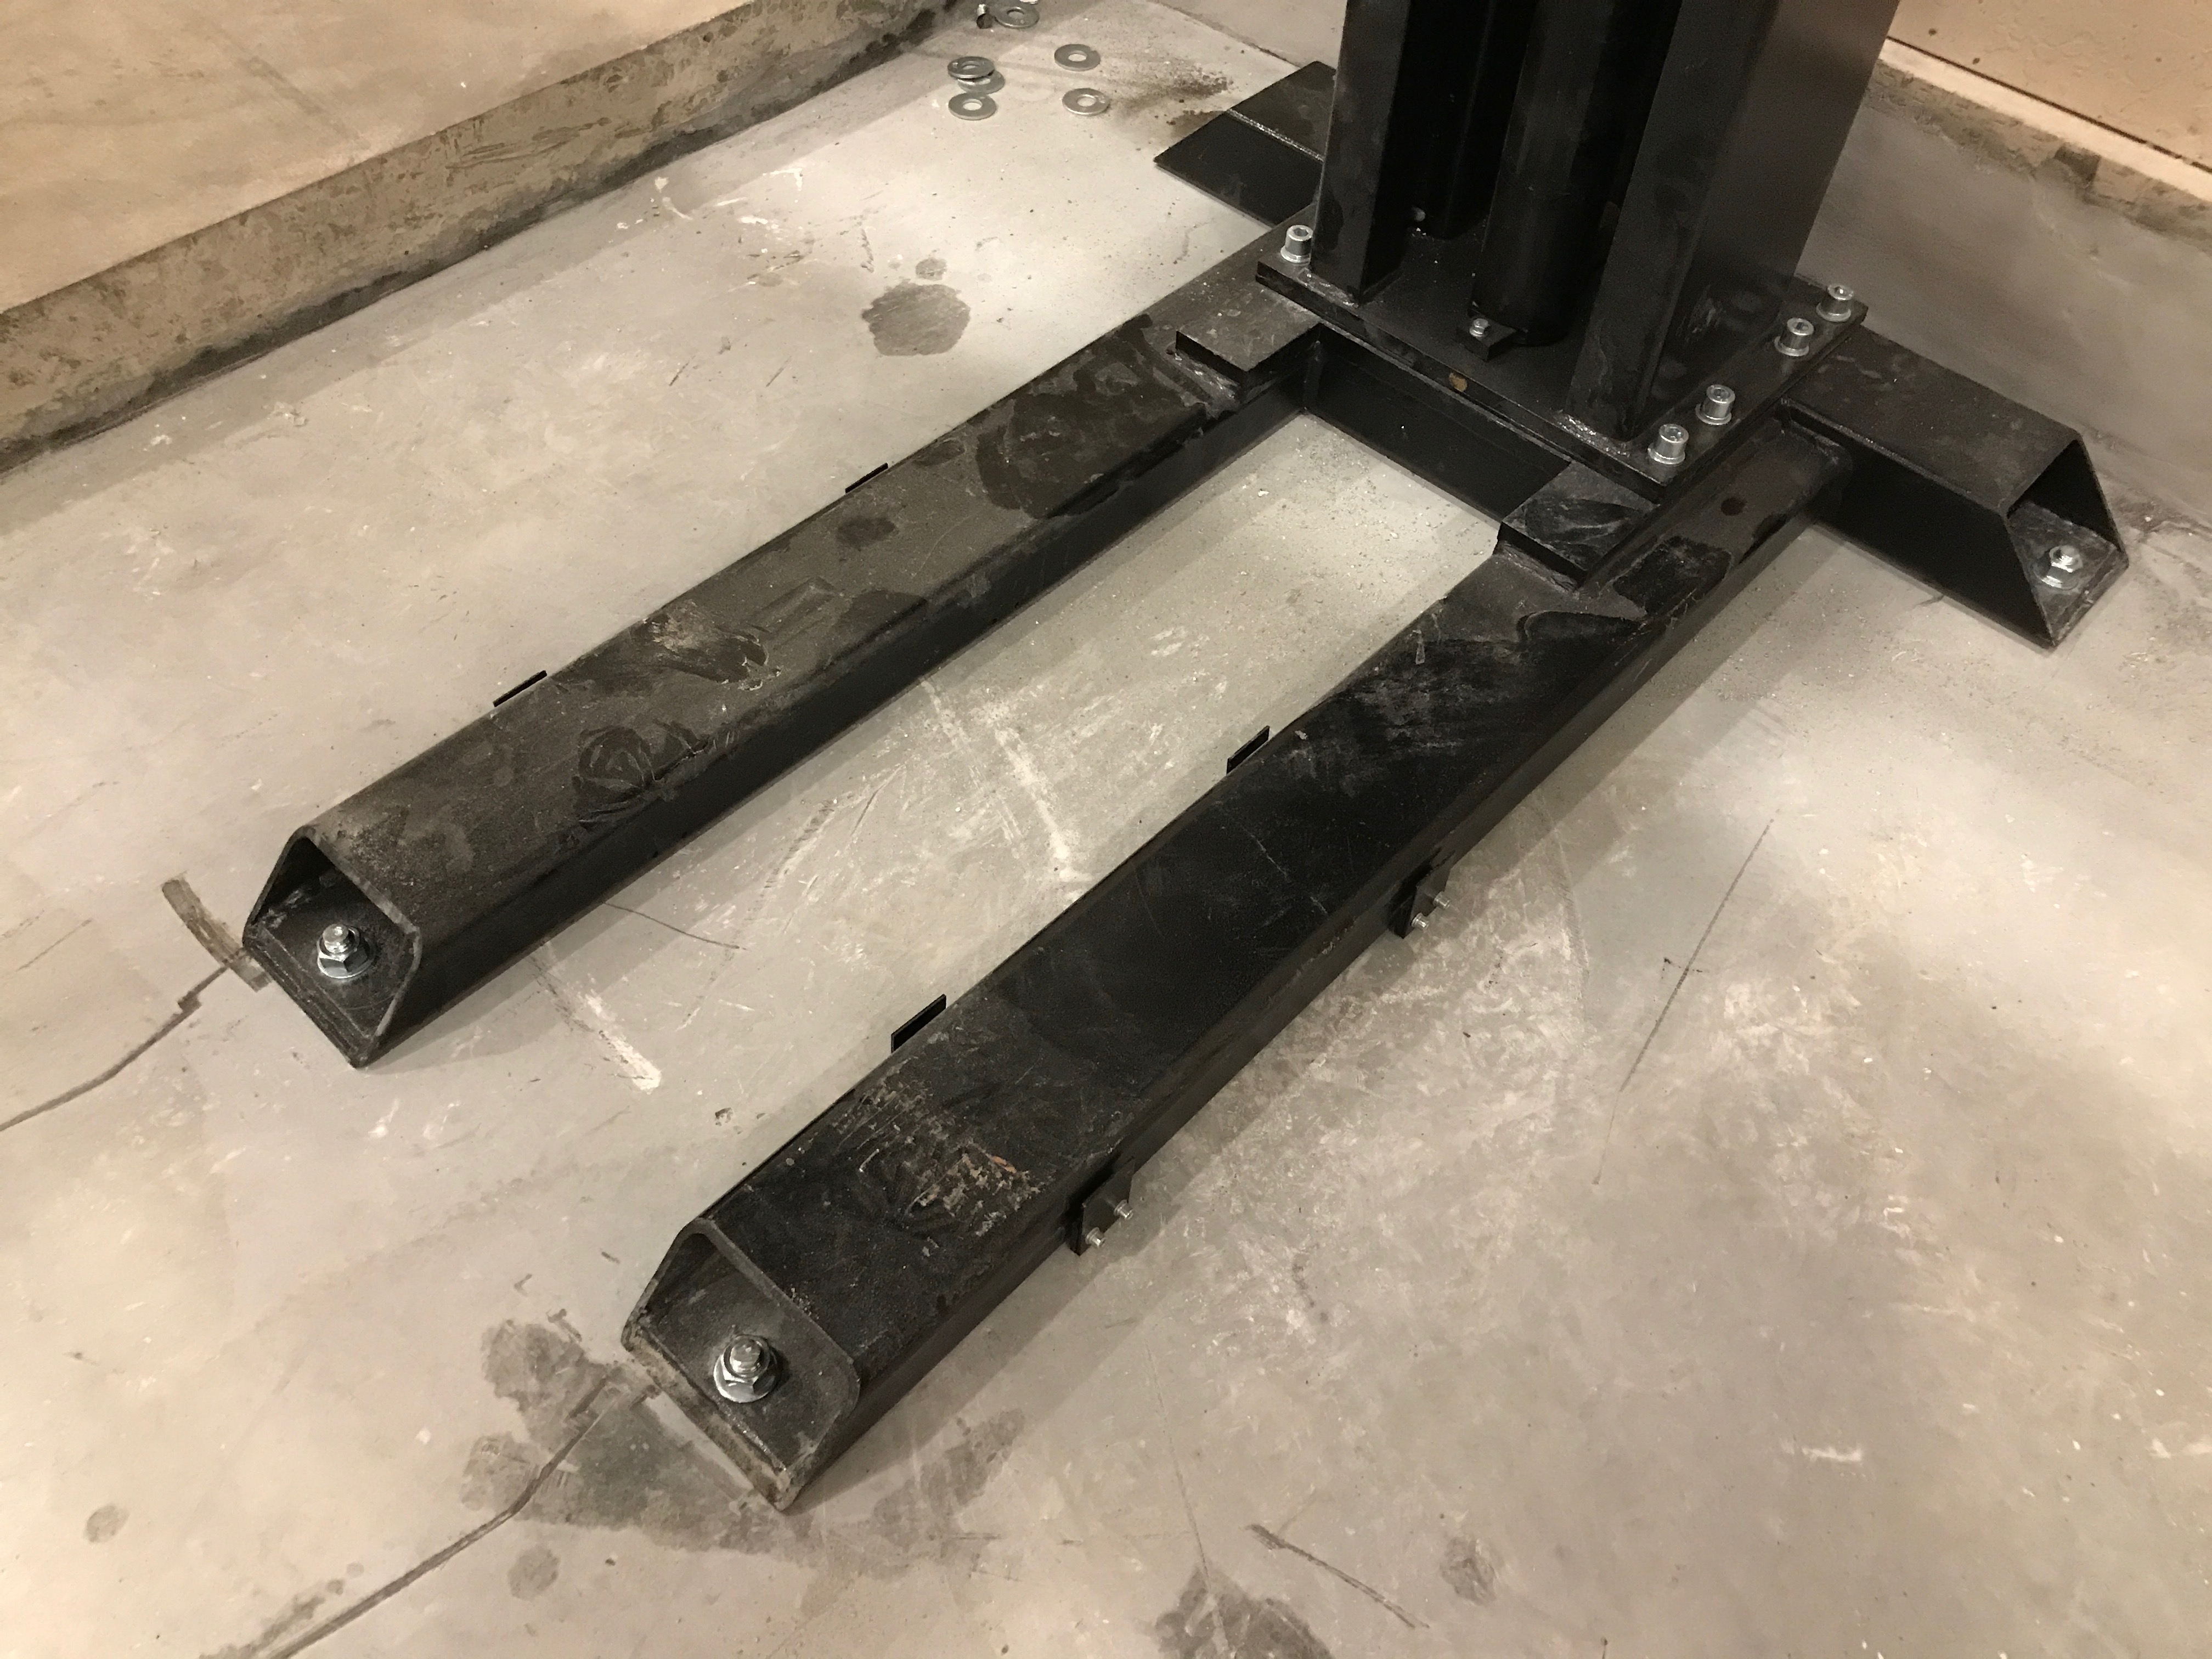
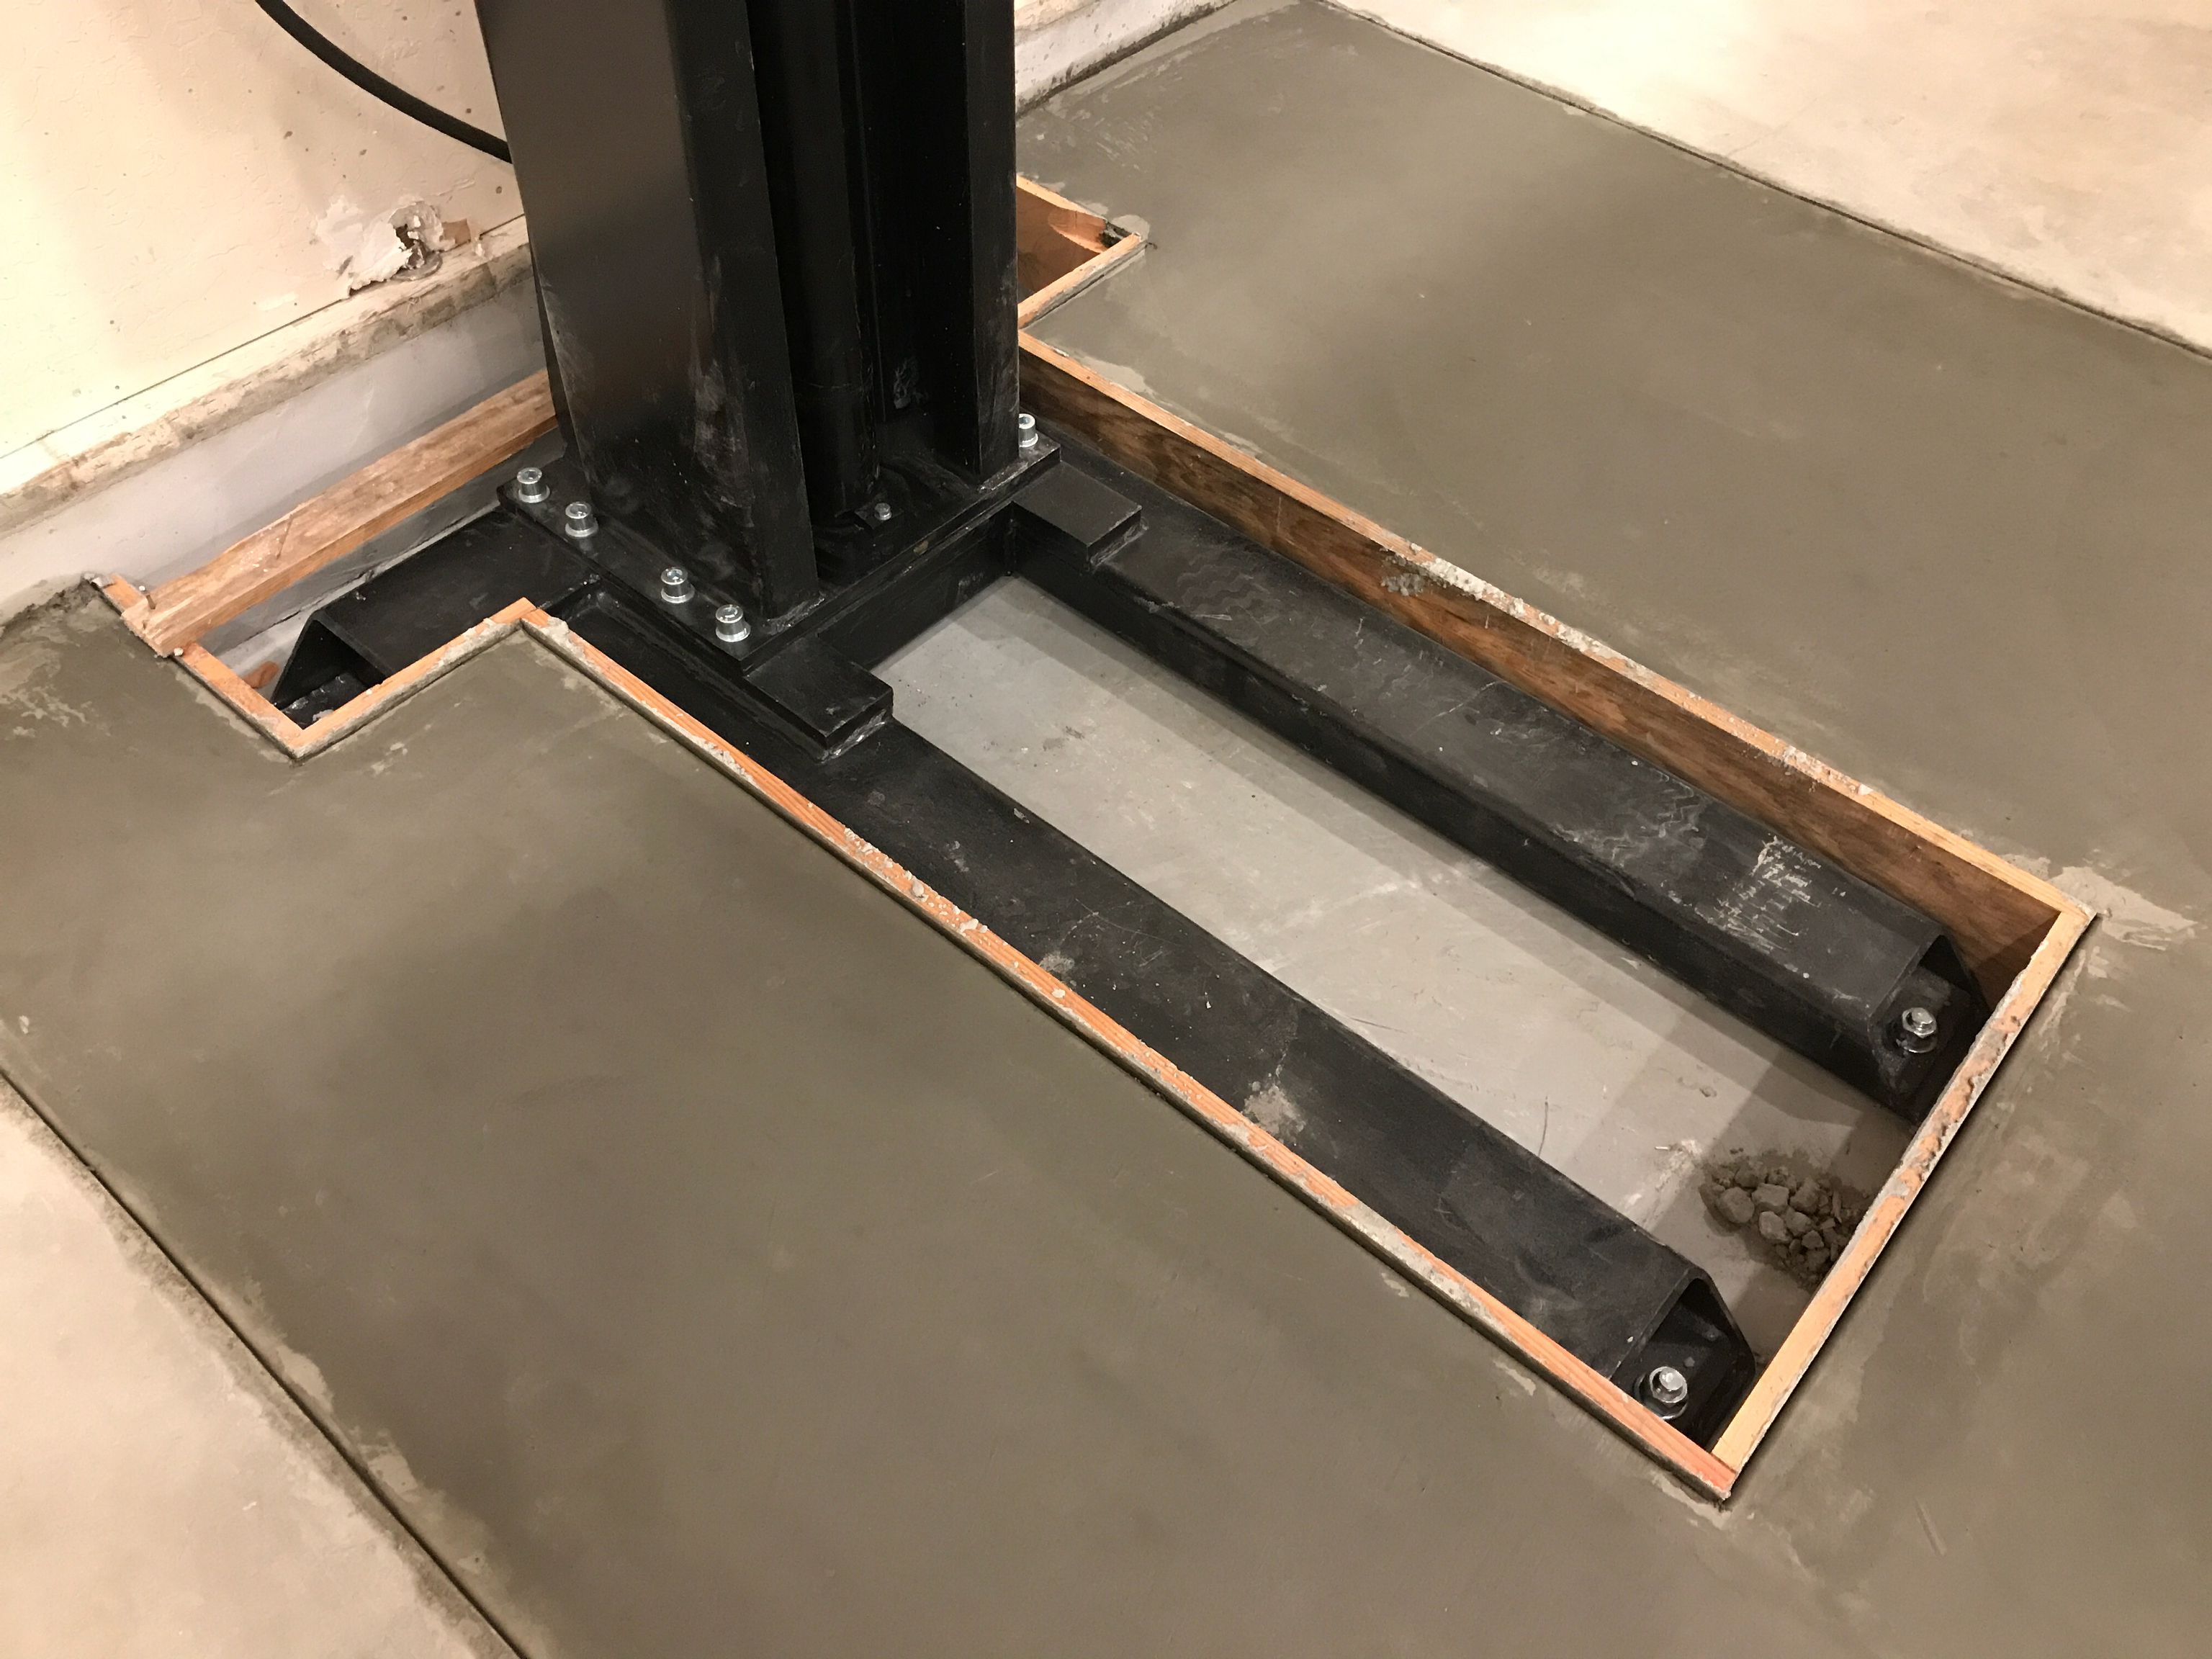
I had the concrete company come back out this morning and pour a new slab that sits flush with our garage floor and surrounds the lift’s baseplate. This slab has rebar ties to the rest of the garage floor slab so it should remain flush with it even if there is some movement.

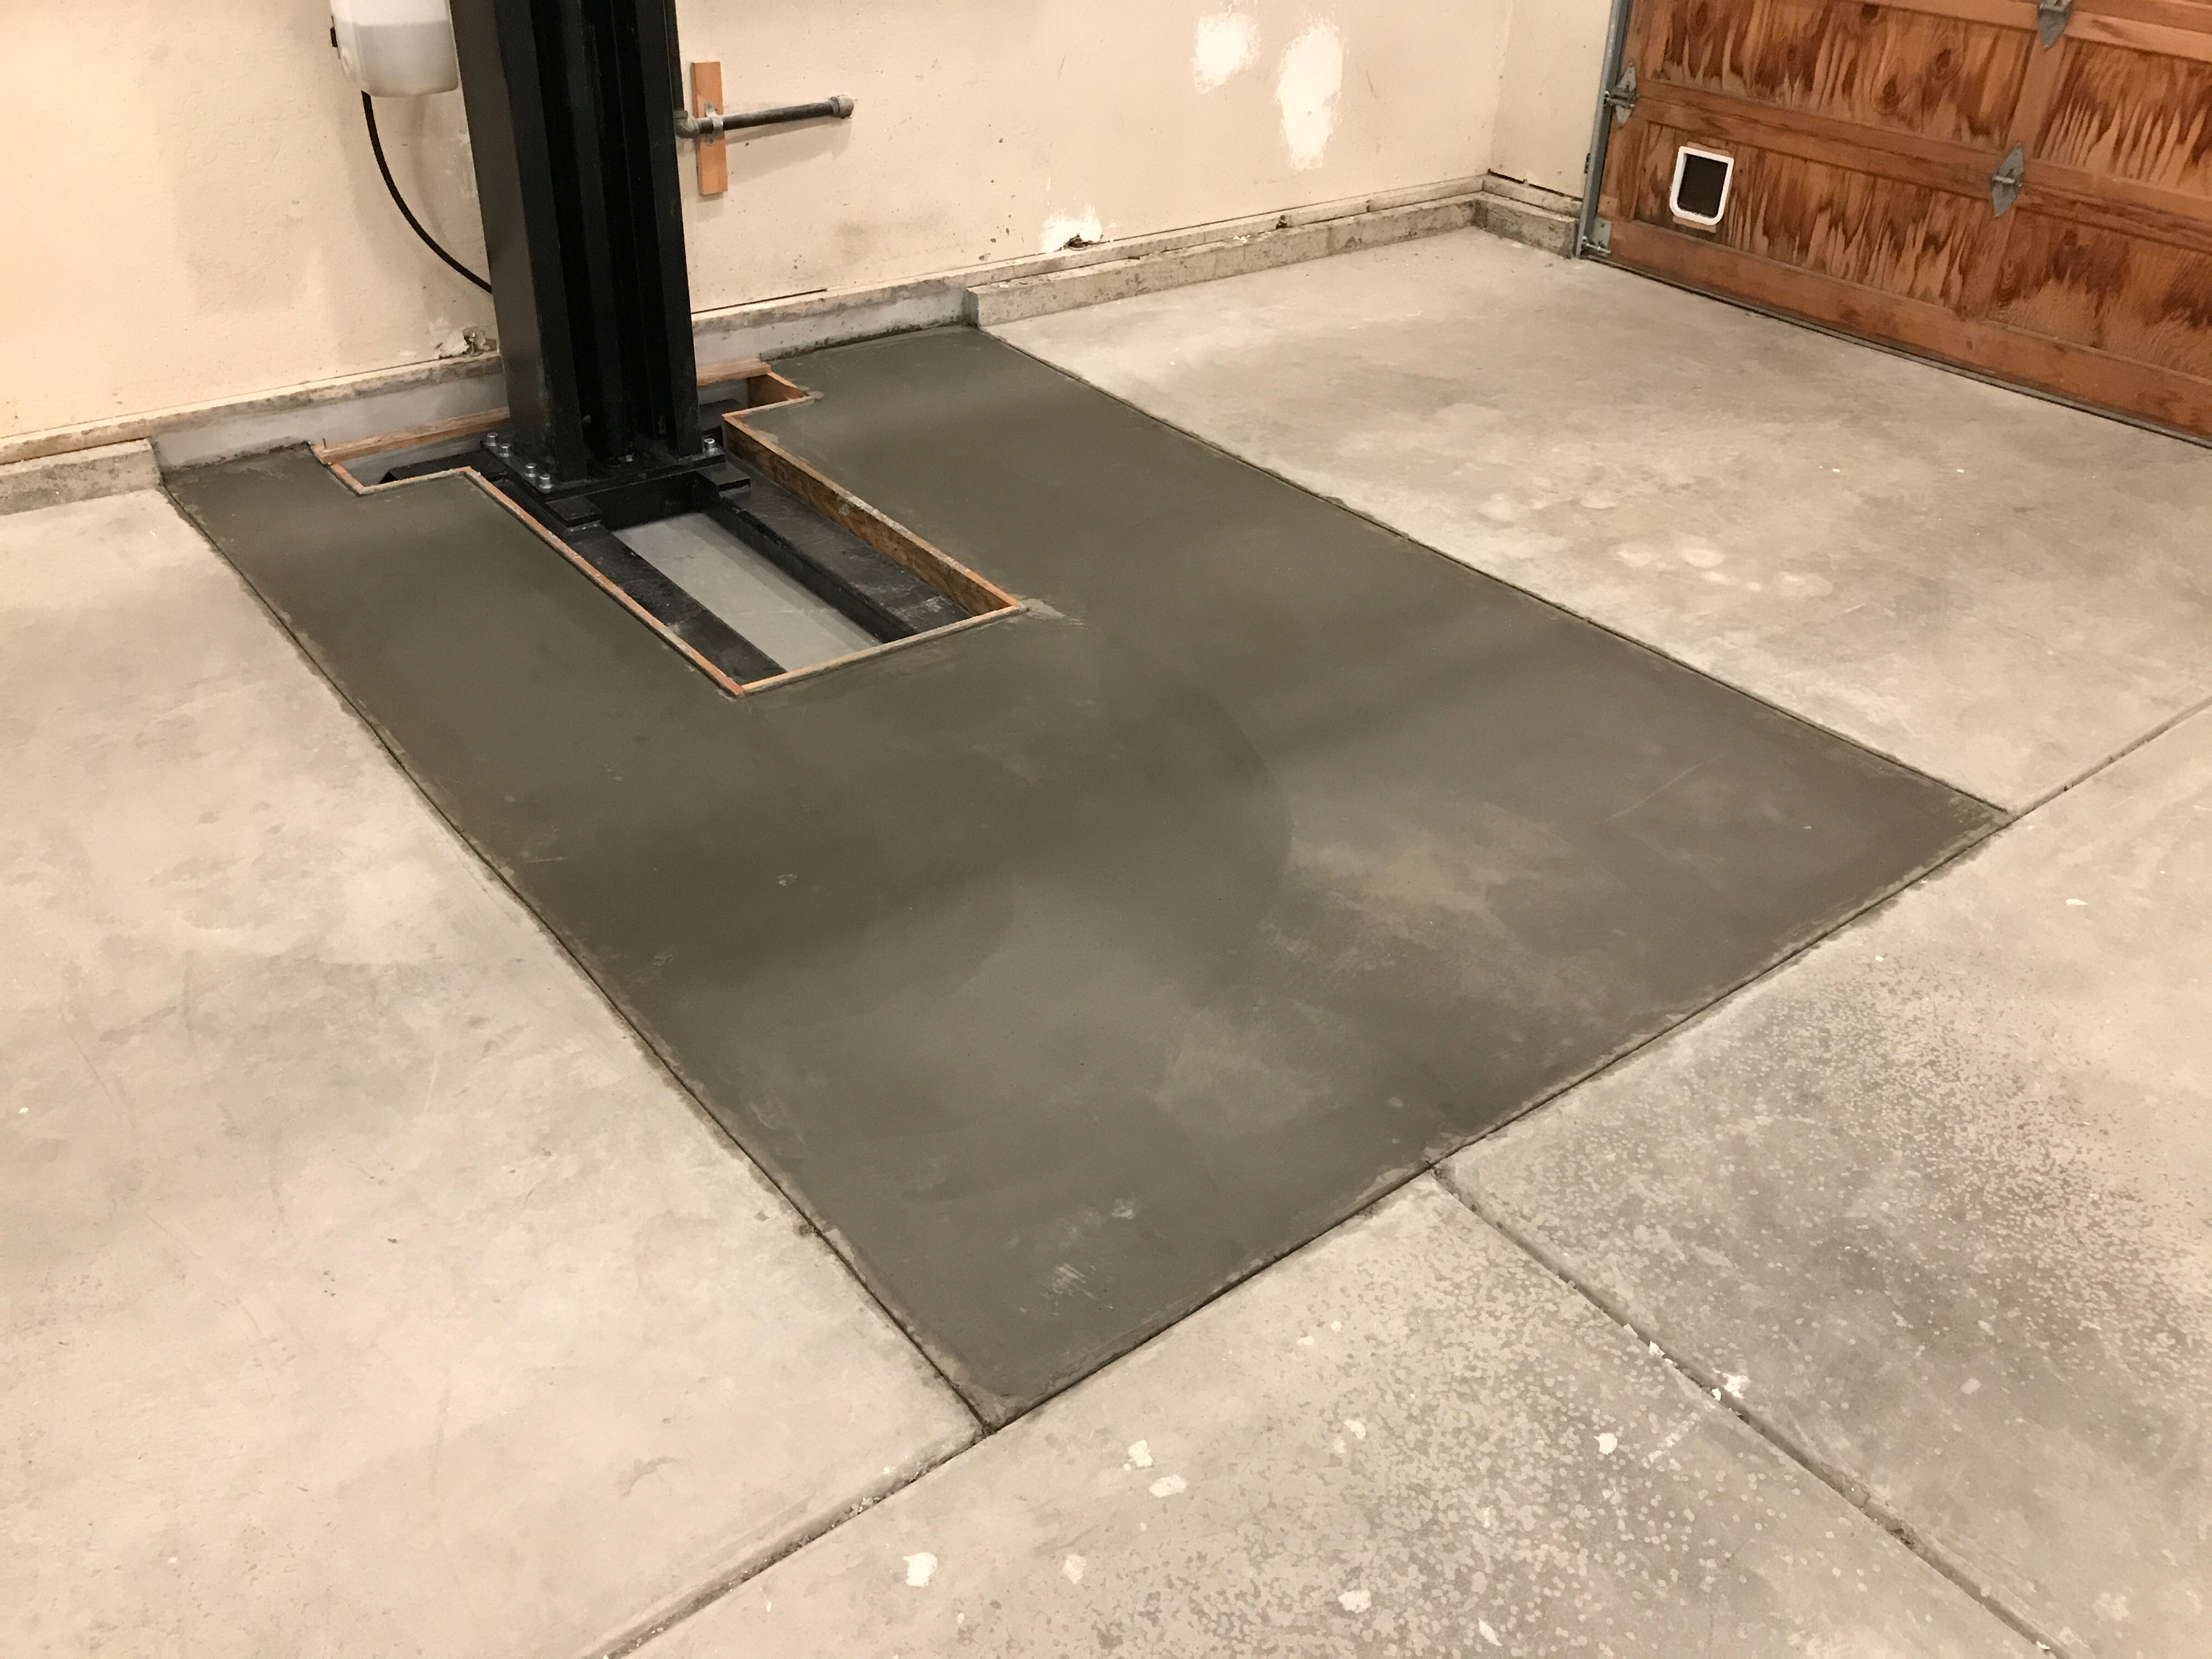
They built a form around the base that I still need to remove. I’ll add a steel plate over the lift base that will sit flush with the floor to make it easy to move around on creepers and stools. The removable plate will also make it easy to remove the lift if we ever move or decide we don’t want it. I’ll have the floor and steel plate covered in epoxy once the concrete cures in 28 days. It should be mostly invisible once done.

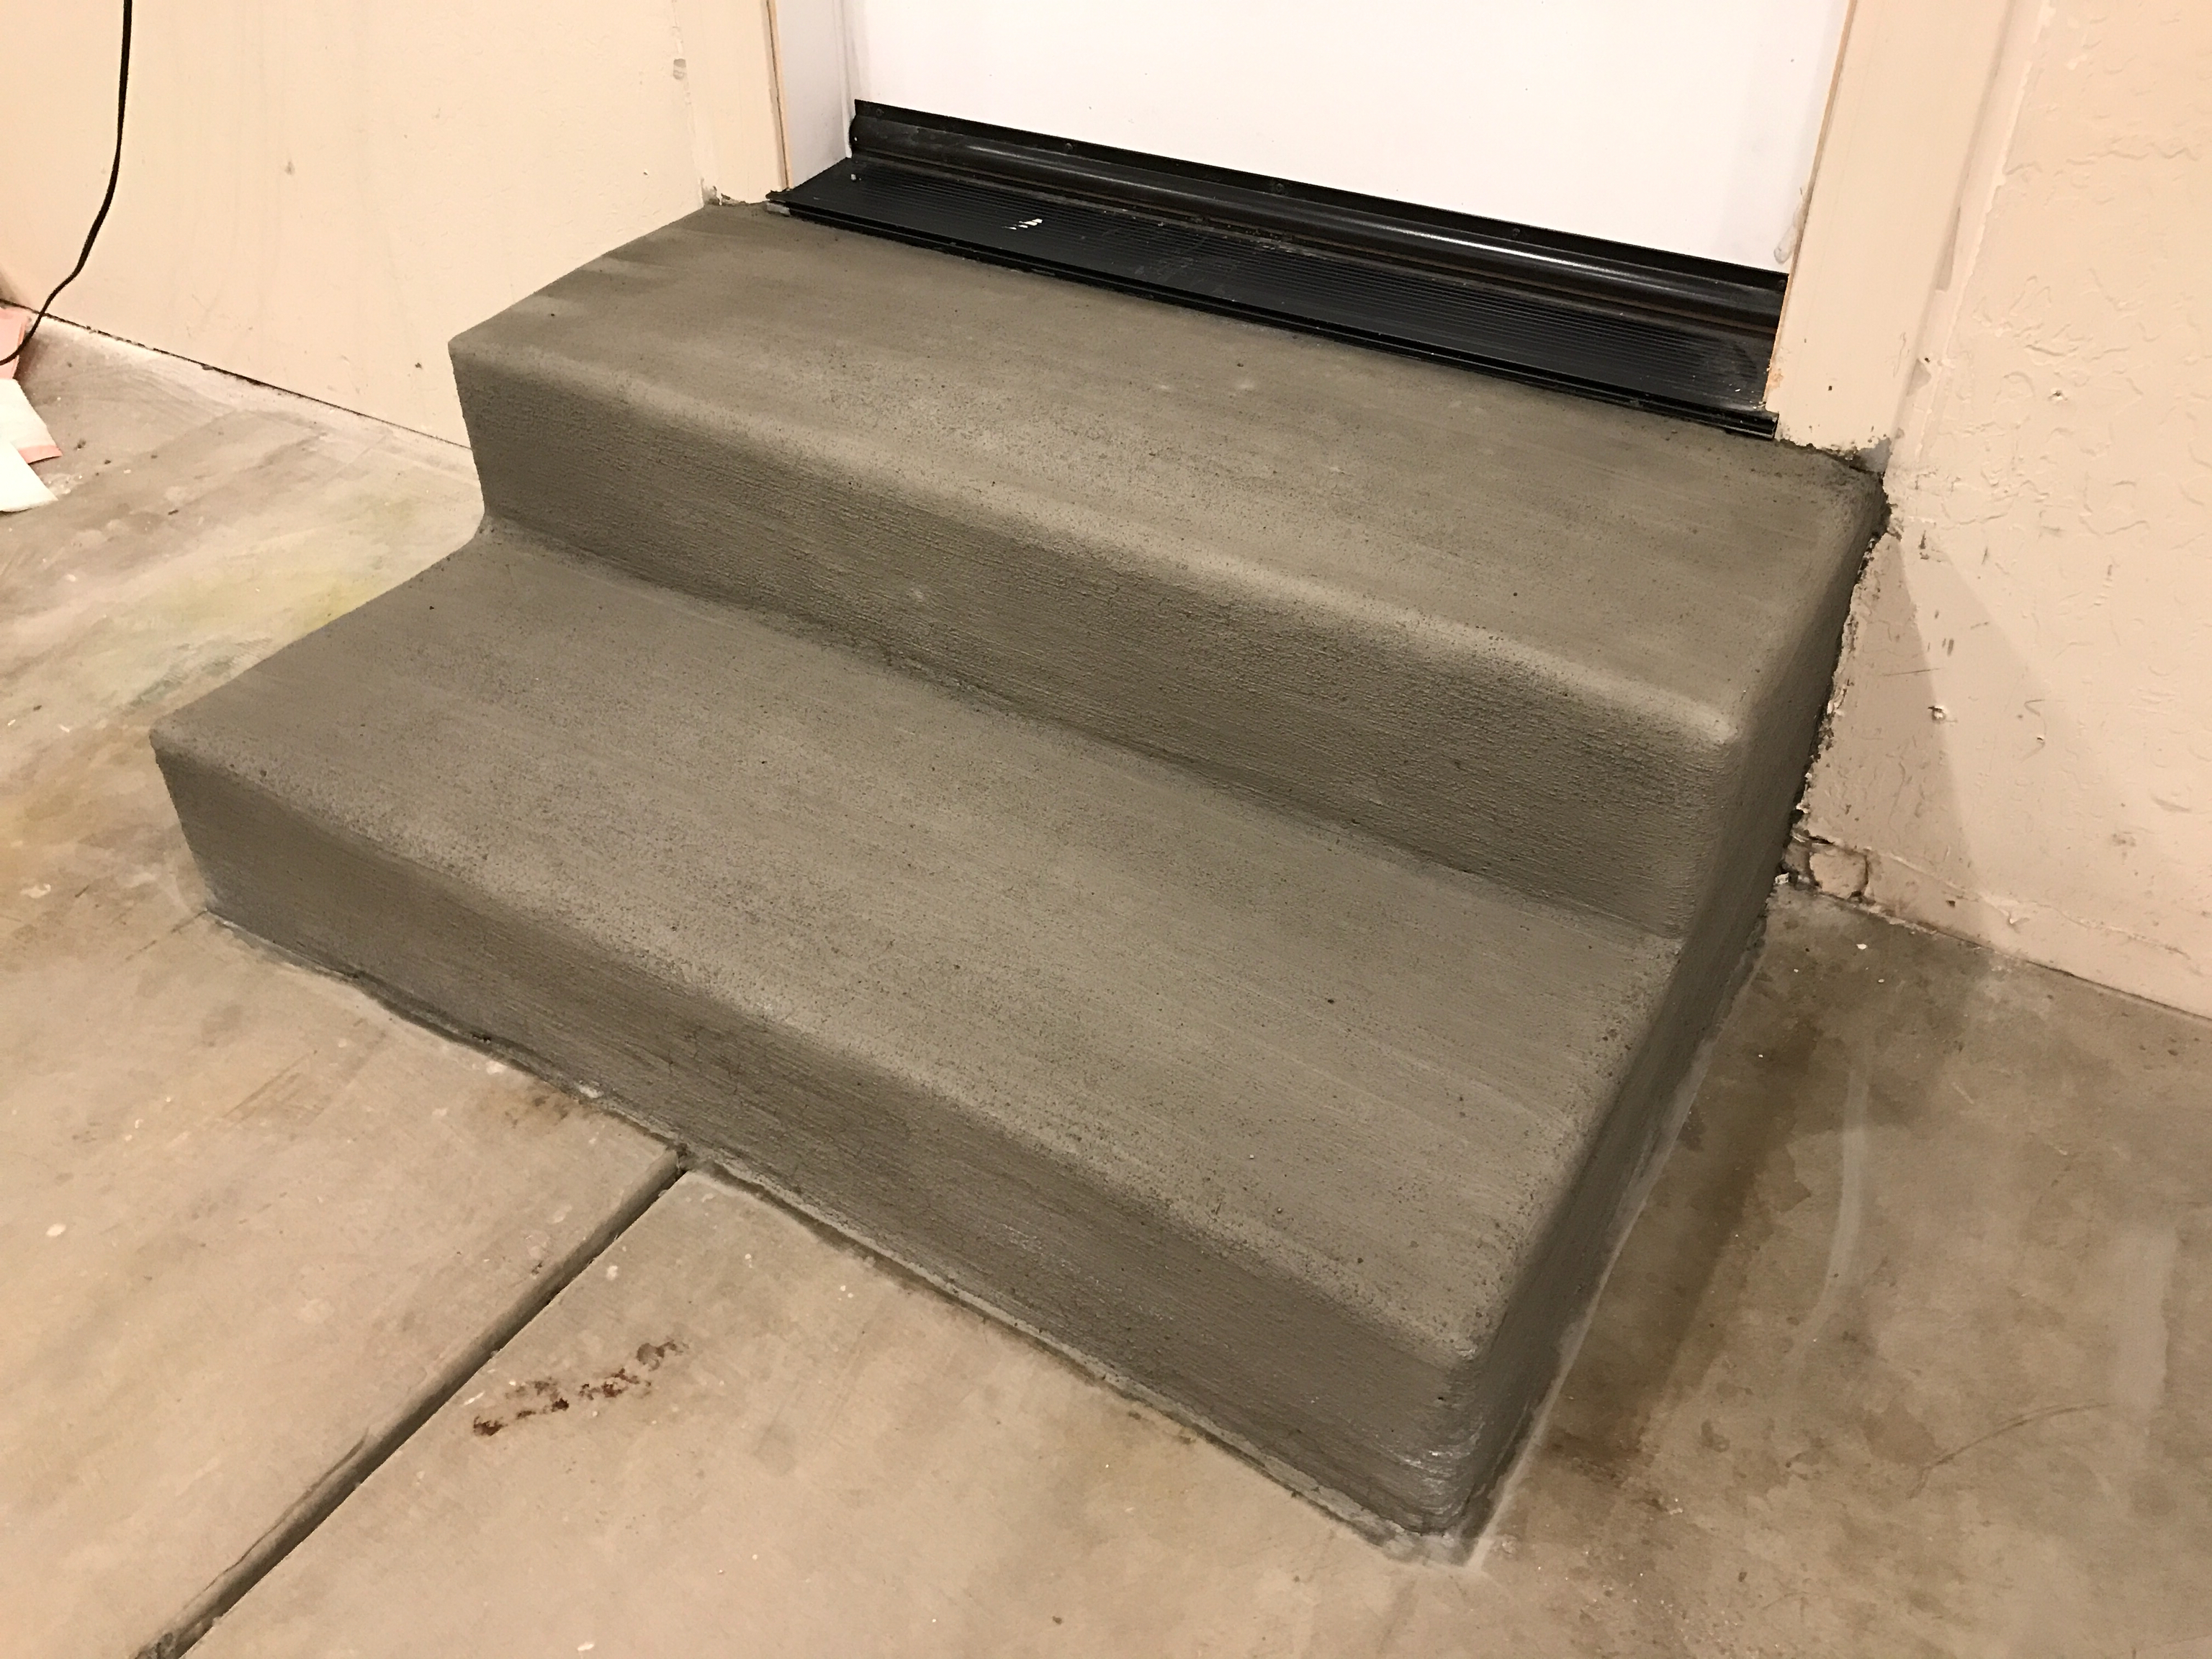
While they were out, I had them pour new steps to the door into the house. There was a single, slightly rickety wooden step here before which meant that you had to step over the door threshold and immediately down one step when coming out into the garage. I had them pour the new step flush with the door threshold to avoid this. The steps come out 24″ which will exactly match our new cabinets that will be installed along this wall.

Retracked Garage Door

I had the garage door retracked to be a high-lift. It now runs within a couple of inches of the ceiling and doesn’t come back as far. This should easily clear any car on the lift. Unfortunately, someone stole the garage door opener out of the back of the installer’s truck when he stopped for coffee, so I’ll have to wait until a replacement shows up before we can operate it.

Anchored Lift to New Slab

I moved the lift into final position using a bottle jack horizontally to slide the base around. Since it’s recessed in a hole, there were convenient edges all the way around to push against. I centered the ramps in the garage door opening and adjusted it from front to back to that it was easy to walk around both ends of the lift. It ended up within 1/8″ from where I marked its position on the slab from the measurements I took from the 3D modeling I did.

I used Simpson Strong Bolt 2 anchors that are 6″ long instead of the 4″ anchors that came with the lift. These will have far greater holding power.

Ordered Kit

We placed the order for the Mk4 Roadster kit today. We ordered the complete kit with the following options:

  • Uncoated chassis
  • 351W ceramic coated 4-port headers
  • 351W engine mounts
  • Upgraded leather roadster seats
  • 18:1 manual steering rack
  • Tubular front lower control arms
  • Independent rear suspension
  • Vintage GPS gauge set
  • Vintage Halibrand replica wheels (17″ x 9″ front and 17″ x 10.5″ rear)
  • Polished stainless steel side exhaust
  • Wind wings
  • Sun visors
  • Heater/defroster
  • Floor mats
  • Front and rear sway bars
  • Chrome driver and passenger roll bars

We also deleted the Mustang front brakes because we’re planning on using the big Wilwood brake kit from levyracing.com. We also deleted the 5pt Simpson Racing Harness because those are date stamped and we won’t need them for awhile. We’ll order them when we’re about ready to drive it so that we can get a later manufactured date.

I heard back from Factory Five pretty quickly with the sales order and a completion date of May 13, 2017. I’ve arranged for Stewart Transport to handle the delivery and the kit should be here by the end of May at the latest.

Assembled Car Lift

My dad stopped by this morning and helped me assemble the car lift. The base was already sitting in the hole, but we needed to stand the 750lb column up and attach it to the base. The instruction manual says you can do this with a shop crane, but I can’t see how that’s possible. We ended up cutting a couple of holes in the ceiling drywall and wrapping four wraps of 400lb rope around one of the ceiling rafters so that we could attach a chain hoist. With eight total strands, the ropes should have over four times the load carrying capacity of the column.

Other than knocking a good sized hole in the wall that will need to be repaired, we managed to stand the column up far enough to get the base bolted on and then stood the column upright without too much difficulty.

Once the column was upright, we bolted on the carriage, lifting arms and runways relatively quickly. I hooked up the hydraulics and ran the lift up and down a few times. The lift isn’t in the final position, but I’ll move it over after the drywall is repaired and the walls are painted. It weighs 2,400lbs, so it will be a bit of a pain to move.

Visit to Engine Builder

While researching engines for the Cobra, we ran across a couple of articles about engines built by IMM Engines down in Indio, CA.

http://www.hotrod.com/articles/build-a-505hp-ford-351-windsor/

http://www.hotrod.com/articles/build-a-595-hp-351-windsor/

After a few discussions with them over the phone, we decided to take a quick trip down there and see their shop. My dad and I flew my RV-7 down this morning and Brian Hafliger picked us up and the airport and took us back to his shop. He spent plenty of time with us discussing the various options for our engine and showing us all of the tooling in the shop. Afterward, he dropped us off at a local Mexican restaurant and then picked us up again later to give us a ride back to the airport. I don’t know if we will have them build our engine, but we certainly learned a lot and I’m now more confident than ever about the engine choices we’re making.